
Raglan sleeve dresses are back and better than ever! If you want to learn how to make a mini dress that you can wear all summer long, this tutorial will be perfect! The universally flattering design features puffy sleeves which are balanced out by the relaxed shape of the dress.
Want to know the best part? You don’t even need a pattern! All you need is this tutorial, your measurements and your selected fabric. If that sounds good to you, keep reading to learn how to make a mini dress with raglan sleeves.
Sew what is a raglan sleeve?
Raglan or Raglan sleeve refers to sleeves that continue up to the collar or neckline of a garment, omitting the shoulder seam. Raglan sleeves are popular due to their increased range of movement which is why they are often used for sportswear.
Want to know how to make a mini dress with raglan sleeves?
Let's get started!
Requirements:
Tip: Refer to the preparation section to work out your measurements and pattern pieces required to determine how much fabric and supplies are required.
- Linen or cotton fabric The amount will depend on your measurements (we prefer using natural fibers to create sustainable garments.)
- 1cm knit elastic, (length will depend on your measurements)
- Co-ordinating thread
- SINGER Sewing Machine (We used the HD6805C)
- Optional: SINGER Overlocker (You can use a zig-zag stitch to finish your seams if preferred.)
- SINGER iron
- Scissors
- Fabric Marker
- Ruler
- Cutting Mat
- Rotary Cutter
- Pins
Preparation:
Let’s get our fabric ready and our pattern pieces measured and cut!
- Pre-wash and press your fabric.
- Measure and cut your pattern pieces as per below:
- Dress (cut 2):
- Width = Body measurement at the widest point (hips, bust or stomach) ➗2 + 20cm
- Height = The top of shoulder to desired length + 2cm
- Armhole height (A) = The top of shoulder to full bust
- Sleeves (cut 2):
- Width = Width of dress rectangle x 1.5 + 2cm
- Height = The top of the shoulder to the desired length + 10cm + 2cm
- Elastic for neckline (cut 1):
- Length = measure the top edge of the neck hole when the garment is lying flat + 10cm
- Elastic for armbands (cut 2): Length = Measure around arm where you would like the sleeve to end.
- Dress (cut 2):
Step-by-step Instructions: How to make a mini dress with raglan sleeves:
Seams are 1.5cm unless otherwise specified
TIP: Overlock or zig-zag raw edges before beginning so construct your dress.
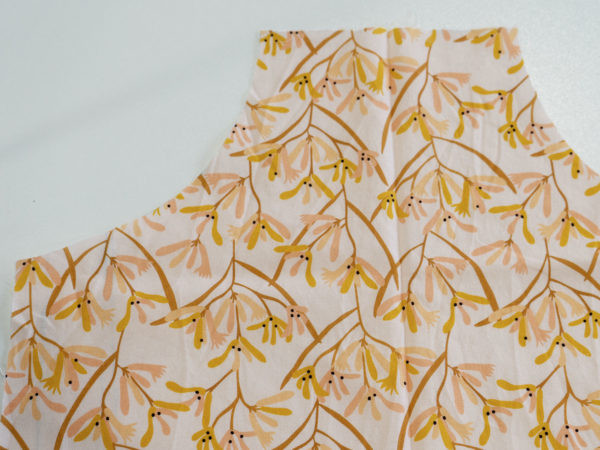
- Take one of the dress rectangles and fold it in half widthways with right sides facing. First mark out the armhole. Measuring from the top corner, mark (A) down the side with raw edges. Then measure 15cm along the top edge from the same corner and mark with your fabric marker. Draw a curved line from the top mark to the bottom mark. (You can do this free hand or use a tailors curve.)
- Cut along the line and then open out the fabric, laying it flat, Trace and cut the arm holes for the second dress rectangle and the sleeve rectangles from this piece.
- With right sides facing, place one sleeve on one of the top pattern pieces, align with the edges of the armholes and pin. Sew the sleeve to the top with a straight stitch. Repeat with the other sleeve on the opposite side of the top piece.
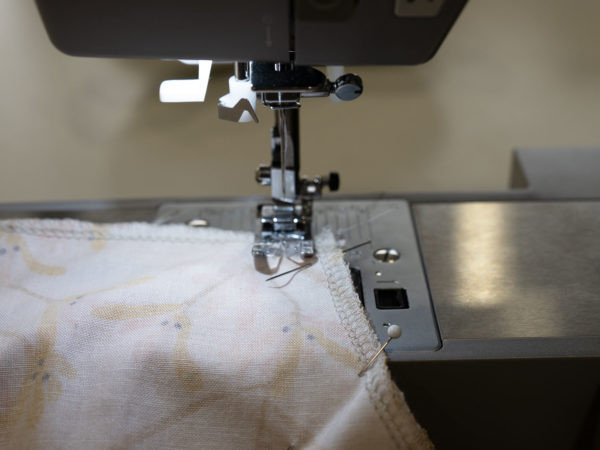
- Fold the sleeves in half with wrong sides facing and then place the remaining pattern piece on top so the right sides of the top and sleeve are facing and the armholes match up. Pin the sleeves to the second top piece and then sew a straight stitch.
- Fold the top right sides together, aligning the side seams of the top and sleeves and pin. Sew the side seams of the top and the underarms of the sleeves with a straight stitch.
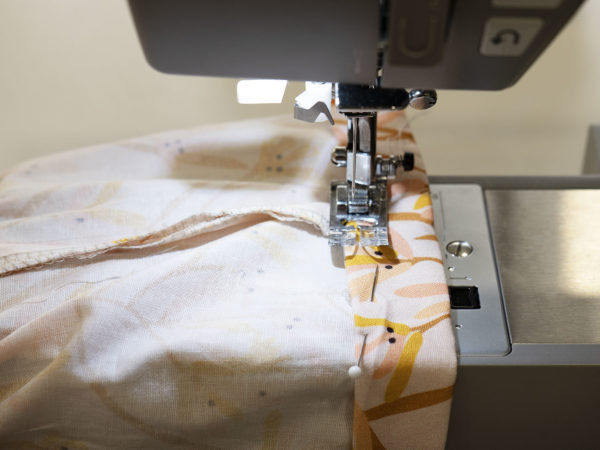
- Sew the casings on the neckline and the sleeve ends following the below:
- a. Fold the seam over by 5mm to the wrong side and press. On the wrong side of the fabric measure 3cm and mark this around the circumference.
- b. Fold the top edge to the line you marked and pin. Press in place for a more secure crease.
- c. Sew a straight stitch along the casing edge, leaving a gap about approximately 5cm to allow for fabric insertion.
- d. Attach a large safety pin to one end of your elastic and insert it through the hole. Feed the elastic through the casing while holding onto the other end so it doesn’t get pulled all the way through.
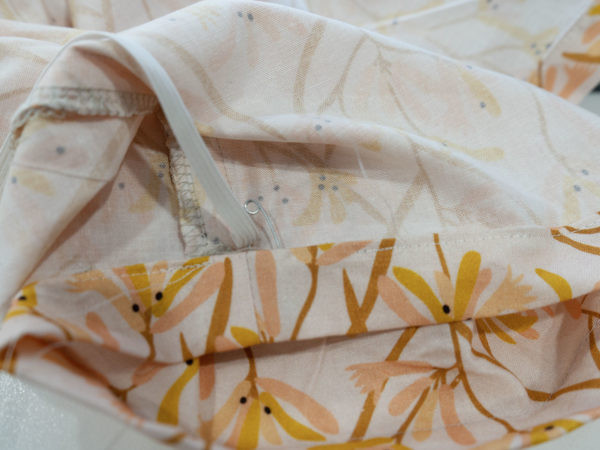
- e. Overlap the ends of the elastic by about 2cm and pin with the safety pin. Make sure the elastic isn’t twisted inside the casing before securing the elastic ends via a zig-zag stitch.
- f. Push the elastic inside the casing. Increase your stitch length to 3.0 and top-stitch around the bottom of the casing and this will enclose the opening the elastic was inserted in.
- g. Snip your loose threads.
- Double-hem the bottom of your dress following the below:
- a. Fold over the raw edge by 2cm, pin and press.
- b. Fold that over again by 2cm and pin and press again.
- c. With your stitch length set to 3.0 sew along the edge of the fold.
There it is - the perfect summer dress! Now that you know how to make a mini dress with raglan sleeves, you can recreate it in a few different fabrics. This way, you’ll have a gorgeous dress to suit any mood. Try dressing it up with heels and accessories or dress it down with sandals for a more casual look.
You can even add a sash belt to tie around your waist - this will create a whole new silhouette. Want a tip? Choose a contrasting colour for the sash belt to really make it pop! Feel free to customise the design by adding in-seam pockets (who doesn’t love a dress with pockets!). We hope you enjoyed this tutorial on how to make a mini dress with raglan sleeves - happy sewing!
We would love to see your personalities shine through your creations so be sure to tag @singersewinganz and use the hashtag #sewitwithsinger so we can see what you have been busy making!