The Marble Maze is a great activity to have on car trips. Why not insert more than one marble, or get creative with your maze designs and have dead ends to navigate.
Level: Beginner
Skills Learnt: Straight Stitch, Pivoting, Top Stitch.
Shopping List:
- 4 x Pieces of felt
- Threads
- 2 Marbles (1cm Diameter
- Scissors
- Pins
- Washable Marker or fabric chalk
Setting up your Machine
See the Sew as you Grow playlist on our Youtube page for step by step instructions.
- Wind the bobbin
- Thread the machine
- Insert the bobbin
- Bring the bobbin thread to the top
Sewing Instructions
- Place two pieces of felt together with the right sides out.
- Place some pins in the corners to keep them smooth and straight. You can choose to cut the felt into a square shape now, but it is not necessary.
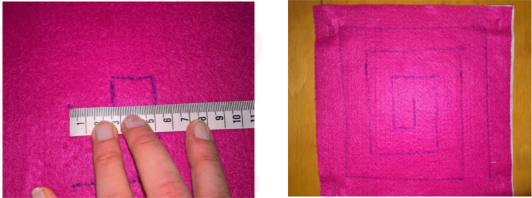
- With a washable marker, mark out your sewing lines. Ensure you leave at least 2.5cm gap between each line for the marble to fit through.
- Sew over the lines marked using a straight stitch. Pivoting at the corners (if necessary).
- Once the maze has been sewn, sew the edges closed, but STOP before you get to the end so you can insert the marble.
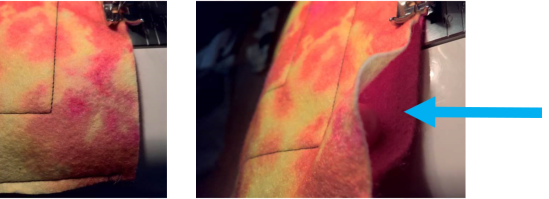
- Insert the marble, pushing it in one of the maze chasm’s and continue to sew the edge closed – Top Stitch.
Try inserting more than one marble into each maze!