
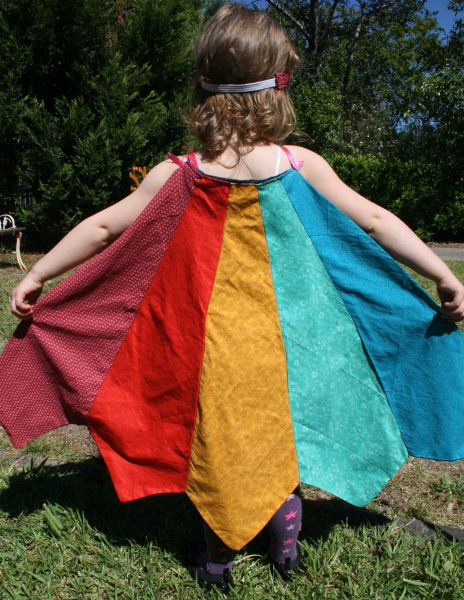
This colourful rainbow cape was made with ease in an afternoon. It can easily be made longer for a taller child. You could try adding some applique for some extra pizazz.
Shopping List
- 5 different coloured fabrics for the cape (Fat Quarters are perfect)
- Dark fabric for the back
- Paper, pen and scissors
- Threads
- Ribbon, approx. cut into 2 x 50cm lengths
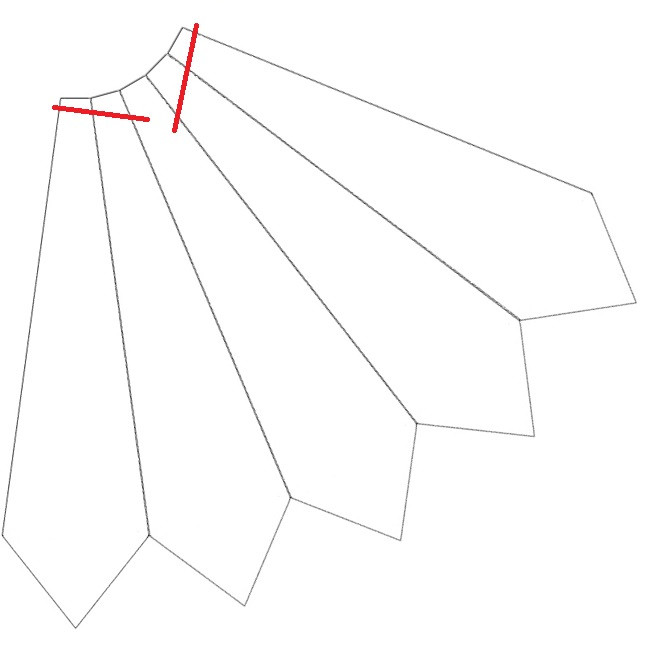
Make a Pattern:
- On a piece of paper, measure out the pentagon shape, adding more length if required.
- Add 1cm seam allowance

Cutting:
- Cut out 5 pieces of fabric in different colours.
Sewing:
- Using a straight stitch, pin two panels right sides together and sew one side.
- Open the two panels, choose the next panel of fabric and pin right sides together and sew one side. Continue this method until the 5 panels are sewn together, forming the back of the cape.
- Use the completed back of the cape to mark and cut out the correct size backing on your dark fabric.
- Place the rainbow back and the dark backing right sides facing, and pin the ribbons to the neckline. Sew around the edge, leaving a 5cm gap to turn the cape the right way in.
NOTE: Ensure the length of the ribbons is on the inside of the pinned pieces.
- Turn the cape the right way in and top stitch the opening closed. Now you have finished your cape, you can choose to stitch in the ditch around each panel.