
Won’t the kids love sitting around Santa’s belt for Christmas? This easy to sew quilted table runner is the perfect addition to ensure you have a Holly Jolly Christmas.
Shopping List:
- 60cm x 105cm Red Cotton Fabric
- 20cm x 105cm White Cotton Fabric
- 6cm x 120cm Black Cotton Fabric (or two short lengths)
- Coordinating threads
- Scissors
- 3 Black Buttons
- 30cm of Gold Ribbon, 1cm width
- 40cm x 105cm Wadding
- Safety Pins (if quilting)
Cutting Instructions:
- Cut out the red cotton into one 20cm x 105cm length (the top piece) and the remaining will be 40cm x 105cm (the backing).
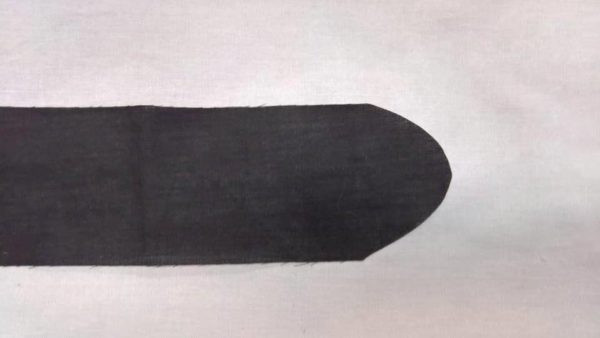
- Cut the Black Cotton into 2 strips, one 70cm long and the other will be the remaining 35cm.
- On the longer piece of black strip (70cm) curve the edge to look like a belt end.
Sewing Instructions:
- Pin the red top piece and white fabric together and sew the length of one edge. Turn out and iron the seam flat. NOTE. Iron the seam to the red fabric so it can’t be seen.
- Arrange the two belt pieces so you are happy with the placement, so the longer piece with the ‘belt end’ is on top. Pin and sew the shorter piece, using a satin stitch.
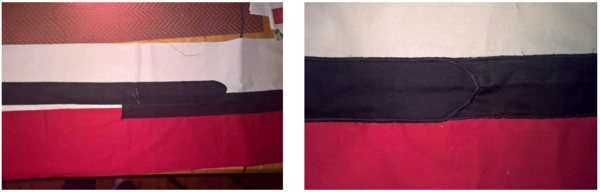
- Pin and sew the longer belt piece, using a satin stitch.
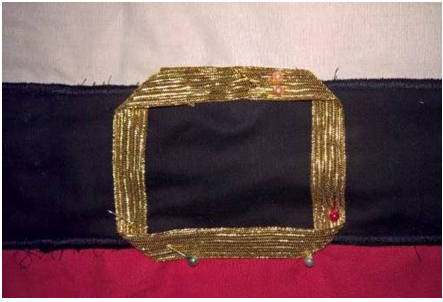
- Measure to the center of the belt and arrange the gold ribbon in a rectangular shape. Pin and cut off any excess ribbon. Sew using a straight stitch around the outer and inner edge of the ribbon.
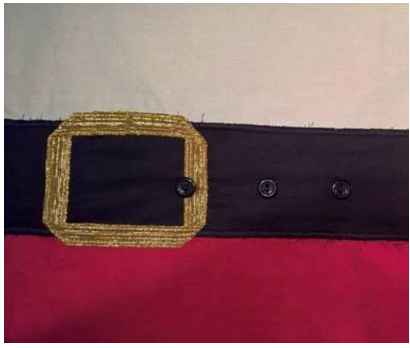
- Place the 3 black buttons into position and mark. Using your button hole foot, sew each button into place.
- Place the backing piece, the wadding and then the top piece and smooth out while pinning with the safety pins. Ensure you keep a tight smooth finish as you go, working from the centre out.
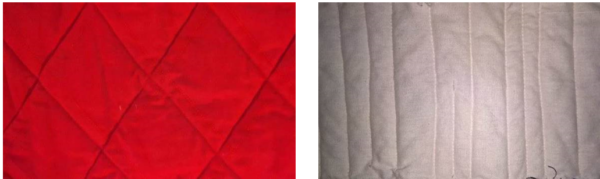
NOTE: If you don’t want to quilt the Table Runner, attach binding now. - To quilt Santa’s Red Pants, we used a checkerboard pattern, measuring at 7cm intervals. Removing the safety pins as you go. Ensure you leave a 2cm seam allowance at the edges so you can create a ‘raggy’ effect.
- To quilt Santa’s White Beard, we used simple lines, with some shorter than the others. Removing the safety pins as you go. Ensure you leave a 2cm seam allowance at the edges so you can create a ‘raggy’ effect.
- Straight stitch a 2cm seam allowance around the edge of the entire table runner. Trim off any excess wadding that overlaps the top piece.
- Using sharp dressmaking scissors, carefully snip from the edge to the sewn seam line at 0.5cm intervals.
- 14. Wash the quilt.
NOTE:As new washing machines don’t have an agitator, we found it necessary to wash the runner a few times, and it helped to place something heavier in the wash with the runner to assist the fraying for the raggy effect.