
The friendly neighbourhood PJ pants are super fun and easy to make. A little math goes a long way. Your whole family could have new cosy pyjama pants for winter.
You can achieve a professional looking finish with your Singer Overlocker.
Shopping List:
- Overlocker and Sewing Machine
- Jersey or Cotton Fabric (the length will depend on the pattern you draw out from the instructions. See measurement B)
- Overlocker Thread and Coordinating Thread
- Elastic (to fit your waist)
- Scissors
- Pins
- Measuring Tape
- Paper (newspaper will be ok)

Note: As these were a gift, we didn’t have the measurements. To make the pants pictured, we folded an existing pair of pants in half lengthways and cut around them. We then cut two pieces out, one for each leg.
Pattern Making Method:
To Find A:
- Measure your hips in centimetres.
- Divide the measurement by 2.
- Add 13cms.
- A =
To Find B:
- Measure from your waist to the floor (outer leg)
- B =
To Find C:
- Measure from your groin to the floor (inner leg)
- Subtract this measurement from B.
- C =
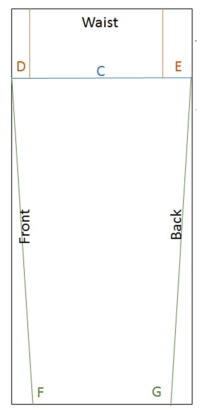
NEXT:
- Measure 2.5cm in from the ‘Front’ of the pants along the waist to where we drew line C and draw line D.
- Measure 5cm in from the ‘Back’ of the pants along the waist to where we drew line C and draw line E.
- At the bottom of the pants, measure 3.5cm in and mark points F and G. Connect F to the front of line C.
- Connect G to the back of line C.
- Draw a curvy line between C and D and C and E.
- Now add a 1cm seam allowance around the entire pattern.
- Draw a curvy line between C and D and C and E.
- On the ‘Front’ side of the pattern, drop the waist line by 5cm and connect the lines. Measure this diagonal line to find the correct measurement for the waistband = H.
- Now add a 1cm seam allowance around the entire pattern.
- Add 2 x the width of the elastic to the top (waist/A) of the pattern.
Cutting:
- Fold the material in half and pin the pattern to the material. If you are using directional material make sure it is pinned the right way up!
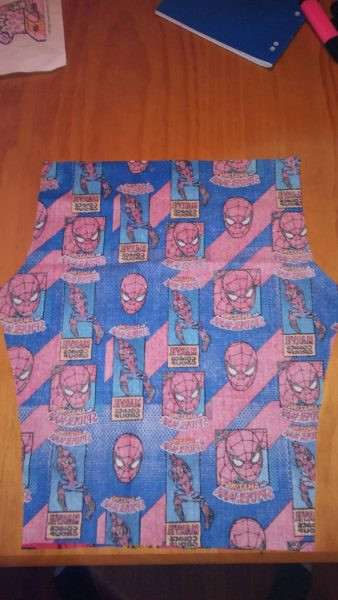
- Cut out the pattern.
Sewing:
- Open up the two pant pieces you have cut and place right sides facing.
- Pin the two curves in the crutch area and overlock the two pieces together.
- Keeping the right sides facing, open the pieces and lay flat to form the pant legs.
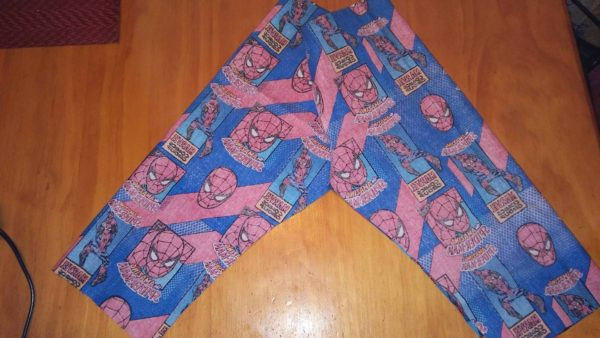
- Pin the legs together and overlock in one straight line.
- Placing the waist of the pants under the overlocker foot and the elastic lined up on top of the pants to the left of the blade place a few holding stitches. Then stretch the elastic out and feed the pants and the elastic through the overlocker – do not let the elastic go through the cutter as this will jam the machine.
- Once you reach the end, cut the excess elastic off, leaving a small overlap to stitch down.
- Turn the elastic over and on your sewing machine, use a zig zag stitch over the top of the elastic, once again stretching the elastic as you sew.
- Turn the bottom of the pant legs over twice and straight sew a hem line.
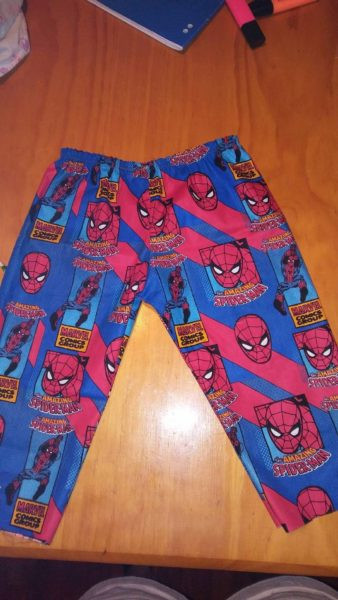
Enjoy your PJ Pants!