
This is a super easy project that is great for beginner sewers. This Drawstring Backpack will make an ideal day pack for busy mums, kids and those on the run!
Shopping List
- Two 13" x 18" (33 x 46cm) pieces of fabric for bag
- One 6" x 9" (15 x 23xm) for pocket
- Two 56" (142cm) pieces of cording
- Coordinating thread
- Ruler
- Bodkin or Safety Pin (to thread the cording)
- Pins
- Scissors
- Pen or chalk for marking
Before cutting out the two 13” x 18” (33 x 46cm) pieces of fabric for the bag. Take a look at your fabric and if it has a directional pattern think about what way you would want the pattern to run and then measure and cut the pieces out accordingly.
Construction
The Pocket:
- Iron the 6” x 9” (15 x 24cm) piece of fabric to remove any creases.
- Fold in all raw edges to the wrong side of fabric about a ¼” (0.65cm) and press all 4 sides.
- Fold the two bottom corners of the pocket and press inwards so the corners don’t bulk up. (see diagrams below)
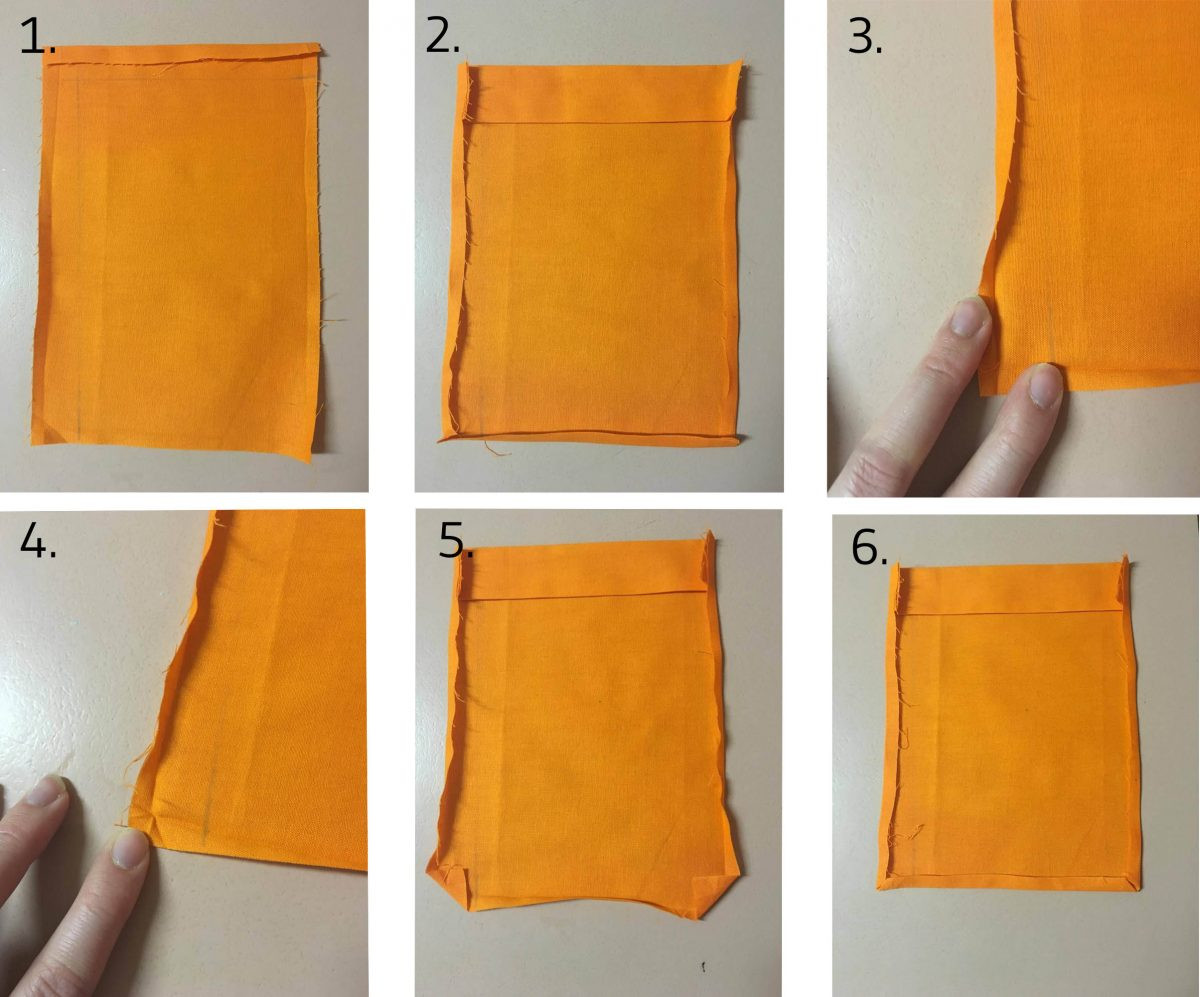
- Press all folds down with an iron.
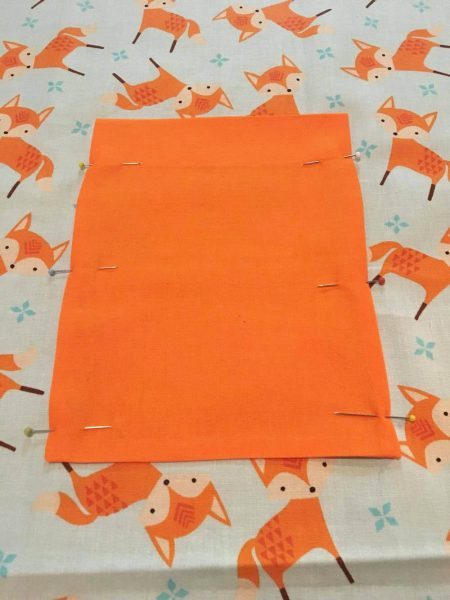
- Place the pocket in the center, right side of one 13” x 18” (33 x 46cm) pieces of fabric. Measure about 2/3 of the way down from the top of the fabric. Once you are happy with the positioning of the pocket, pin it in place and then straight stitch around the edges of the pocket to attach it to the fabric. Remember not to sew the top of the pocket!
The Bag:
- Match the right sides of the fabric together and pin in place
- Select Zig-Zag stitch on your machine (this helps prevent the woven fabrics from fraying) and then sew along 3 sides of the fabric (take notice of the bag opening). For the right and left sides of the fabric start stitching 2” from the top and end stitching 1” from the bottom. Zig-Zag Stitch the bottom from end to end.
- Optional: Trim the raw edges carefully with pinking shears and try to get as close as you can to the Zig-zag stitch without cutting it. This will give you a neater finish on the inside of your seams.
- Now fold down ¼” (0.65cm) from the top of both sides of the opening, iron it down and then fold down another 1 ¾” (4.45cm) and press.

- This is where your cording will go through. Make sure this casing is big enough to fit the size cording you have chosen. Straight stitch it in place. Turn to the other side and repeat.
- Take the first piece of cording and pull it through the 1” (2.5cm) hole in the bottom and then pull it up through the center of the bag and thread it through the hole at the top on the same side. Use the bodkin or safety pin to help you pull the cording through. Once it is out the other side, take it back through the middle of the bag, (1” (2.5cm) hole matching up with the other end). Secure it with a knot. Repeat this step for the other side.
- Hand sew any spaces left around the 1” (2.5cm) space in the bottom and underneath the cording openings at the top.