
This passport holder is one of the quickest projects you can make! It’s made using cork fabric, which means fabric edges won’t fray, nor will they need seam finishing. There’s a place for your passport, as well as pockets for any other smaller documents you might want to keep handy.
So stitch one up before your next travelling adventure!
Shopping List:
Everything you need to complete this project in one place. Use this convenient checklist to ensure you have all the required materials in your sewing room, or take it with you when you shop for supplies.
- Depending on where you buy it, cork fabric may be sold by the sheet or on a roll. Whichever type you buy, make sure there is enough for the following:
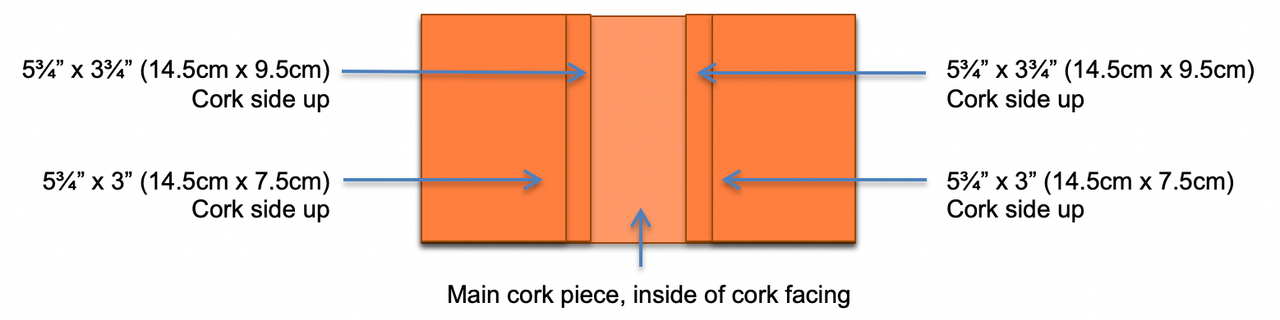
- One piece of cork fabric for the main cover: 5¾” x 8¾” (14.5cm x 22cm)
- Two pieces of cork fabric for larger pockets: 5¾” x 3¾” (14.5cm x 9.5cm)
- Two pieces of cork fabric for smaller pockets: 5¾” x 3” (14.5cm x 7.5cm)
- Non-stick presser foot
- All-purpose sewing thread
- SINGER® universal needle, size 14/90
- Rotary cutter, mat and ruler
- Paper clips (to use instead of pins for holding fabrics together for sewing)
- Hand sewing needle
Sewing directions
- Use a rotary cutter, mat and ruler to cut your cork pieces as indicated on the Shopping List. Note: If your cork fabric was on a roll, you may need to use a slightly warm iron with a press cloth to flatten the pieces. Don’t press directly on the cork fabric – use a press cloth, which can simply be a scrap of 100% cotton fabric, to prevent scorching.
- Lay the large, 5¾” x 8¾” (14.5cm x 22cm) cork fabric piece with the cork down and the inside of the cork fabric facing you. Place the two larger 5¾” x 3¾” (14.5cm x 9.5cm) pocket pieces on the main fabric, one at each end, with the cork side facing you. Place the two remaining 5¾” x 3” (14.5cm x 7.5cm) pocket pieces on top of the first pocket pieces with the cork side facing you.
<start="3"> </start="3">
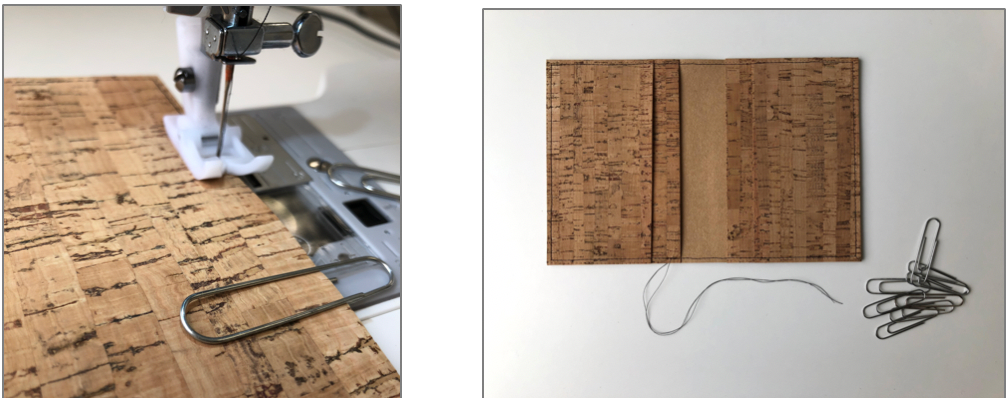
- Use paper clips instead of pins to hold the layers together for sewing, as regular pins will leave permanent holes in the cork fabric.

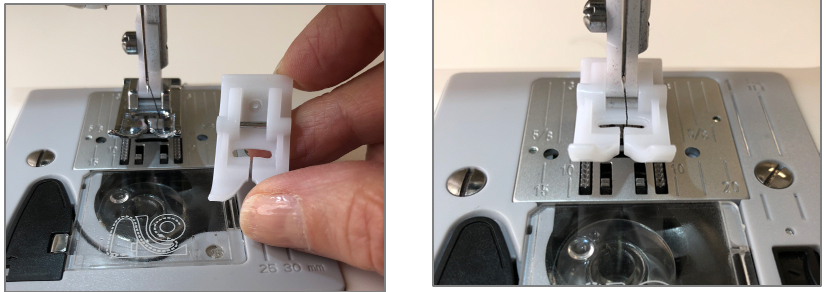
- At the sewing machine, remove the All-Purpose Foot and attach the Non-Stick Foot which will allow the fabric to feed smoothly and freely as you sew. Select straight stitch with a stitch length setting of 3.0mm. Using a longer stitch length setting will prevent the seams from perforating.
- Sew around the whole piece, removing paper clips as you come to them (don’t stitch over them). Don’t back-stitch at the beginning or end, but instead use a hand sewing needle to bring the thread tails to one side of the fabric, tie a knot and then trim the threads. This will prevent stitch build up that will otherwise be very obvious on the cork fabric.
Tip for beginners: When you come to the corner and it’s time to turn the fabric, turn the hand wheel toward you to bring the needle down into the fabric before you raise the presser foot lifter to turn the fabric. This will prevent the fabric from shifting when you turn. After turning, put the presser foot down and resume sewing – you’ll have a nice, cleanly sewn corner!
- Place your passport into the pocket on the right. The other pockets are for any other small documents you might want to keep handy. You’re ready to go!