
This Candy Cane Cushion is a great project to create for the Christmas Season. Make 1, 2 or many to decorate your home or office.
Shopping List
- 35cm of Red Fabric
- 45cm of White Fabric
- Candy Cane Pattern Pieces
- Scissors
- Coordinating thread
- PolyFill approx. 200g
- Iron
Preparation
- Print the Candy Cane templates on A4 paper. Tape the top and bottom, aligning stems of the candy cane together. Cut out the Candy Cane Shape.
NOTE: Ensure Page Scaling is on none to print at actual size. - From Red fabric:
- Cut (3) 8.5cm (3 ¾”) x width of fabric (WOF). Cross cut lengthwise into (6) 8.5cm strips.
- From White fabric:
- Cut (3) 8.5cm (3 ¾”) WOF. Cross cut lengthwise into (6) 8.5cm (3 ¾”) strips.
- Cut (2) 4cm (1 ½”) x WOF. Trim to 62cm Includes seam allowance.
Sewing
All seams are ¼ “ (6mm) unless otherwise specified.
- With right sides together, sew (1) red 8.5cm (3 ¾”) strip and (1) white 8.5cm (3 ¾”) strip, right sides together along length of strips. Press seam to red fabric. Repeat for remaining strips.
- Sew 2 x red/white strip units together, alternating the colours.
HINT: to prevent ‘Banana Bending’ of the fabric, sew each alternate strip in opposite directions. Press seam to red fabric. - Sew the remaining red/white unit onto this 4 strip unit. Press seams towards red fabric.
- Fold the fabric, wrong sides together, lengthwise, matching the stripes. Pin on outer edges if necessary.

- Place the paper candy cane pattern on the top of the fabric at a desirable angle to best suit the candy cane stripes. Cut the candy cane out, avoiding any pins.

- Now it is time to sew the gusset. Sew (2) 4cm white strips together, right sides together, at both short ends. Press seams open.
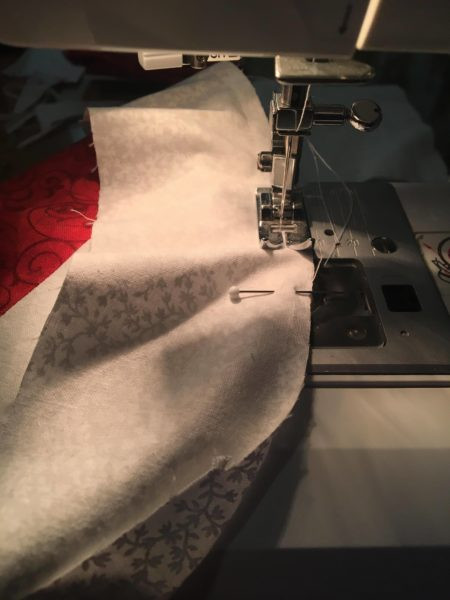
- Aligning raw edges, sew the white strip and (1) candy cane side, right sides together, starting along a straight section of the candy cane shape.
HINT I found it best to use few or no pins here. (Don’t worry it will be easy!). Focus on the 1 - 2cms in front of the foot, slowly moving around the shape, lining up the edges as you go. When you get to the curves, reduce speed and the fabric will manoeuver to the shape of the candy cane. - Repeat for the second side of the candy cane, matching the Candy Canes shapes. Leave an opening of approximately 10cm (4”) along a straight edge. You will have a some of the gusset fabric overlapping, this is for the seam allowance to sew up the opening later.
- Clip seam allowance, particularly around the curved seams.
- Turn right side out, pushing all seams out. (You may find it easiest to use a pen or turning tool to help you with this.)
- Fill with the polyfill, until the candy cane feels firm. Hand stitch the opening in the gusset closed using a slip stich and you are done!