

Throughout my artwork you’ll find cryptic messages and hidden puns. The night my husband and I got engaged we celebrated by sharing Pacific Oysters roasted over hot coals by the ocean. They were the biggest oysters I’d ever seen and so it struck a light of creativity. I asked the waiter if he could put the oyster shells in a box for me to take home. As he raised one eyebrow and looked at me with confusion he said yes and took the plate to the kitchen. The thought of having our wedding rings in a ring box, didn’t feel right, it wasn’t me. It had to be something unique and creative with a hidden pun. The day of our wedding the rings sat like two pearls nestled in our oyster shell. They happened to be with the wrong person, at the wrong time in the wrong spot but nevertheless gracefully made its way down to chain to us. It was a simple message to the love of my life that ‘The World is Now “Our” Oyster’
Machine Requirements
- Singer Heavy Duty Sewing Machine.
- General Sewing Equipment.
Requirements
- Oyster shell (top and bottom)
- 5mm satin ribbon x 30cm length (dusty rose)
- Baking paper.
- White satin fabric.
- Fibrefill
- Small metal hinge.

Creating an Inverted Pattern
- Cut a 10 x 10cm square of baking paper.
- Scrunch it into a ball and then lay flat.
- Insert it into the shell cavity making sure all the nooks are filled.
To fill a cavity and get the most accurate fit, your paper needs to be as malleable as possible. This technique allows the paper to reach all the nooks inside the shell.
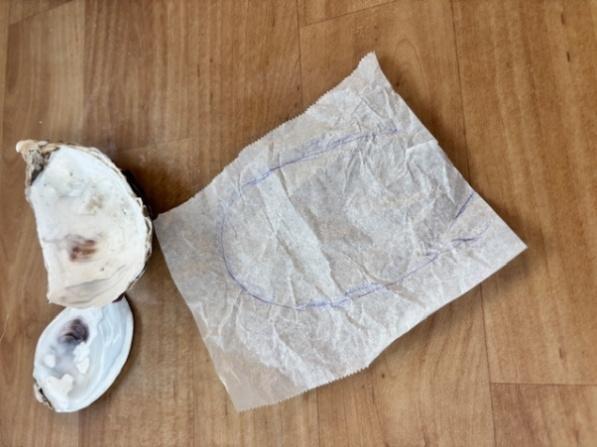
- Roughly sketch around the lip of the oyster. Remove and refine the lines, creating a smooth edge.
- Create a new template by redrawing the shape and adding a seam allowance.
- Use the second template to cut out 2 × satin fabric shapes.
Sewing Instructions
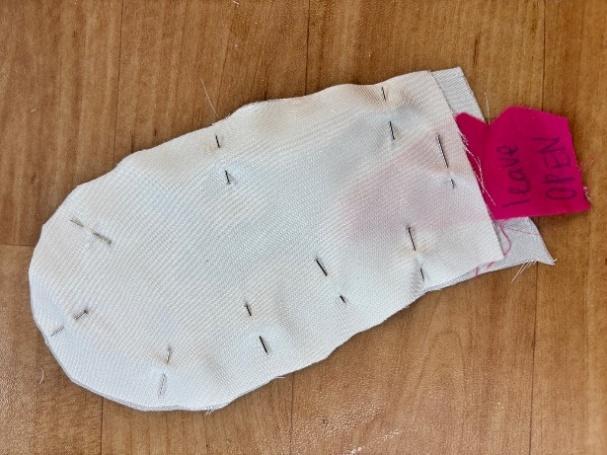
- With the right sides together pin your pattern to your satin and cut out.
To make life easier, I like to leave a little tab so I remember which spot to leave open.
- Set your Heavy Duty Sewing Machine to a straight stitch and carefully sew around the edge leaving your seam allowance.
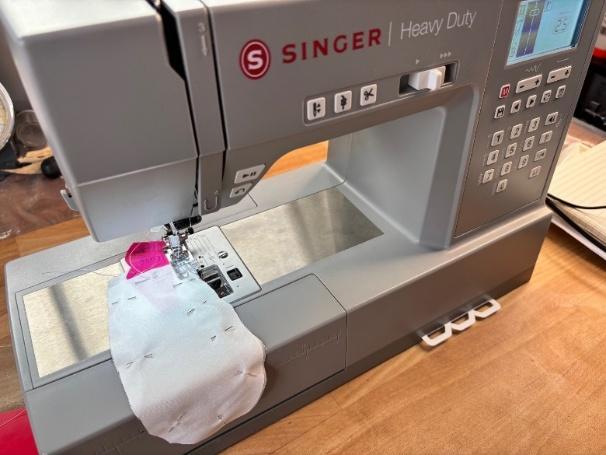
Make sure to hold the fabric firmly and use a new needle to avoid threads being pulled.
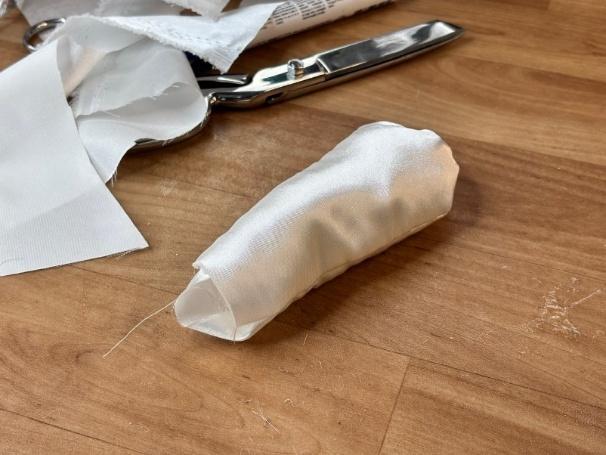
- Clip edges and turn inside out.Fill with the fibrefill filling until the pillow is sitting flush with the shell. Ladder stitch the opening closed.
Over stuffing will change the shape of the pillow and not allow it to sit correctly, so adjust as before sewing closed. Remember the rings need to fit too so have some give for them to sit comfortably.
- With some fabric glue adhere your ribbon to the centre of the shell.
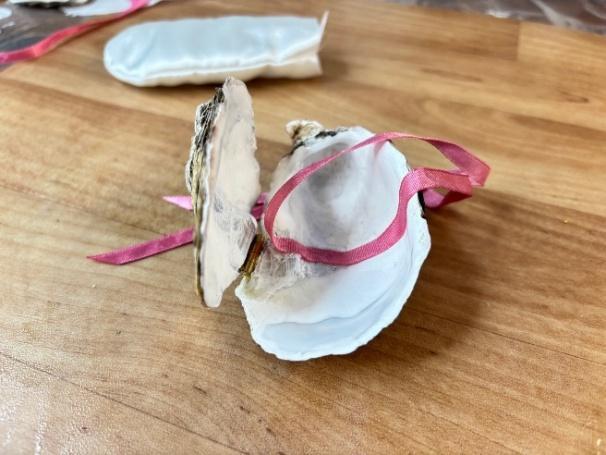
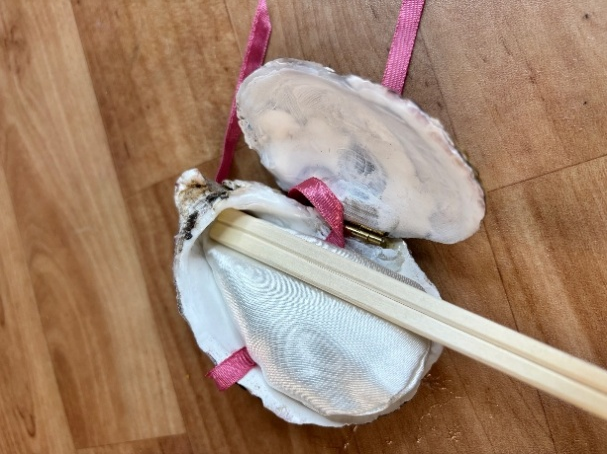
- With fabric glue carefully position the pillow inside the shell. Make sure all the nooks are filled. Use some chopsticks to get in those tricky spots. Leave to dry overnight.
If it isn’t sitting flush anymore, you may need to sculpt it by tucking in and gluing areas.
- Trim the tails of the ribbon to your desire. If the rings are available bow them in for better accuracy.

To prevent the ribbon ends from fraying, I like to quickly run a flame back and forth a couple of times. This trick will cauterize the tips and stop them from unravelling.
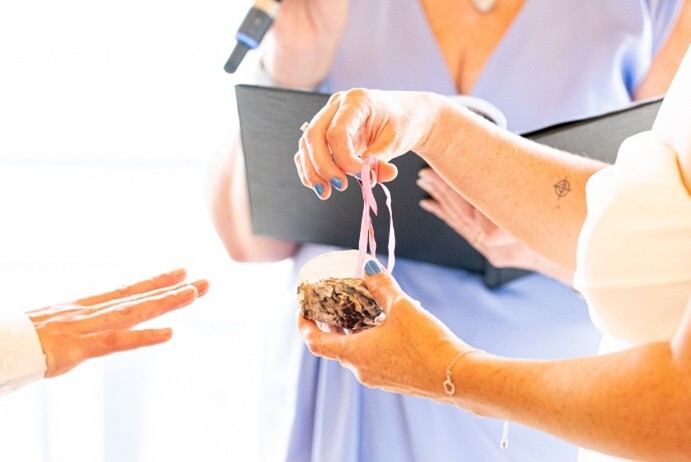
We swapped rings May 10. It was nothing but endless bloopers and laughter. Everything you could ask for!
The world is your oyster, just try not to get shucked! (I couldn’t resist ?)


Don’t forget to share your projects with us on Instagram, tagging @singersewinganz and using the hashtags #sewitwithsinger #singersewingmachines #singersewingaustralia or our Facebook page Singer Australia & New Zealand