
Wish you could leave the fear behind and to finally make friends with your overlocker?
We’ve all been there, choosing projects that will work with white thread because that’s what your overlocker is threaded with and you will avoid rethreading it at all costs… or never touching the tension for fear of never finding that sweet spot again, stuck forever twisting those mysterious dials not really sure what does what…
Today we are going to bust through that fear and make it easy for you. It’s time to unlock the many things that your overlocker can do.
Threading your overlocker
The first tip is to get an air threader if you don’t have one already! I know, I know, an upgrade might sound extreme. However, air threaders are life-changing, or at the very least practice-changing! If you are spending more time, tweezers in hand, frustrated and fiddling with threading your machine - go and test one at your local sewing shop. If you don’t have a local sewing shop, just have a look at this instructional video on the
This is the machine that I use, and it really is as easy as the video shows. With the flip of a lever and a puff of air the thread is through the loopers in less than a second. Doesn’t that sound like bliss?
If you’re not ready for an upgrade - it’s time to put in the reps. Thread and rethread your machine 5 or more times in a row and soon it will become second nature.
Adjusting tension
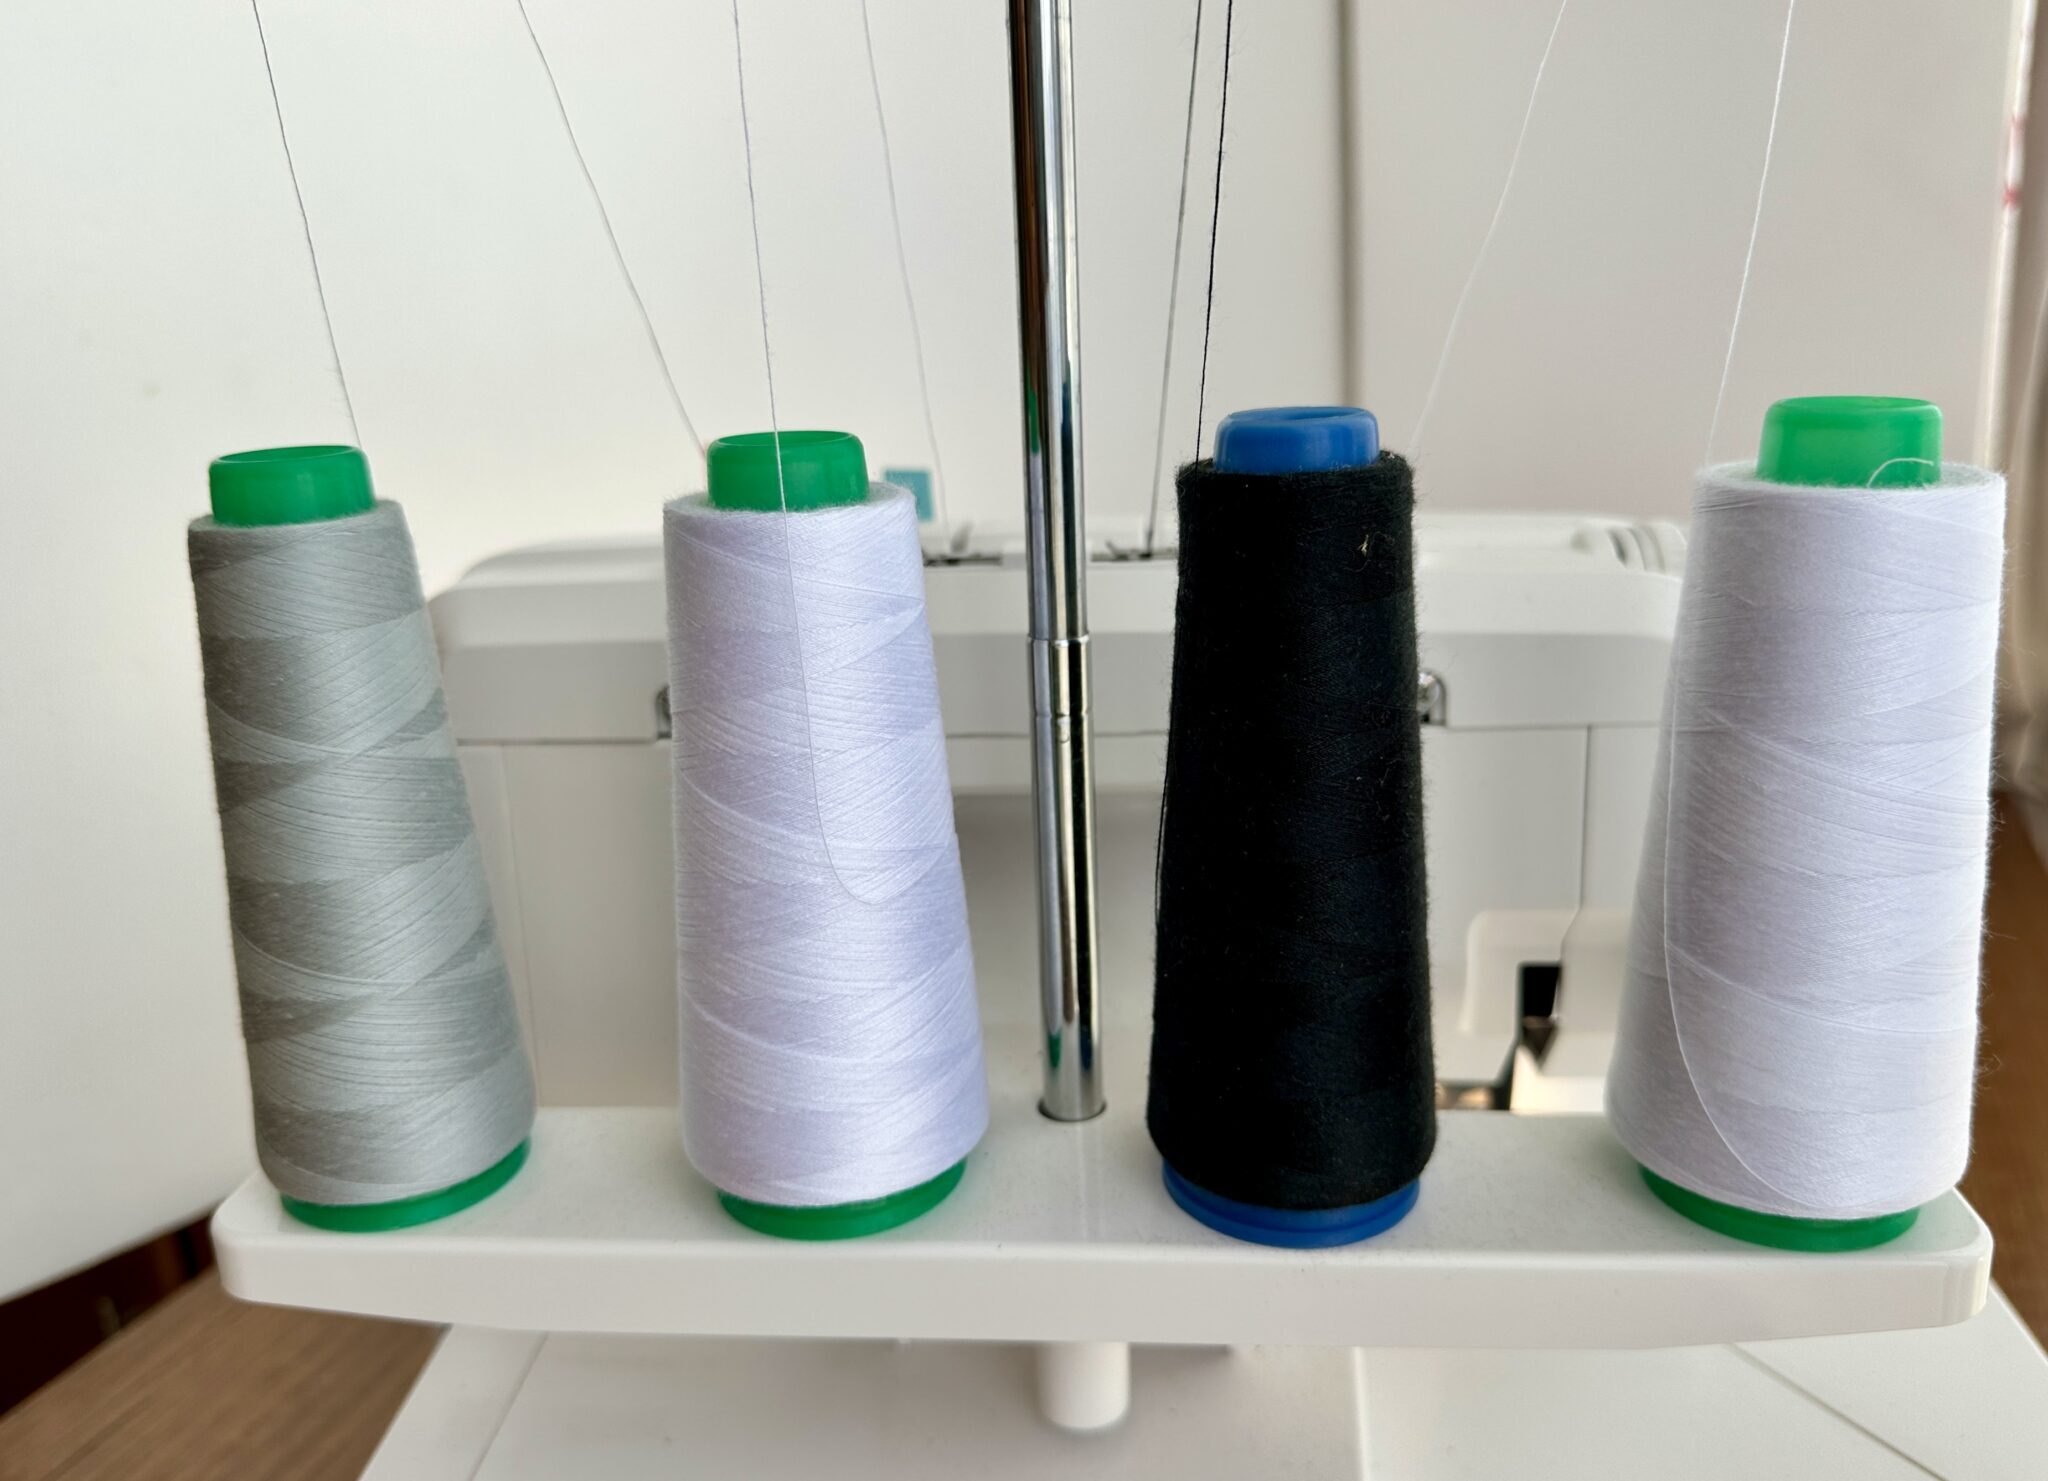
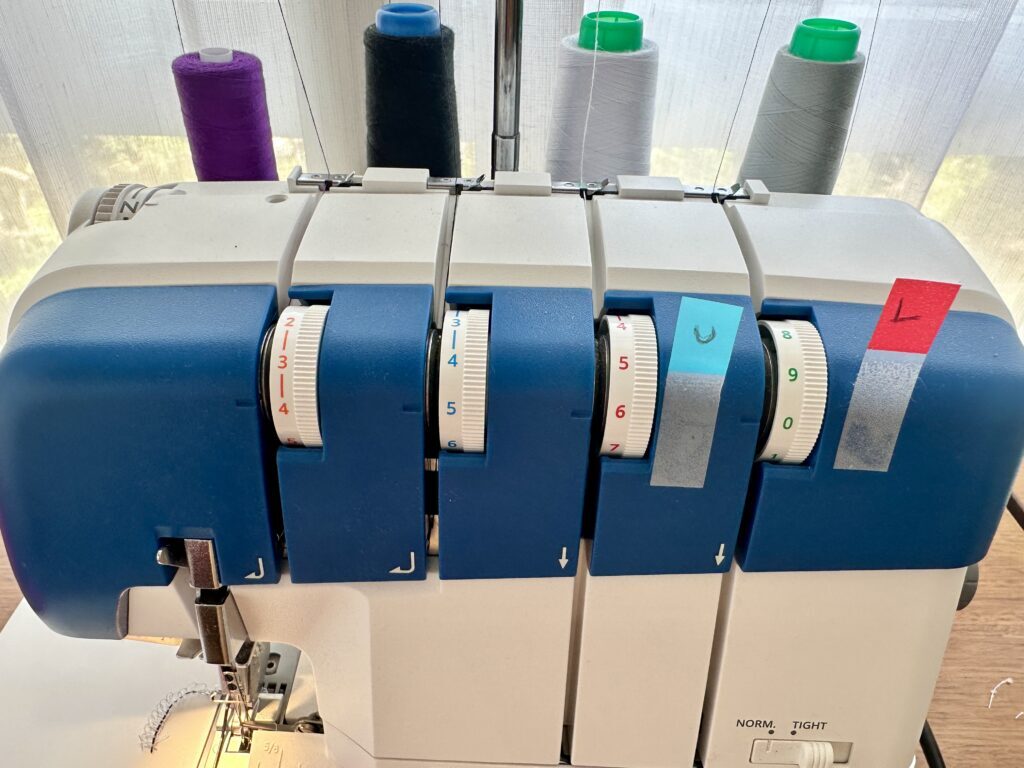
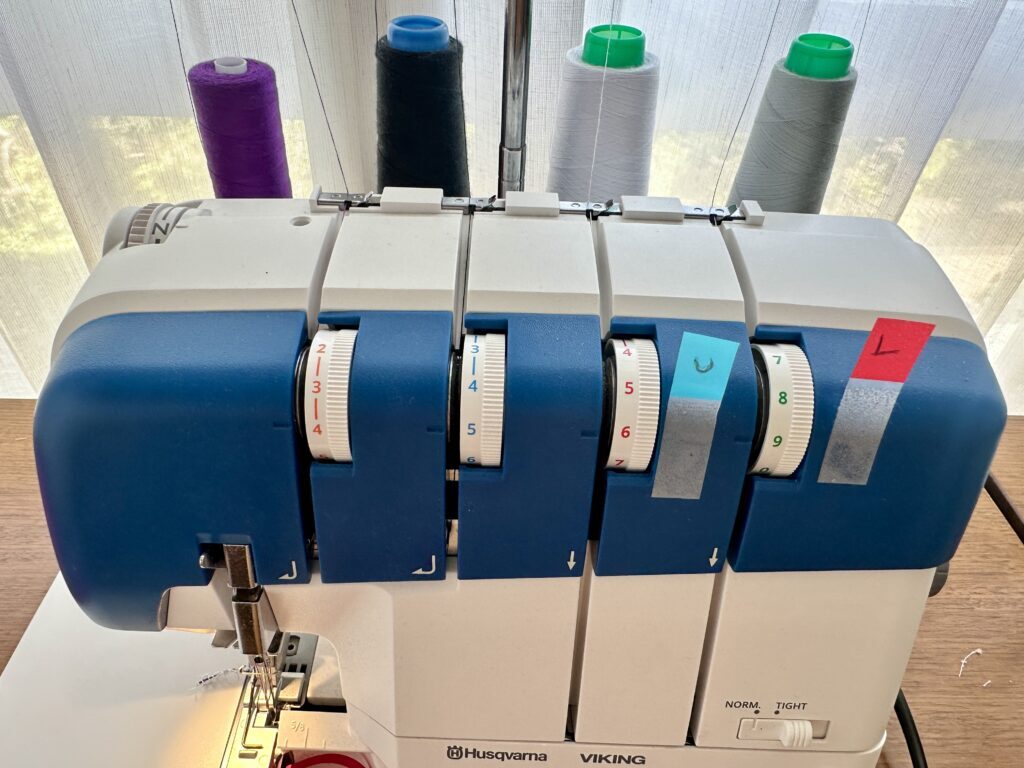
Let’s get ready to deeply understand the tension on your machine. The first thing is to add different coloured thread for each of the four cones. Easy peasy now that you’re comfortable with threading! The reason for this is so you can see how each change of the tension dial affects each thread as you stitch. If you don’t have four different colours of overlocker thread you can use the same colour on one of the loopers as you have in one of the needles. Alternatively, you can also use regular sewing thread. Because overlocker thread is fuzzier than standard thread you shouldn’t use it in a sewing machine, but the other way around is just fine!

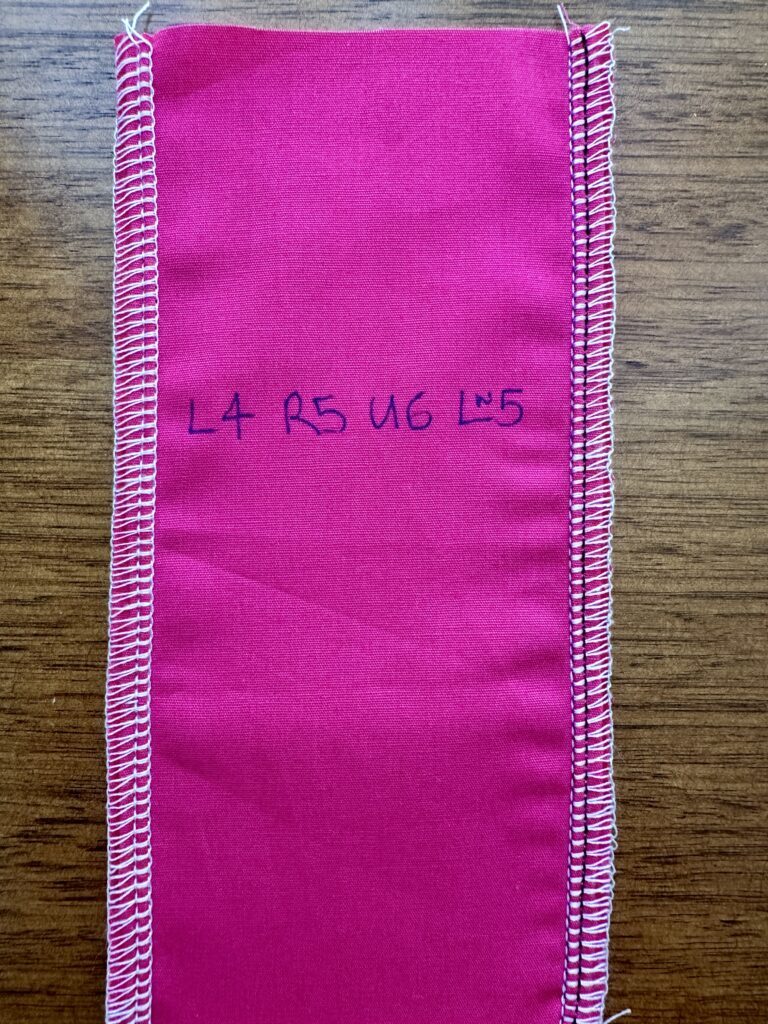
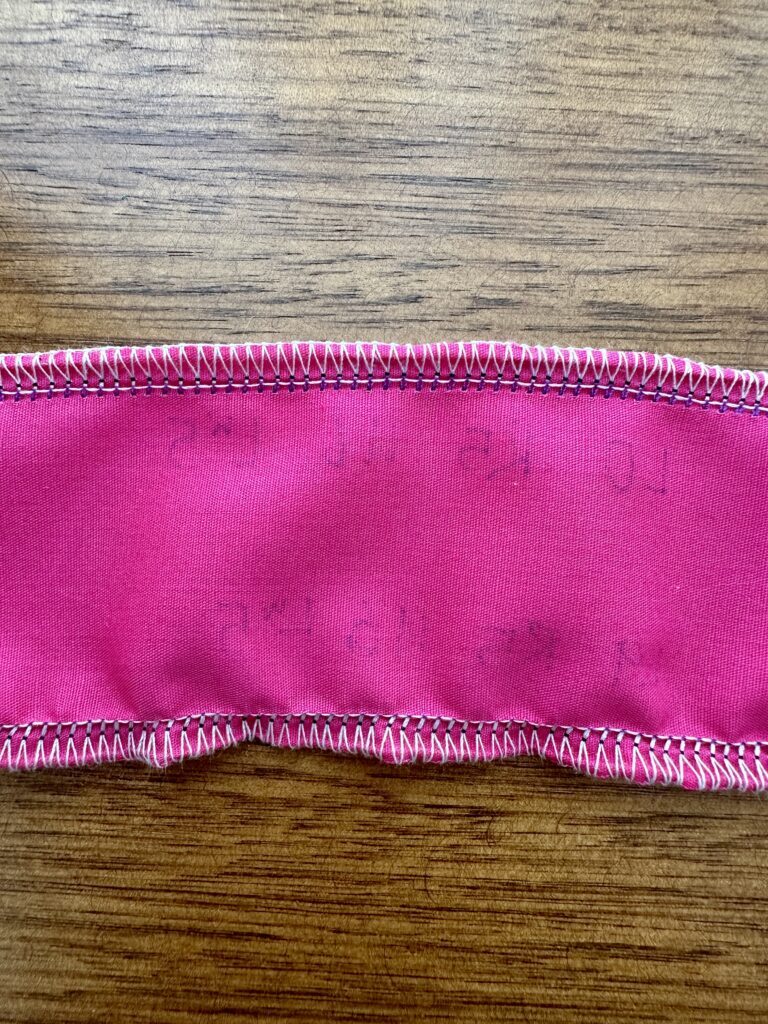
Before you start changing anything, if you are happy with your current tension settings for the fabric you use most often, take a photo of the current settings and do a sample of stitching on a scrap of fabric. You can see an example in the photos of what you are aiming for. Your needle stitches should be nice and even and your looper threads should meet at the edge of your fabric.
Left Needle
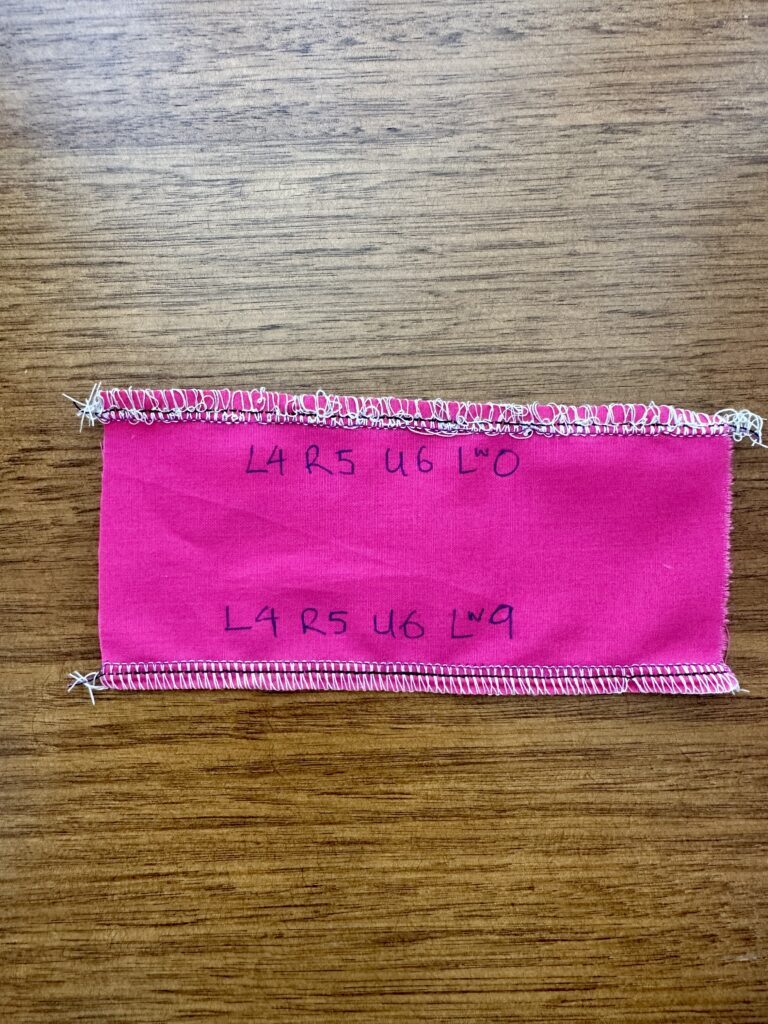
Now the fun starts! Let’s take your left needle tensions dial - the one to the furthest left as you look at your machine - all the way down to 0. Keep your other tension dials as they were. Grab a scrap of fabric and test out what the stitch looks like. Write directly on the fabric what your settings were.
Turn your left needle tension dial all the way up to the highest setting (9 on my machine) and test the stitching out on the opposite edge of the fabric scrap. Note down your tension settings next to the stitching.
Inspect your stitches and see what difference it made as you changed the left needle to each extreme. You can see in the images below, as I loosened the tension to 0, the purple thread became much more visible on top and underneath the fabric. Having the left needle tension this loose also affected the looper threads as it wasn’t holding them in place. Conversely when the tension was tightened to 9, the left needle thread was so tight that it bunched up the fabric as I stitched, eventually snapping the thread right at the end.


Right Needle
Repeat this process with the right needle tension dial - second from the left on your machine. As you can see in the images below, the black thread behaves in much the same way. Showing up too much on the top and bottom surfaces of the fabric and not securing the looper thread enough when dialled down to 0. When the tension is increased to 9 the effect is more subtle, but it is bunching up the fabric between the two rows of stitching.
Upper Looper
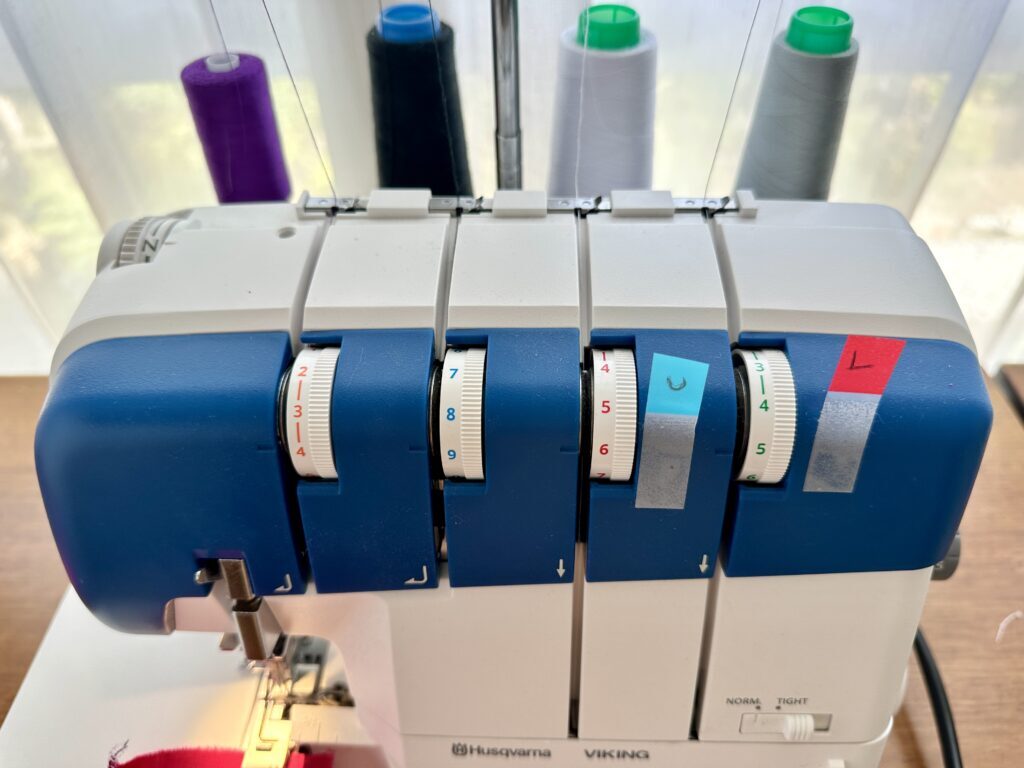
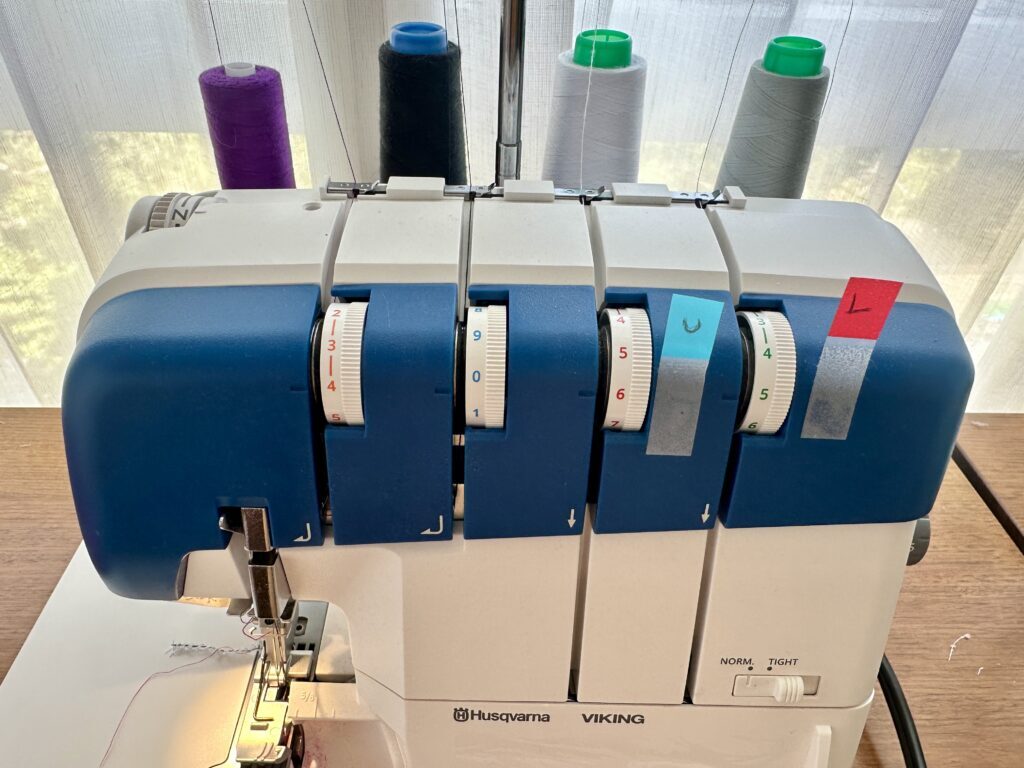
Guess what’s next?! That’s right, do the same thing with your upper [CQ1] looper - it’s the third dial from the left of your machine. If, like me, you tend to forget which is which - add a little sticker U for upper next to this dial and L for lower next to the last one.
The images below show you how loosening the tension for the upper looper results in upper loops that are too long and wrap around to the back of your fabric. When it’s tightened to 9 it pulls the lower loops around to the front of the fabric and pulls on and distorts the purple left needle thread.


Lower Looper
This is where things start to get wild! The lower looper tension dial is the furthest to the right on your machine. When it is on 0 the lower loops come all the way to the front causing a great big mess. The tight tension of 9 on the lower looper doesn’t give quite the same drama but it pulls the upper looper slightly to the back of the fabric.
Going Forward
I highly encourage you to do this experiment on your own machine. The best way to learn is through doing. I guarantee you that once you have played with your tension like this you will be able to spot what the problem is much faster when your stitches go a little wonky. And yes, it will happen. If you’re using different weights and thickness of fabrics, you will likely need to change your tension. Now that you know exactly how to do it, it will be a breeze! Don’t forget to keep your fabric scrap samples for reference to help in those situations if you need them!
Finally return your tension dials to your most used, favourite settings. Let’s take one final look at how you want your stitches to look.
Don’t forget to share your projects with us on Instagram, tagging @husqvarnvikingsewingaus and using the hashtags #husqvarnavikingaustralia # husqvarnavikingsewing #keepingtheworldsewing or our Facebook page Husqvarna Viking Australia.
Follow on Social Media :
Facebook | Instagram | Pinterest | Youtube | Tiktok | X/Twitter