
Who remembers the Magic Eye books from the early 90’s? You know the ones with patterns that you had to go cross-eyed to see the image?
Well, my friends, this is the inspiration for the beautiful artwork you’re about to create.
Machine Requirements
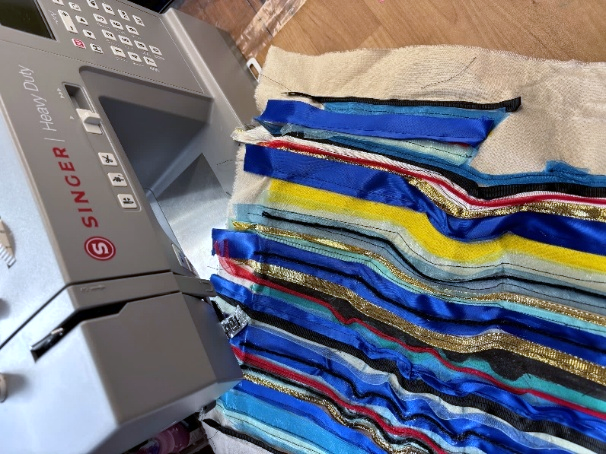
- Singer Heavy Duty Sewing Machine.
- Free Motion Presser Foot.
- Singer Extension Table.
Requirements
- Calico
- A variety of recycled ribbons - I found mine off Marketplace.
- Adhesive spray and marking pen (optional).
- Ruler
- Tailors chalk or led pencil.
- Iron on fusible interfacing –
- Frame
Preparing the fabric
1. Cut your calico and interfacing to fit the size of your frame, include a border of 10cm extra all round.
2. Iron the calico and place wrong side up. Lay the interfacing shiny side down, cover with a sheet of baking
paper and fuse together with an iron.
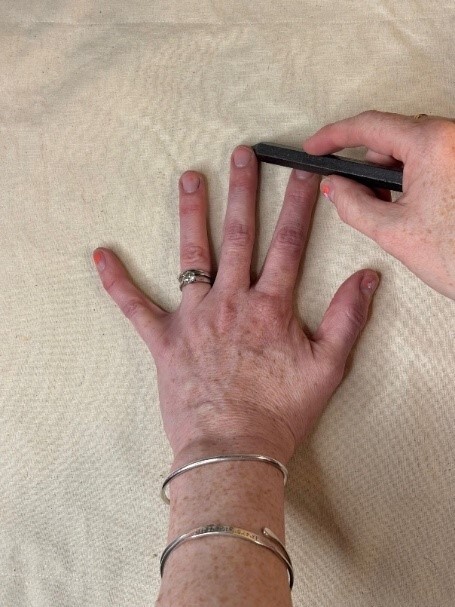
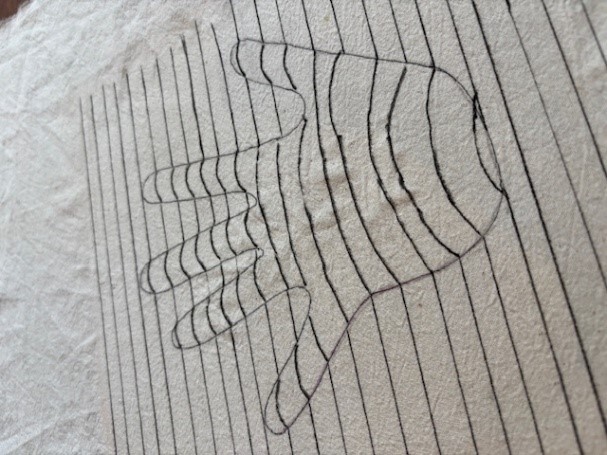
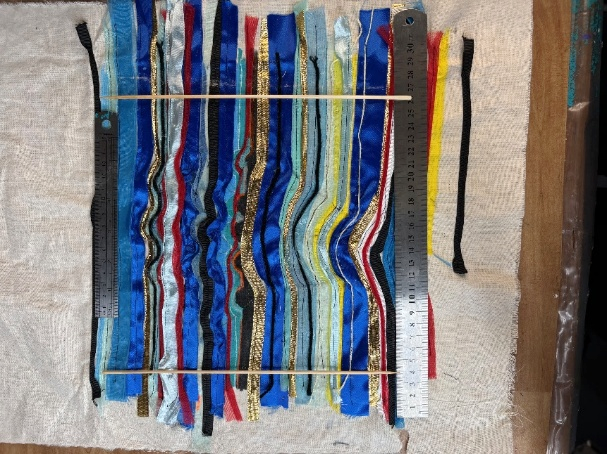
3. Place your hand in the centre of the fabric and outline your hand.
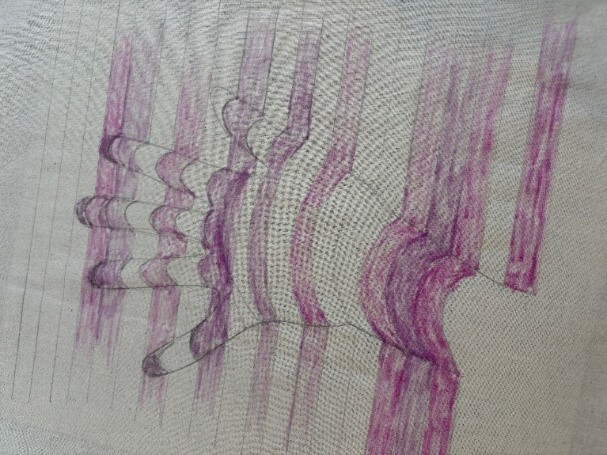
4. Then with a ruler draw horizontal lines 1cm apart across the fabric, missing the shape of your hand.
5. Now draw a little arch for each finger matching up with the corresponding line.
Sewing secret - To make things a little easier I coloured in certain rows, so I didn’t get mixed up with all the lines. Now these rows are just a guideline. Your ribbons can be thinner or wider.
Sewing Instructions
Things are going to get a little wild, so buckle up!
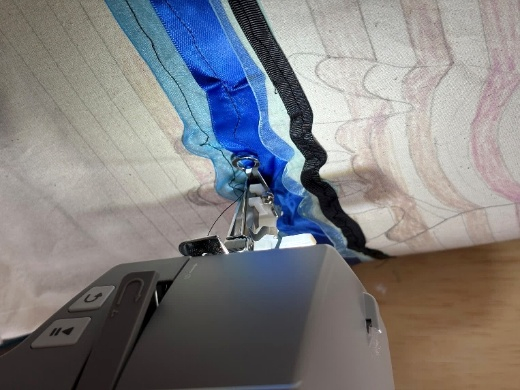
- Now, you can either pin your ribbons into place or spray a little adhesive glue to tack them down when you sew. I always freestyle so I use different techniques for different areas. You do you!
It’s almost impossible to have the sewing lines cookie cut perfect. One of my biggest rules when it comes to art is..
“embrace the imperfections”
With that being said, I’ve chosen to use a black thread to show the wiggly bits and “embrace the imperfections” you can’t beat handmade authenticity.
It also saves you from changing the thread for each colour.
2.Starting 5cm above the fingertips and work downwards.
Sewing secret - If some bits are just too fiddly use puff paint, paint pens or fabric glue and polyester cord to fill in the spaces. Keep a quick unpick handy.
3. Once you’ve reached the bottom of your hand continue for 5cm more.
4.Measure the frame to fit your masterpiece, outline the perimeter with some tailor’s chalk then sew 2 rows along the edge for reinforcement.
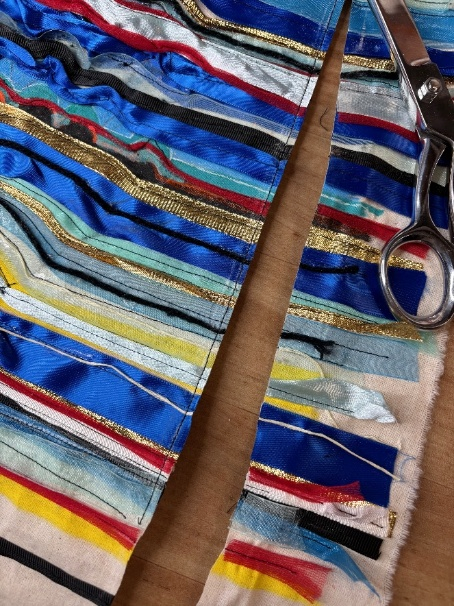
5. Enjoy the satisfying moment and cut the masterpiece to size.
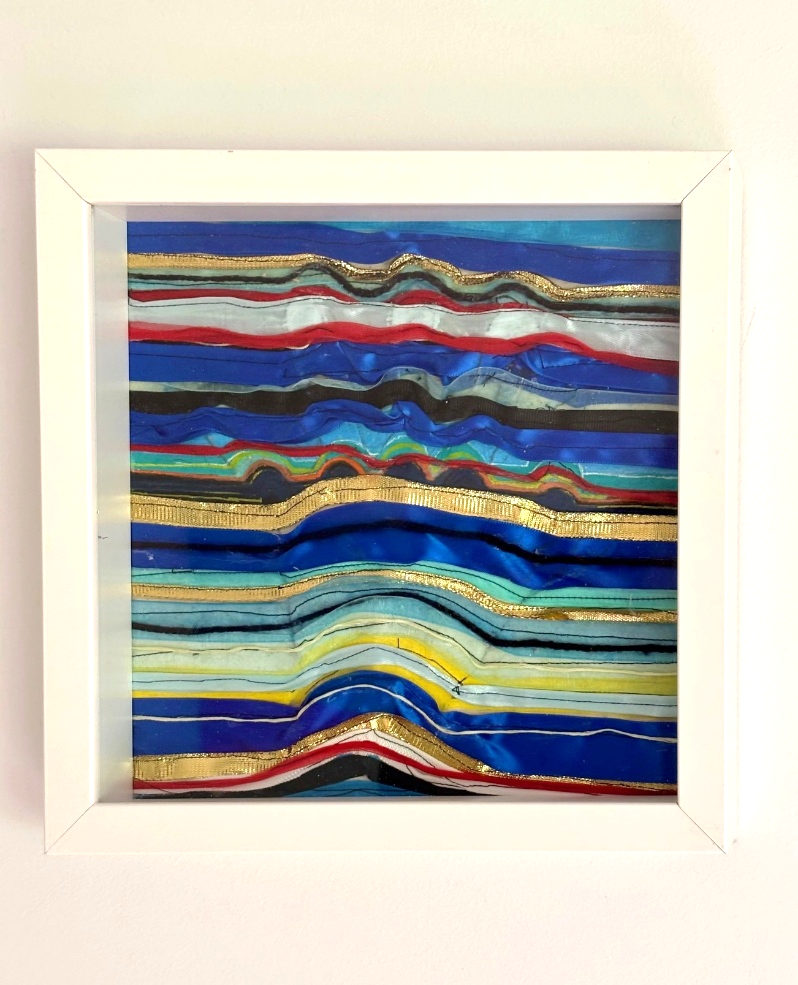
6. Frame it and name it!!
I called mine “The Heist” and set it in a white shadow box frame.
We can’t wait to see what you create! Don’t forget to share them with us on Instagram, tagging @singersewinganz and using the hashtags #SingerAustralia #Singersewingmachine #perfectionstartshere or our Facebook page Singer Australia & New Zealand