
The SINGER® Ruffler Attachment Presser Foot is a great time-saving attachment! It does all the work for you; all you need to do is set the depth of pleats and how many stitches you want in between and away you go!
How to use the Ruffler Attachment foot:
- Attach it to your sewing machine. It attaches to the shank with the bar at the back, and then the semi-circular loop goes over the needle clamp. Most of the attachment will be in front of the needle.
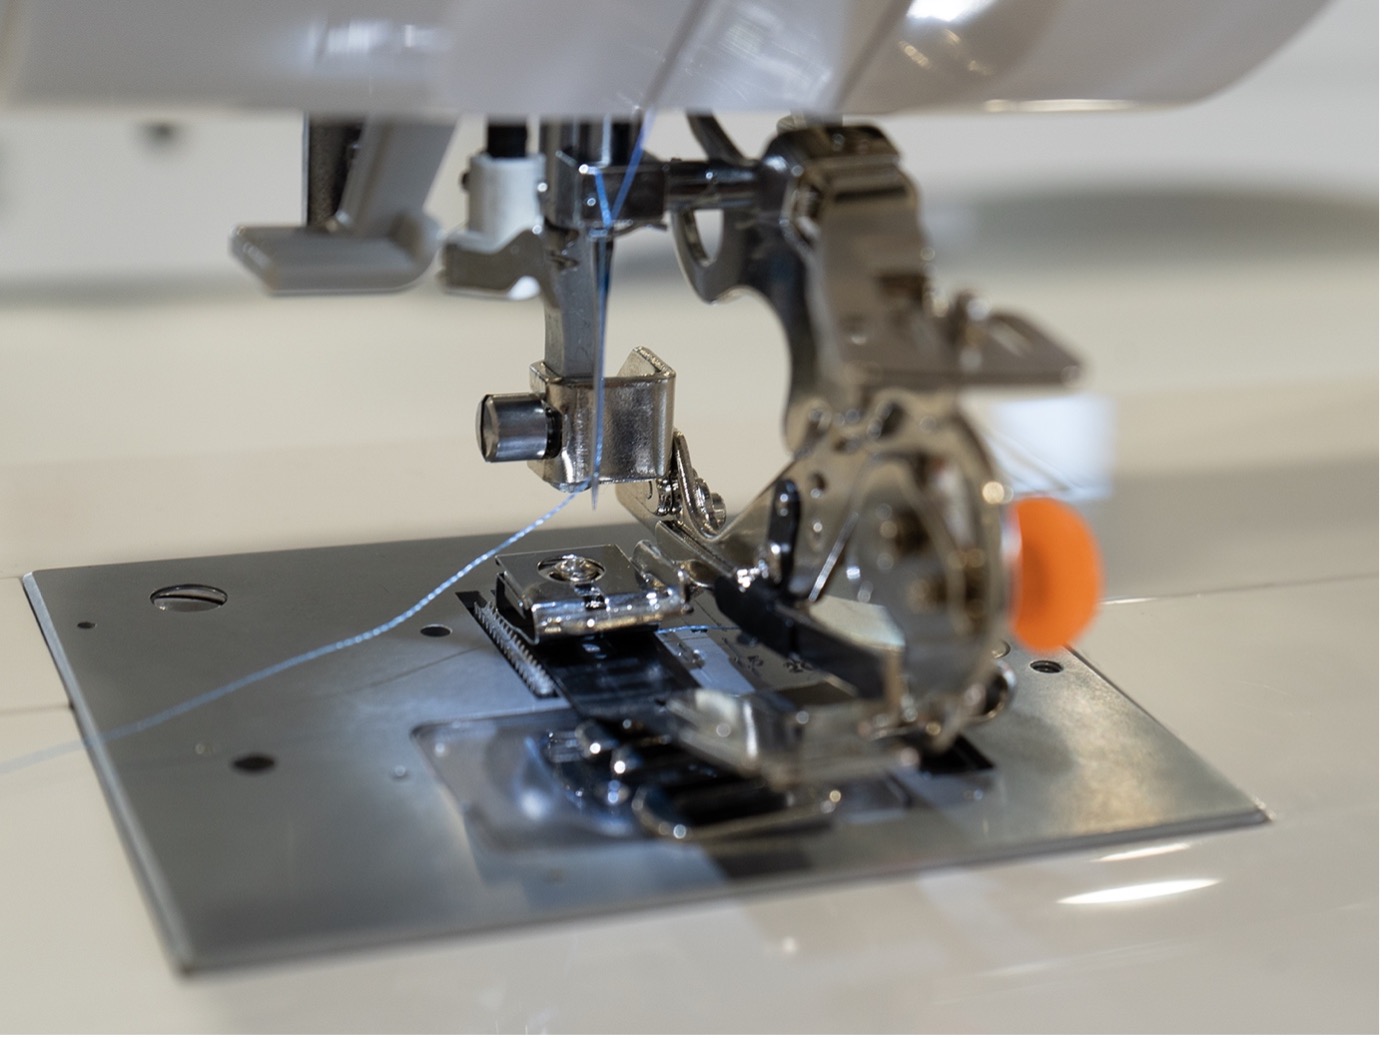
- 2. Set your machine to a straight stitch with a length of 4.0. Caution: Do not use any other stitch type, it will not work with this attachment.
- Before sewing check the following:
- Needle position – check that your needle goes through the hole in the foot without hitting the foot. If it is going to hit, adjust your needle position accordingly so it goes through the hole
- Foot down – make sure your presser foot is in the down position before sewing. If you forget to put it down before sewing, you will cause a thread jam.
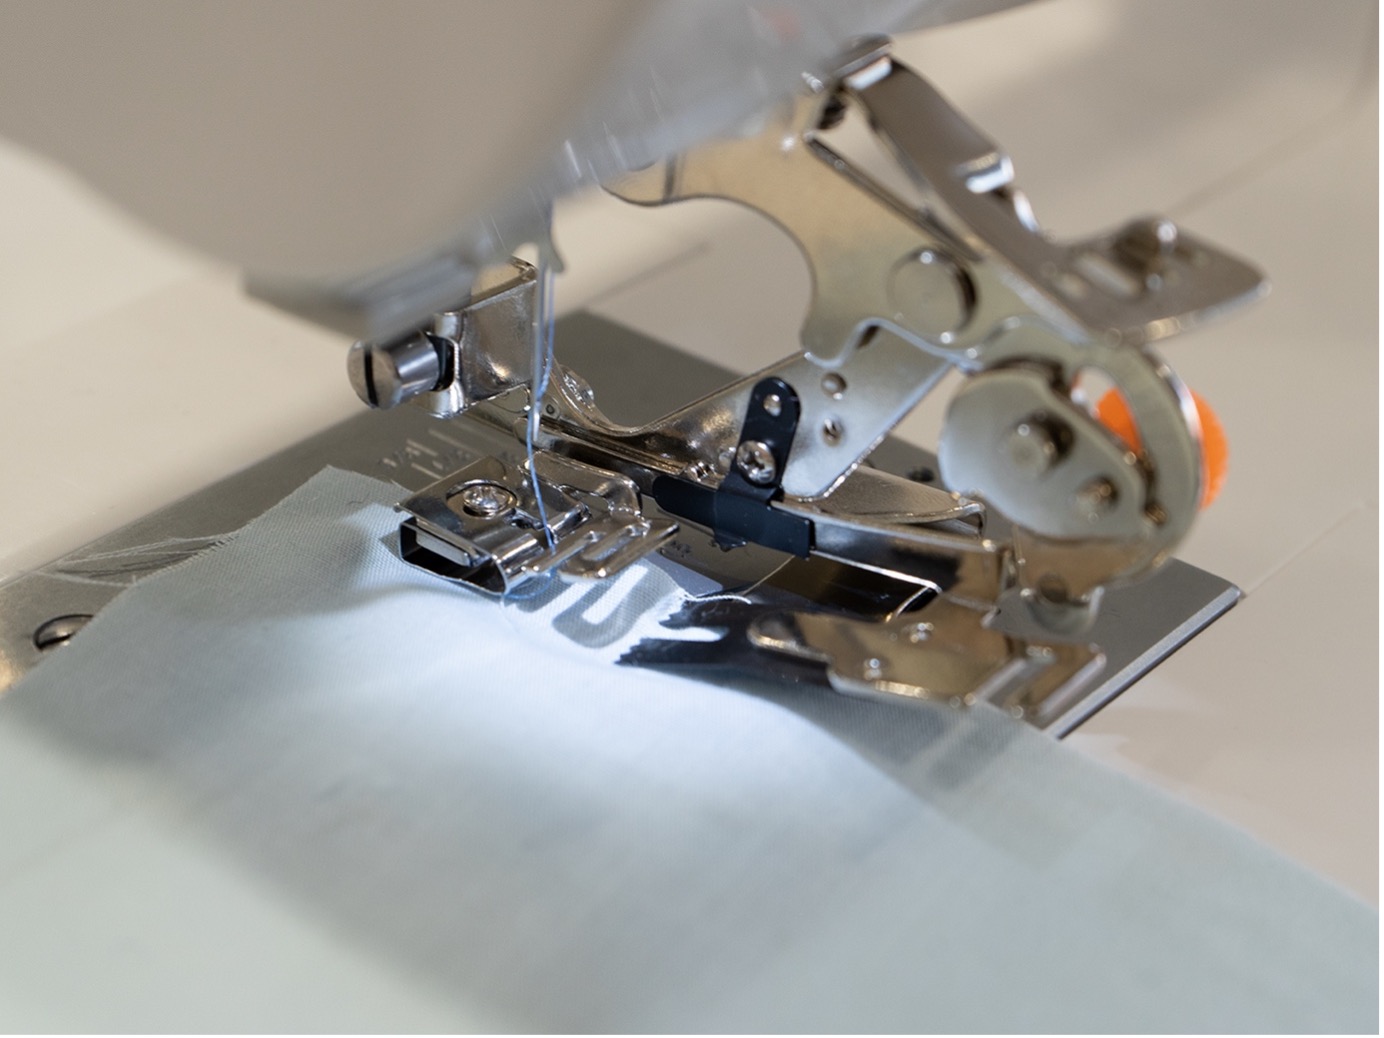
- Now grab some scrap fabric and do a test row of stitching. This is a great time to check the settings of the foot, so you get the type of ruffles or pleats you want for your project.
Adjusting the Ruffler Attachment settings:
The Ruffler Attachment has 2 points that you can adjust the settings. The first one changes the distance of your pleats, and the second point changes the depth of gathering.
How to adjust the distance of pleats:
This is done with the lever located on the front of the foot. You will see 4 settings:
- Star = no pleating
- 12 = A pleat is formed every 12th stitch giving less fullness
- 6 = A pleat is formed every 6th stitch giving a medium volume of fullness.
- 1 = A pleat is formed with every stitch giving the most amount of fullness.
- Cut a strip of fabric at 25cm long
- Gather it up, using your preferred settings
- If it now measures 13cm, you have a 2:1 gather and if it now measures you have a 8cm you have a 3:1 gather.
Simply move the lever to which setting you want for your project!
How to adjust the depth of pleats:
This is done with the knob attached to a long adjusting screw at the back. This adjusts the depth by adjusting the stitch length. A smaller number will result in deeper ruffles and larger number will result in shallower ruffles.
Tip: Cut your strip for ruffling a bit longer than what you think you need, and then trim any excess.
If you want more accurate measurements, you can also do the following:Now that you know how to use this amazing Ruffler Attachment, why not try it out on a fun project!
Conclusion:
Now you know how to use the SINGER® Ruffler Attachment Foot you can conquer many more projects that feature ruffles, without all the match and hand pleating!
Why not try adding ruffles to your next top project, or make some funky cushions for your lounge room?
If you make project with the SINGER® Ruffler Attachment Foot don’t forget to tag us! We love seeing your creations. Be sure to tag @singersewingaus and #sewitwithsinger in your posts so we can see!