
Carry your belongings in style with this In The Hoop Shoulder Bag Tutorial.
The perfect size for carrying your phone and a few little things in style. Plus, you can personalise it with your SINGER™ embroidery machine.
You can use it yourself or give it as a thoughtful, personalised gift for a loved one. Simply follow the instructions below in our In The Hoop Shoulder Bag Tutorial to create a beautifully unique bag.
Requirements:
Here is all of the materials and equipment you will need to complete the In The Hoop Shoulder Bag Tutorial.
- EM9305 Embroidery Only Machine
- 2 x Main Fabric - 17cmx26cm (6 ½”x10”)
- 3 x Lining Fabric - 17cmx26cm (6 ½”x10”)
- 1 x Lining Fabric – 18cmx27cm (7”x10.5”)
- 2 x H630 Pellon - 16.5cmx25.5cm (6 ½”x10”)
- 3 x Tearaway Medium Weight - 26cmx41cm (10”x16”)
- 1 Zip Size 5 – 15.5cm (6”)
- 1 Zip Size 5 - 16.5cm (6 ½”)
- 2 x Size 5 Zipper Pulls
- 2 x 2.5cm (1”) wide Key Fob
- 1m x 2.5cm (1”) wide Polypropylene Webbing
- Embroidery Thread
- Bobbin Fill
- General embroidery accessories eg. Thread snips, fabric glue etc.
- Sticky tape
- Embroidery Design – SINGER Shoulder Bag
Press the two pieces of pellon behind the 2 pieces of Main Fabric.
Instructions - Side 1
To complete side one of the In the Hoop Shoulder Bag Tutorial, follow the twelve steps below.
- Hoop a layer of tearaway only.
- Insert thread same colour as background fabric.
- Retrieve design ‘Shoulder Bag Side 1’.
- Go to Stitch out screen.
- Press the Baste button on the machine and stitch out for placement.
- Lay a piece of Main Fabric right side up over the placement line.
- Press the Baste button again to secure in place.
- Insert thread for decorative stitching.
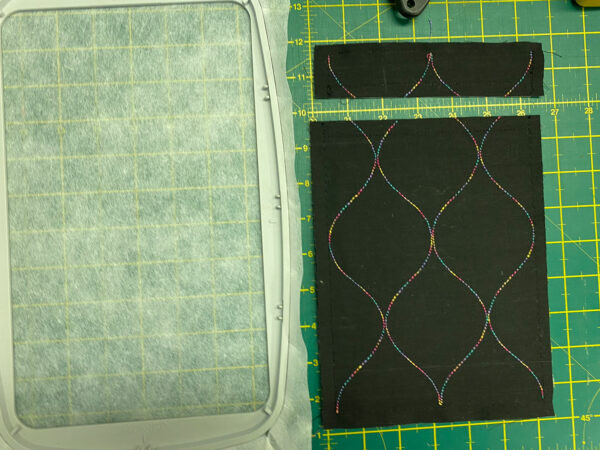
- Colour 1 – Stitch out decorative lines.
- Press the Trim button on the front of the machine to bring the hoop forward.
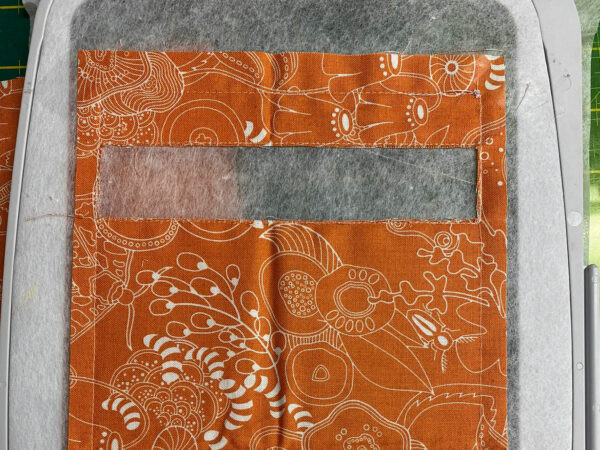
- Lay the large lining piece (7”x10.5”) right sides down over the hoop. Overlap the main fabric evenly on all sides.
- Colour 2 – outline for zipper area. STOP in design.
- Remove the hoop from the embroidery unit and cut on the lines as pictured.
- Carefully push the lining fabric through to the back and pull gently. Hold out with pins as pictured. You will be able to see some of the lining on the front of the bag.
- Return the hoop to the machine and press start to stitch a rectangle around the zipper area. STOP in design.

- Remove the hoop from the embroidery unit again and centre the zip underneath the cutout. Ensure the zipper pull is to the right side. Use tape to hold in place.
Instructions - Side 2a
To complete the first section of side two of the In the Hoop Shoulder Bag Tutorial, follow the nine steps below.
- Hoop a layer of tearaway
- Retrieve design ‘Shoulder Bag Side 2’
- Use the Baste button on the front of the machine to give a placement line.
- Lay the Main Fabric over the placement line evenly.
- Use the Baste button to secure the fabric in place.
- Colour 1 – Fancy stitch detail and the cutting line. Insert initials or name at this point.
- Remove the hoop from the embroidery unit and remove the fabric from the hoop.
- Carefully remove the tearaway and cut along the zipper placement stitch line.
- Place these two pieces to the side.
Instructions – Side 2b
To complete the second section of side two of the In the Hoop Shoulder Bag Tutorial, follow the nine steps below.
- Hoop a layer of tearaway
- Use the Baste button on the front of the machine to give a placement line.
- Remove the hoop from the embroidery unit and turn over.
- Lay a lining piece with the wrong side facing the stabilizer and tape in place.
- Return the hoop to the machine.
- Colour 2 – This will stitch the zipper placement line and a zig-zag edge for the lining. STOP.
- Remove the hoop from the embroidery unit and carefully cut out the lining fabric from inside the rectangle. Cut as close to the stitches as you can without cutting them.
- Press the start button and satin stitch the edges of the lining. STOP.
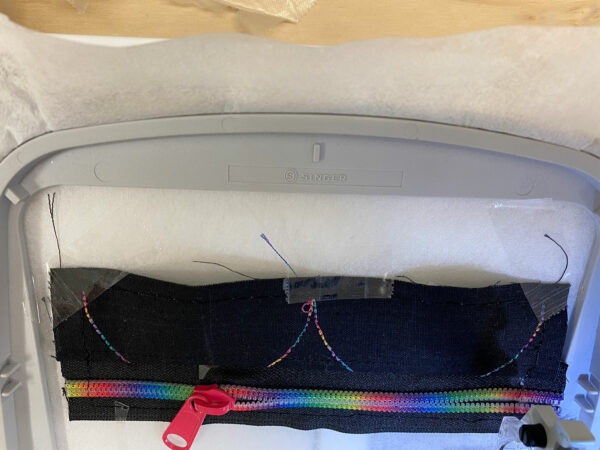
- Now lay the zipper over the placement line. Secure with tape. Move the zipper pull to the far right.

- Stitch the zipper in place. Use the foot control for better control when moving the zipper pull.
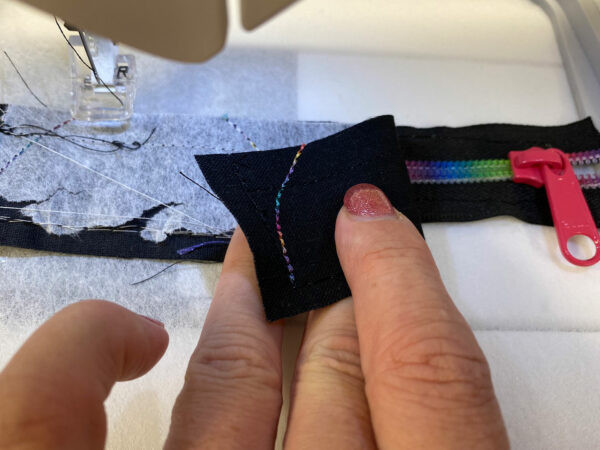
- Lay the top piece from Side 2b right sides down over the zipper as pictured. Ensure the cut line is even with the edge of the zipper.
- Colour 3 – Stitch down the down fabric. Flip up the top piece and secure with tape.
- Lay the bottom piece right sides down over the bottom of the zipper as pictured
- Colour 4 – Stitch down the fabric. Flip down the bottom piece and secure with tape.
- Colour 5 – Stitch to hold the main fabric in place. Ensure the zipper pull is in the middle of the hoop.
- Remove the hoop and gently tear the stabilizer from behind the zipper area.
- Place the hoop right side up on the bench and lay the completed Side 1 right sides down (make sure the zipper is half way open!!!). Ensure the corner stitches are matched and tape in place.
- Return to the machine and stitch Colour 6.
- Remove the hoop from the embroidery unit and turn the hoop over. Lay the final lining piece right side to the stabiliser and tape in place.
- Colour 7 – Return the hoop to the machine and stitch the final colour. This will join it all together.
Instructions – Finishing your Singer Shoulder Bag
To finish the In the Hoop Shoulder Bag Tutorial, you simply need to complete the final 5 steps to add the finishing touches to the project.
- Remove the shoulder bag from the hoop and carefully remove excess stabilizer. Trim bag the outside of the bag to ¼” from the last stitch line. Cut off the corners.
- Turn the bag through once through the last lining piece stitched and push out the corners.
- Turn the bag through again through the zipper and push out the edges.
- Place the Key Fobs evenly on the top of the bag and gently hammer into place.
- Put the ends of the handles through the key fobs and stitch into place with a zig zag.
Congratulations, you have now completed the In the Hoop Shoulder Bag Tutorial. We hope you enjoyed getting creative with your SINGER™ embroidery machine and creating a unique accessory either for yourself or as a gift. If you’re looking for inspiration for your next project using a SINGER™ sewing or embroidery machine, check out our blog to get some ideas.
If you complete this In the Hoop Shoulder Bag Tutorial, don’t forget to post it to social media and tag @singersewinganz on Instagram, @singeranz on Facebook or @singersewinganz on TikTok.