
If you're looking for a fun and easy DIY project this winter, a beret is the way to go. It's also perfect for beginners who want to try something new!
A great advantage to using this method, is that you can choose to use a different fabric on either side and make it reversible!
Requirements List:
- 1meter x 25cm or 50 x 50cm of your chosen fabric. A medium – heavy weight fabric will work best. If not Interfacing may be necessary.
- Scissors
- Measuring tape / ruler
- Interfacing if your fabric is not thick enough to hold shape
- Coordinating thread
Preparation:
- Measure your head circumference. Use this measurement to work out the size of your beret.
Workings for Beret Pattern Pieces:
Step 1:
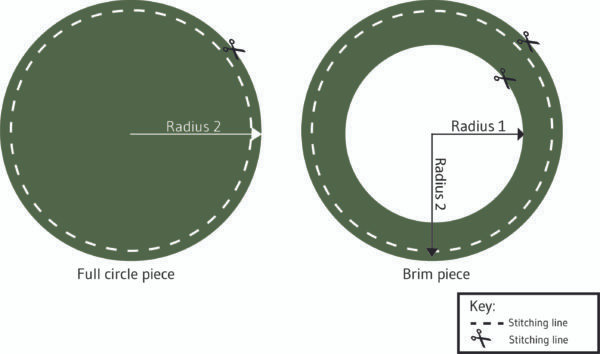
Divide your head circumference by 6.28 (π * 2) to get the radius of your inner circle (radius 1). Use this to draw out your circle on your fabric.
e.g., head circumference = 58cm… 58 divided by 6.28 = 9.2cm is the radius 1
Step 2:
For the outer circle or brim of the beret: radius 1 + 8cm = Radius 2. From the same center point as the inner circle draw this larger circle creating the brim.
e.g., 9.2 + 8cm = 17.2cm is the radius 2
Step 3:
For the Full circle pieces (top of beret) Use Radius 2 to draw out onto fabric.
- If your fabric requires interfacing fuse to your fabric as per manufacturer’s instructions.
Cutting:
- Cut x2 Full Circle pieces
- Cut x2 Brim pieces (the head circumference is cut out from middle).
Construction:
Seam allowances are ¼” or 1cm unless otherwise specified
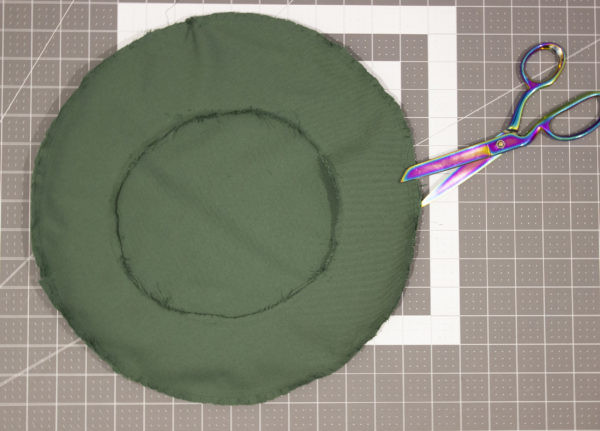
- Place your brim piece on top of a full circle piece right sides together pin in place.
- Sew around the outer edge of the circle.
- Clip around the edges of the circle in regular intervals ensuring that you do not cut through the stitching.
- Repeat steps 1 – 3 for other 2 pieces.
- Turn one of the sewn pieces right way out.
- Place the piece turned the right way out inside the remaining piece. Right sides of these pieces should be facing.
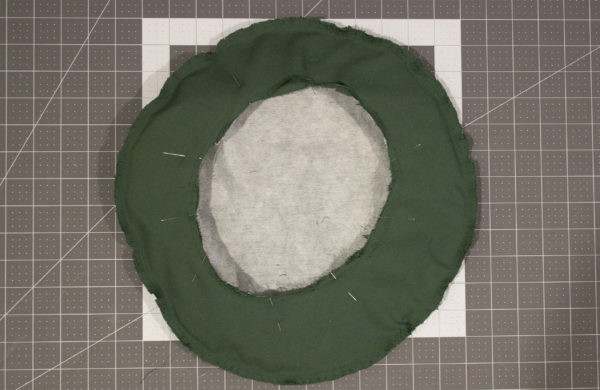
- Pin the inner circle and sew leaving a small opening about 2.5 – 3cm for turning
- Turn the right way out. Push one side into the other, so it resembles a bowl. Push around the seams with your hand to push the shape out nicely. Press.
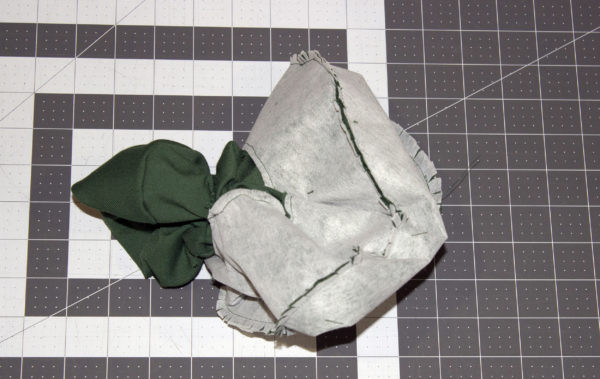
- Increase stitch length to 3.5 and top stitch around the inner circle. This will close the opening. Get creative with your beret by adding pom-poms, embroideries, appliques, brooches, and more!
Make one for friends and family as a wonderful homemade gift idea or make many for yourself (one in every colour) to truly have fun with your winter wardrobe.
Don’t forget to tag us @singeranz or use hashtag #sewitwithsinger, so we can see your wonderful creations!