
Introduction:
Want to shop in style with our very own reusable denim bag? Then this project is perfect for you!
We’ll show you how to make a denim bag. To complete this project, we recommend using the SINGER ® Heavy Duty HD6805C Digital sewing machine. When combined with denim needles, it’s a great choice for sewing heavy-weight fabric such as denim.
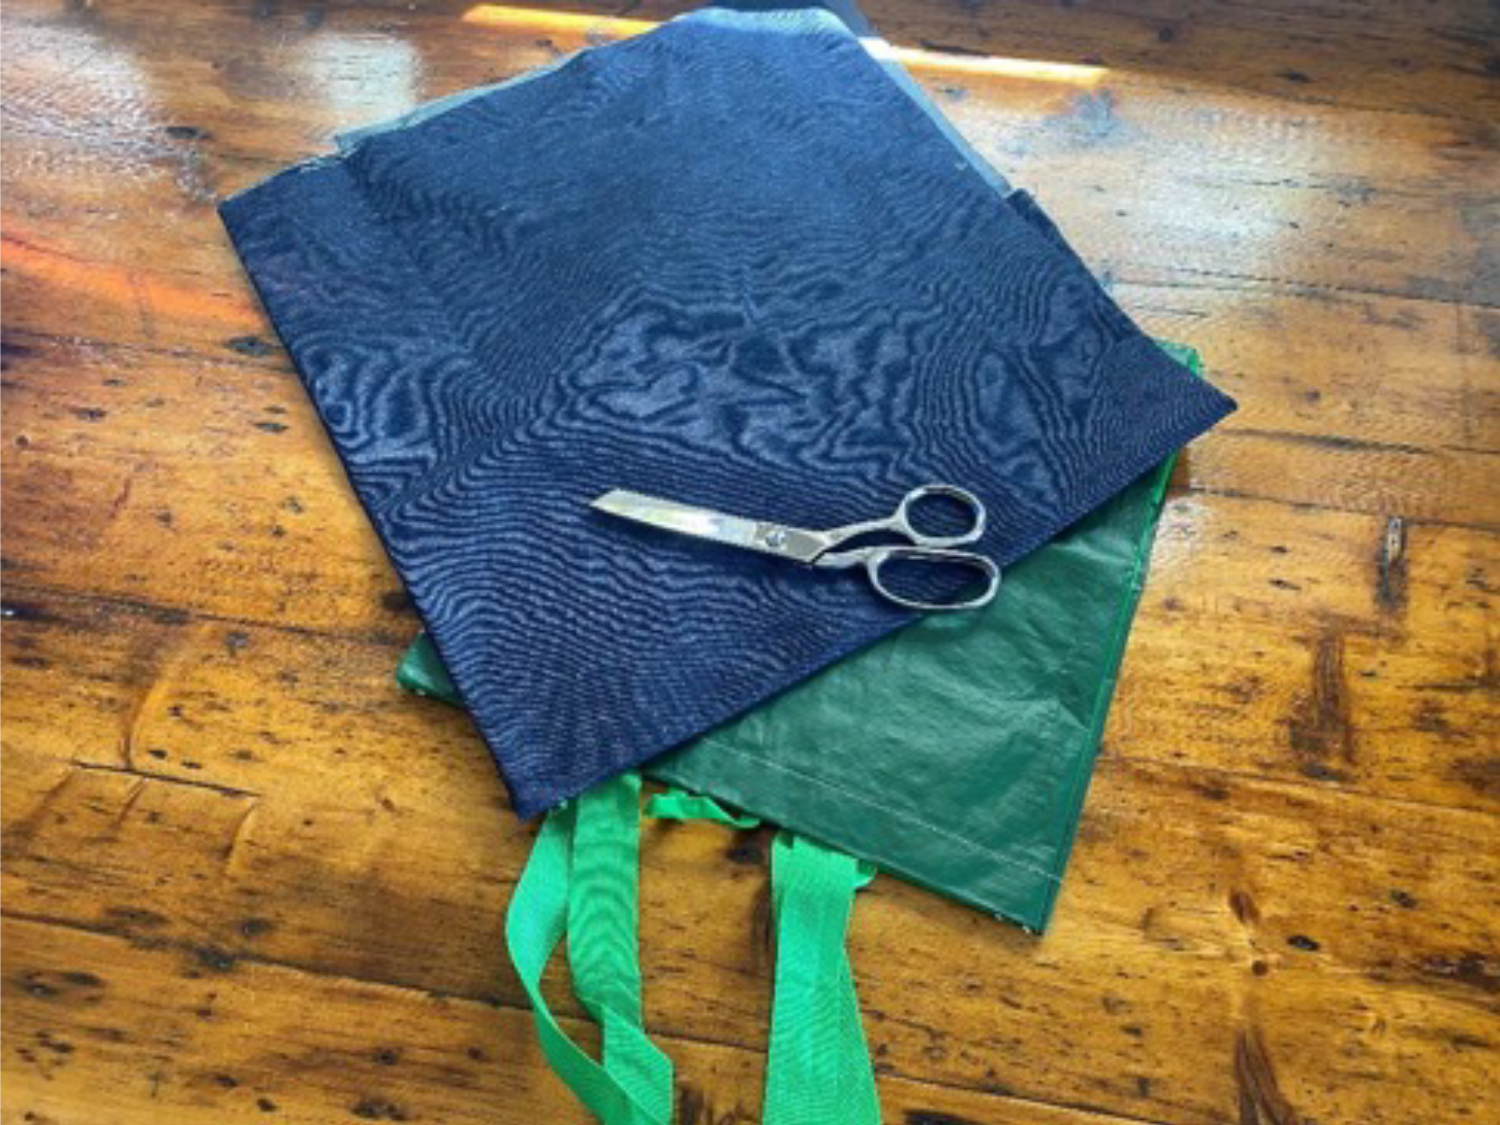
Using a common green supermarket bag as your pattern, this bag is practical, functional and fun to make. No maths needed!
You have unlimited options to decorate your denim bag and make it uniquely yours.
Tip: You can also take the bottom cardboard from the original shopping bag and use this for extra support in your own denim bag.
Ready to learn how to make a denim bag? Let’s get started!
Requirements:
Here is what you need to make a denim bag!
- SINGER® Sewing Machine (we used the Heavy Duty HD6805C Digital Sewing Machine)
- Dressmaker’s Shears (if you don’t have any, you can get our SINGER® 8” Bent Shear Scissors)
- Iron (Need an iron? Check out our range! SINGER® Irons)
- Medium to Heavyweight Canvas or Denim 1m x 1m
- Lining fabric 1m x 1m
- Bias Binding 2.2m
- Ruler
- Fabric marker or chalk
- Bag handles- we used circular bamboo 19cm handles
- Pins and/or clips
- Jean/Denim needles
- Green supermarket bag for your pattern
Cutting:
- Cut (2) 35cm x 35cm main fabric squares for the front and back of the bag.
- Cut (1) 25cm x 105cm main fabric piece for the side/base gusset.
- Cut (2) 10cm x 20cm main fabric rectangles for loops to hold your handles.
- Cut (2) 35cm x 35cm lining fabric squares for the front and back lining.
- Cut (1) 25cm x 105cm lining fabric piece for the side/base gusset lining.
- 3m of colourful bias binding. See Sewing Tip below for instructions.
Sewing tip: Want to make your own bias binding for your denim bag? Follow the instructions below:
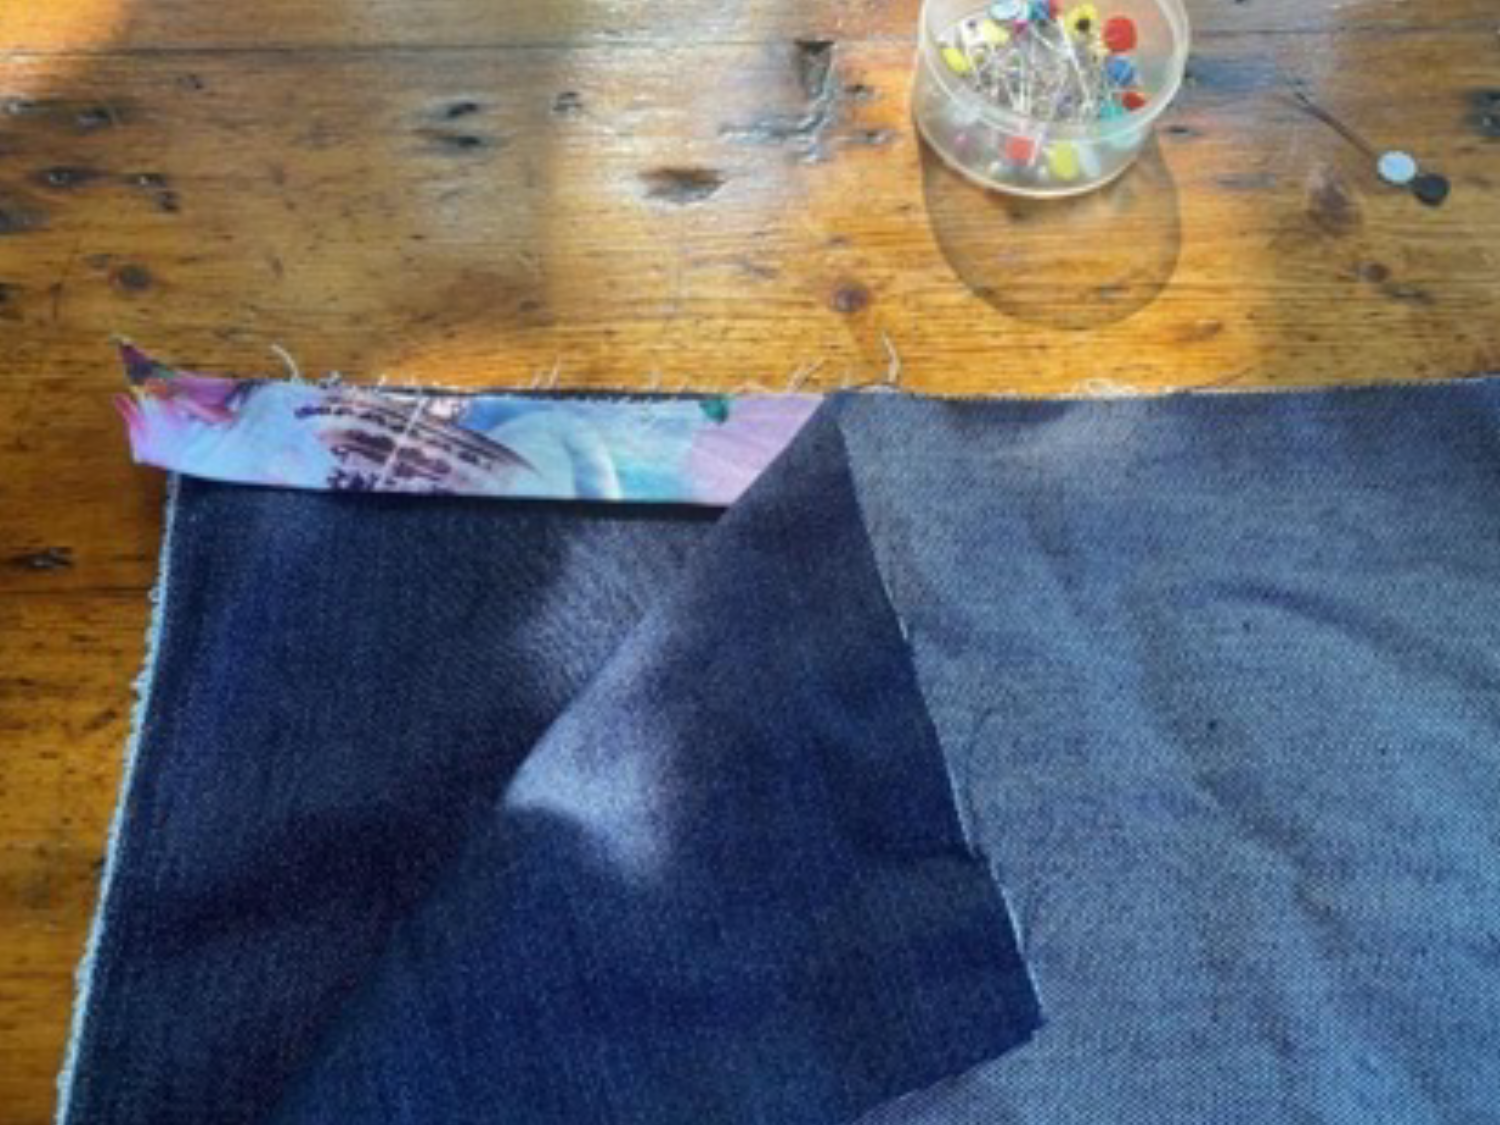
- Begin with a fabric square. Fold in half diagonally and press to get a diagonal line. Cut along this line and then every 5cm in both directions to create the bias, so that the strips have the maximum stretch. You can also use a rotary cutter and ruler if you have these available.
- Join the strips at the diagonal edges, with right sides together to make one continuous binding strip. Sew a 1cm seam. Trim the excess fabric at seam, leaving 0.5cm seam allowance. Press seams open and trim dog ears. Press binding in half lengthwise.
- Refer to picture below. This option gives you the opportunity to have colourful bias binding to complement your denim bag.

Construction:
- Using one 35cm x 35cm square pieces, pin half of your bias binding to the right side of the fabric, down one side. When you reach the corner, place a pin in the corner, pivot fabric and continue along bottom edge. Continue pinning bias along bottom edge, and pin and pivot bias and continue up second side. Leave the top of your square free from binding.
Hint: You may find it easier to baste your bias in place at this stage. Using the general purpose foot, stitch length of 4mm, stitch in place with a 6mm seam.
- Repeat step one for the second square piece.
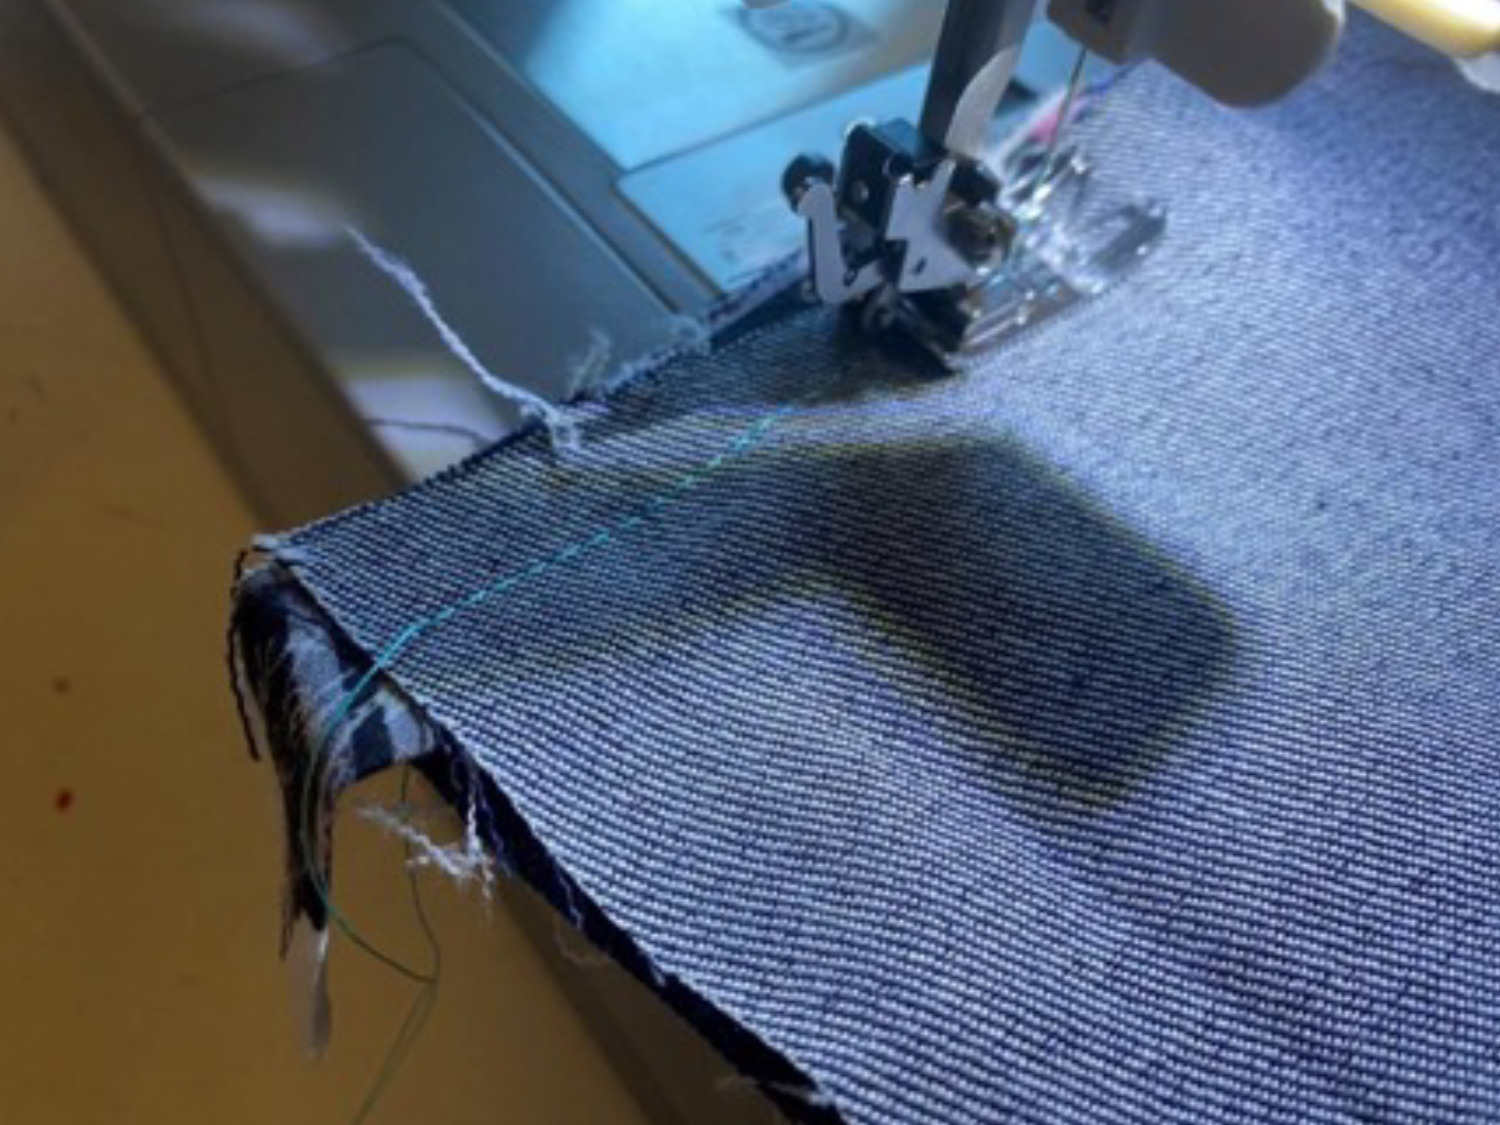
- Using the side/bottom gusset, match raw edges and pin along one side edge, sandwiching the bias in the middle. Pin in corner as before, and pivot fabric. Pin along bottom edge to corner, pivot and pin fabric again at corner. Pin to last edge.
- Ensure all raw edges are together and even. See the picture below.
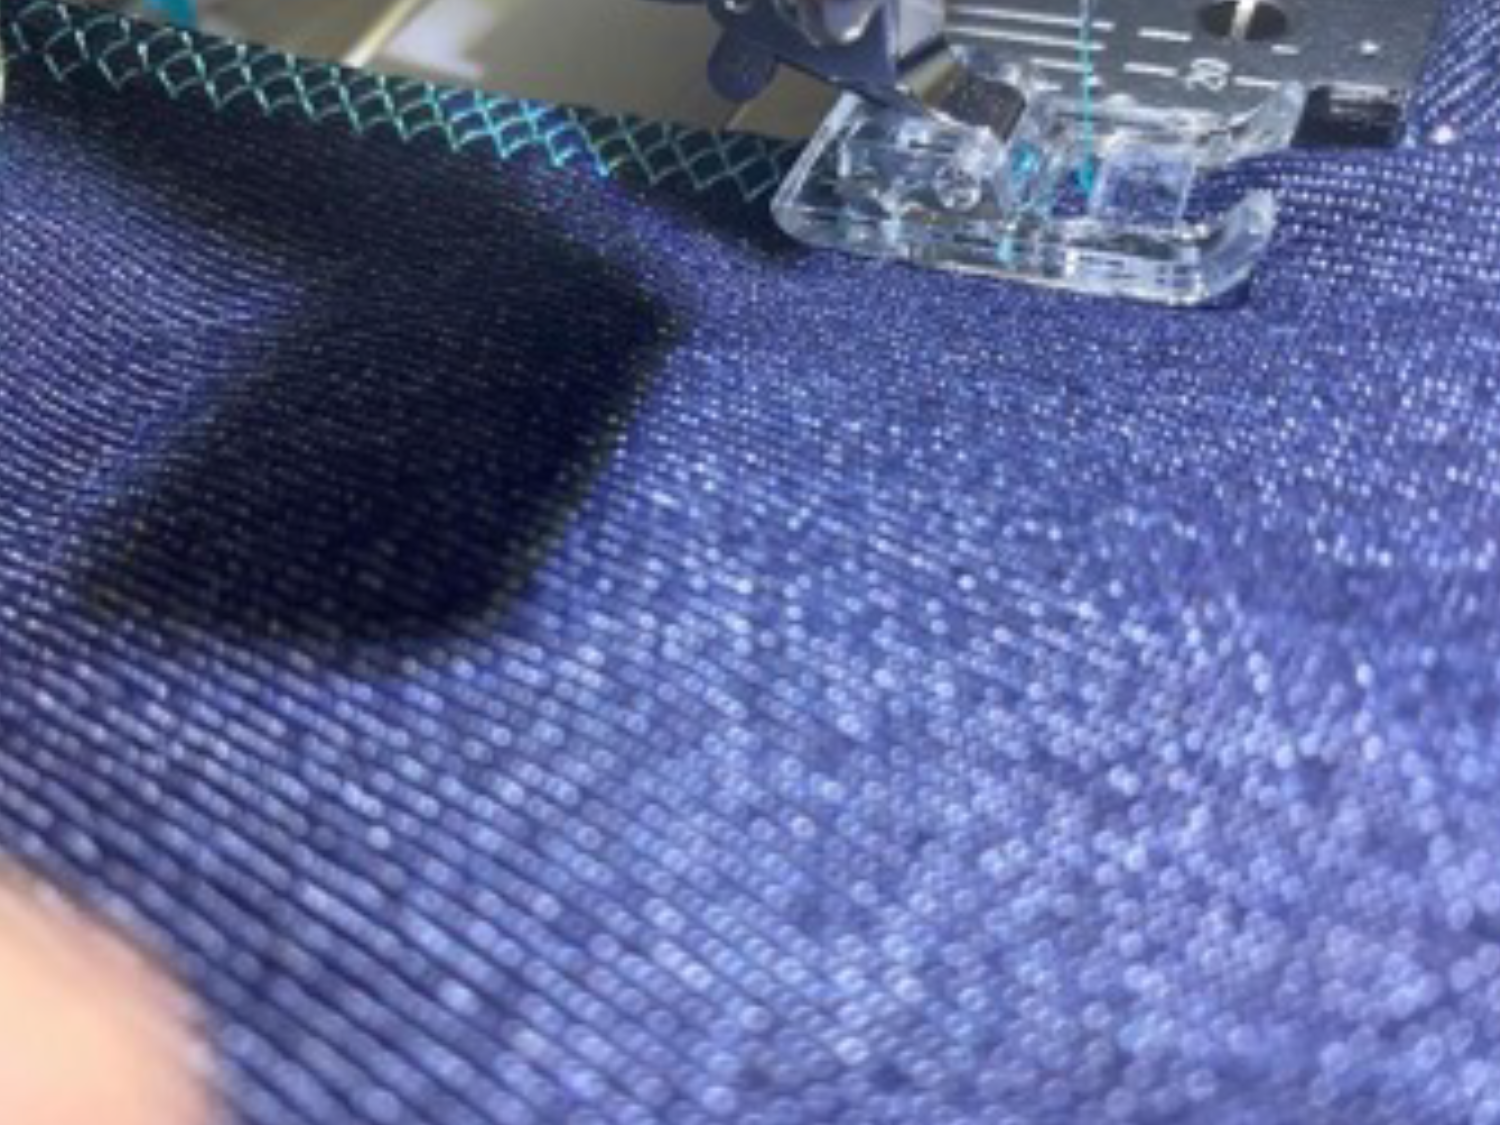
- Using your general-purpose foot from your machine and a straight sewing stitch, sew around the edges of your binding and fabric, 1cm seam. When you reach the corner, clip into the seam of the side/bottom gusset to make it easier to pivot fabric. Continue sewing around all three sides of the bag. Refer to picture below.
- Repeat step 5 for the second side of the bag. Place aside.
The SINGER® HD6805C Digital Sewing Machine has a needle down function for turning those corners and ensuring your stitching is continuous. It also has the tie-off function to ensure your stitches start off securely.
- Using one lining square piece, sew three edges of your lining square to the side/base gusset piece, right sides together.
- Repeat for second lining square piece, however, leave an opening of 10 cm on one of your sewn sides which we will use to turn the bag the right way around later. Set aside.
- To make the loops for each handle, fold each 10cm x 20cm rectangle in half, right sides together. Sew a 1cm seam all the way around three edges, leaving one short edge unsewn. Clip corners and turn the right side out, Press.
- Repeat for second handle loop.

- Place your lining piece inside your main fabric bag, right sides together with side seams matching. Pin in place. Refer to picture above. Centre the raw edge of your handle loop pieces in the middle of each larger side. Pin in place with the raw edge sandwiched between your main fabric and the lining.
NB: Please note we have demonstrated in the previous picture how the handles will fit through your loops but please don’t leave the handles inside the bag.
- Sew a 1cm straight stitch around all the open top seams. Reinforce with a zig zag stitch.
- Using the side opening we left unsewn in our lining, turn your bag the right way around and press. Carefully, straight stitch to sew up the lining opening.
- Pin the top of the bag to ensure the lining cannot be seen from the front. Refer to the below picture.
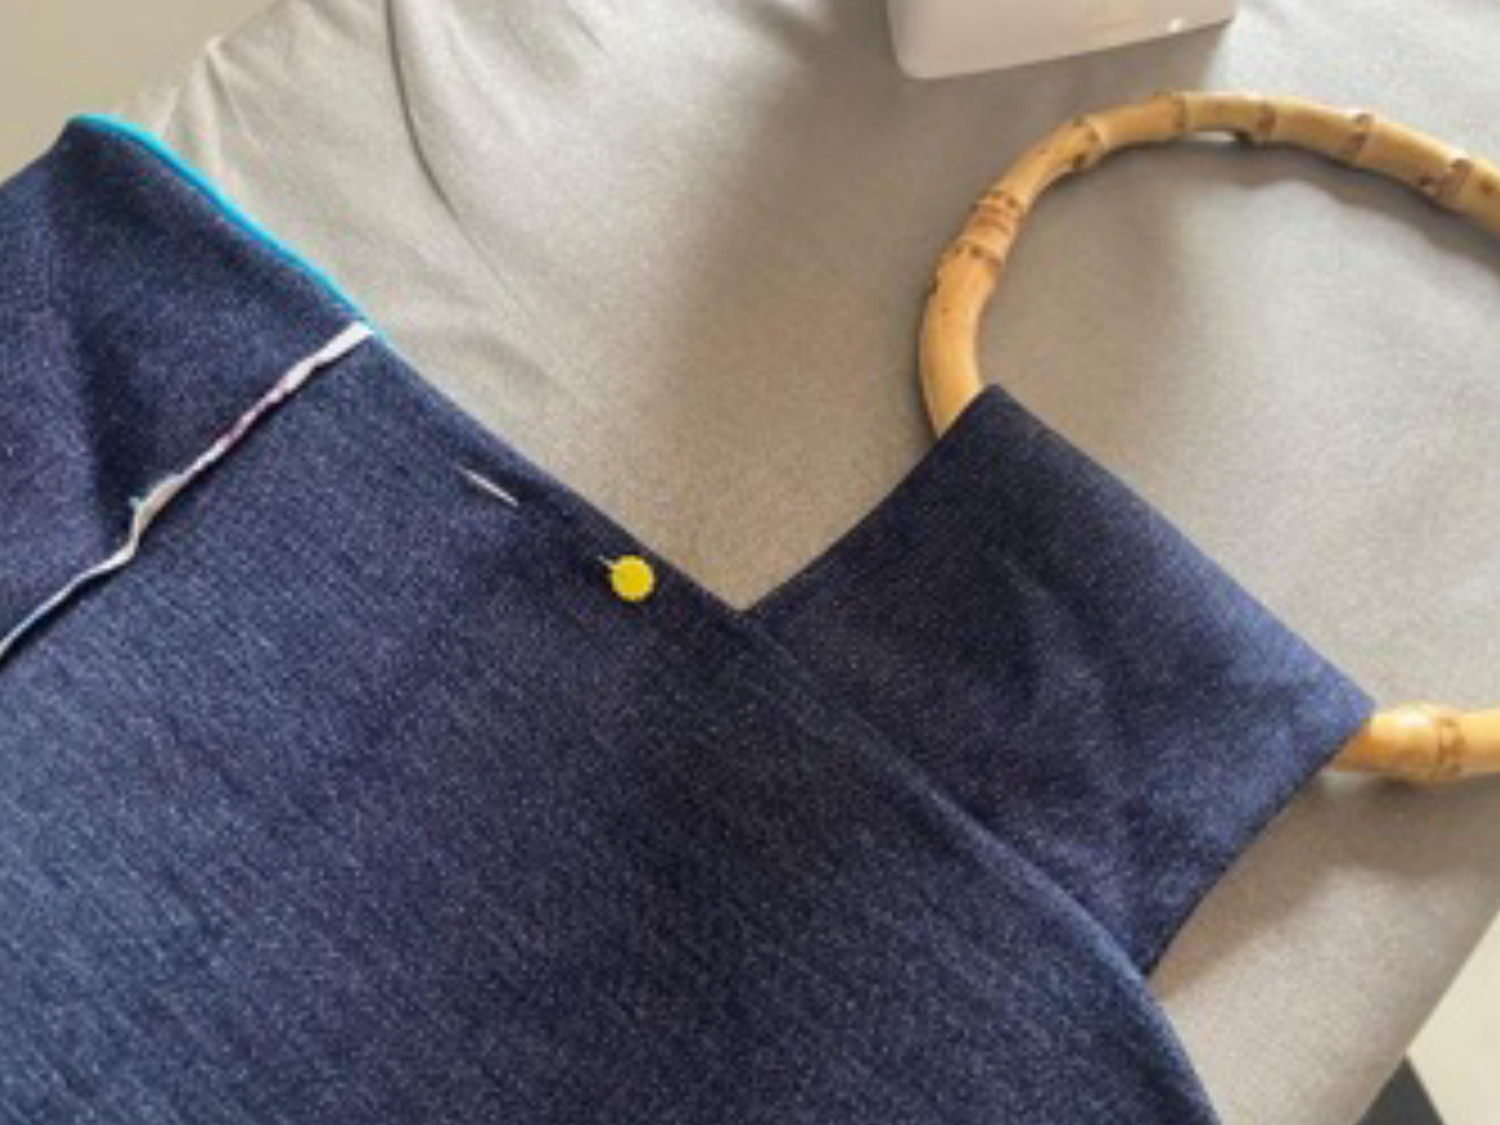
- Now thread your handles through your loops and fold over the finished edge of your loop to the inside of your bag. Securely top stitch in place. Refer to the picture below.
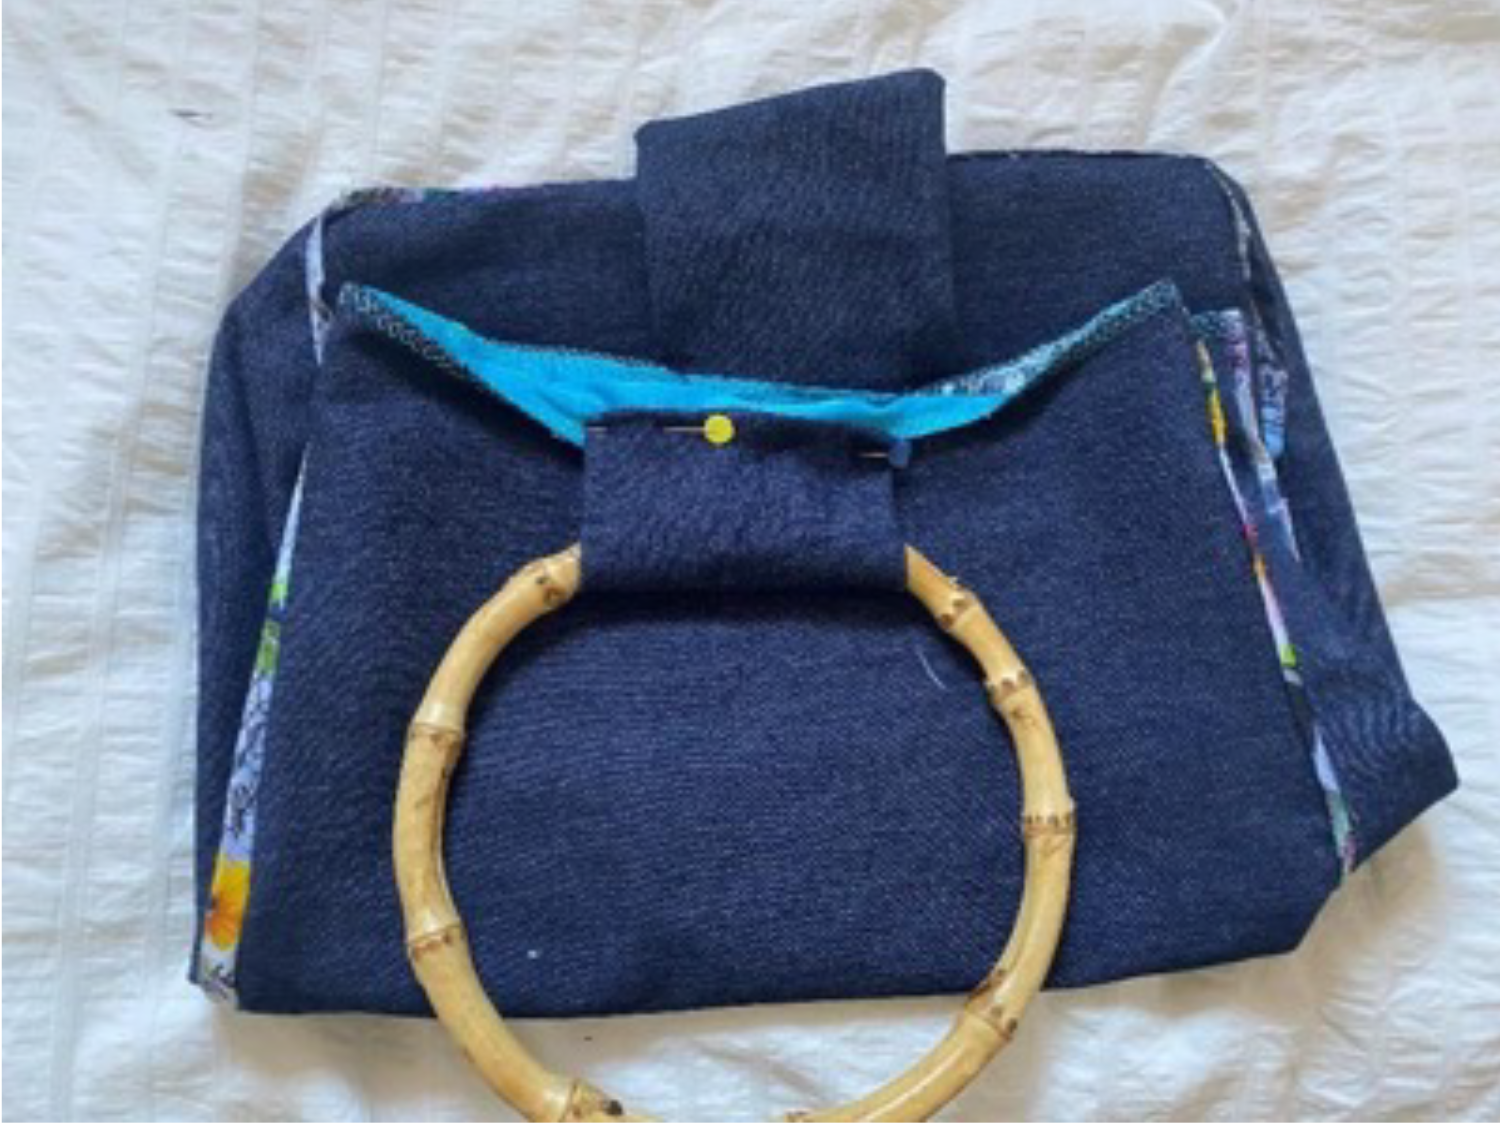
- Top stitch the top of the bag to hold lining in place. To add extra interest, use a decorative stitch. We used 005 with the A foot. Refer to the below picture.
- Remove the card from the bottom of the green bag and place in the bottom of your own bag. This should fit snugly.
Conclusion:
Congratulations you have now learned how to make a denim bag! It is perfect to gift to Mum for Mother’s Day. If you’re tempted to keep it for yourself, why not sew up an extra denim bag for yourself!
Did you want to personalise your denim bag even more? You can add some embroidery to the front or back of the bag before assembling using a SINGER® embroidery machine, such as the EM9305 Embroidery Only Machine.
When you complete this project, don’t forget to tag us! We love seeing your creations. Be sure to tag @singersewingaus and use #sewitwithsinger in your posts so we can see!