
Learn how this Piecing Quilt Backing Guide will walk you through everything you need to know to create a smooth and professional quilt backing. From choosing the right fabric to measuring, cutting, and sewing, you’ll learn essential techniques to prepare your quilt backing perfectly for longarm quilting.
Piecing Quilt Backing Guide: Step-by-Step Tips for Longarm Quilting
Step 1 – Choose the right fabric
Fabric Quality
Quilt shop quality quilting cotton is the perfect choice for a quilt backing. It’s soft, durable and stands up well to washing. Be careful with lesser-quality cottons that are thinner or ones that are treated with excessive sizing to make up for its lower quality.
Some quilters like to use flat sheets to back their quilts. Once again quality is important. And I would recommend washing the sheet before using it. It likely will have a different thread count than the fabrics in the top and will shrink at a different rate. That can cause issues with washing the quilt.
Other fabrics like Minkee, Cuddle, fleece, etc. need to be used with special care when quilting because of the stretch factor. Be sure to research how to load and quilt with these types of backings before you decide to use them for your quilt. It is worth learning because these fabrics can make your quilts especially cuddly.
Fabric Design

The backing doesn’t have to match the front fabric in style or color, but accurate measuring tools like quilting rulers can help keep designs aligned and square. One thing to be careful about is directional geometrics and stripes. I have learned the hard way that fabrics are not always printed square. When using very large pieces for the quilt backing imperfections can be magnified.
I purchased a fabric from the sale bin at a great bargain price with no clue what I would use it for. But I did buy a large quantity so I could use it for a backing. After I made this quilt top:
Aztek by Mary Beth Krapil 2015
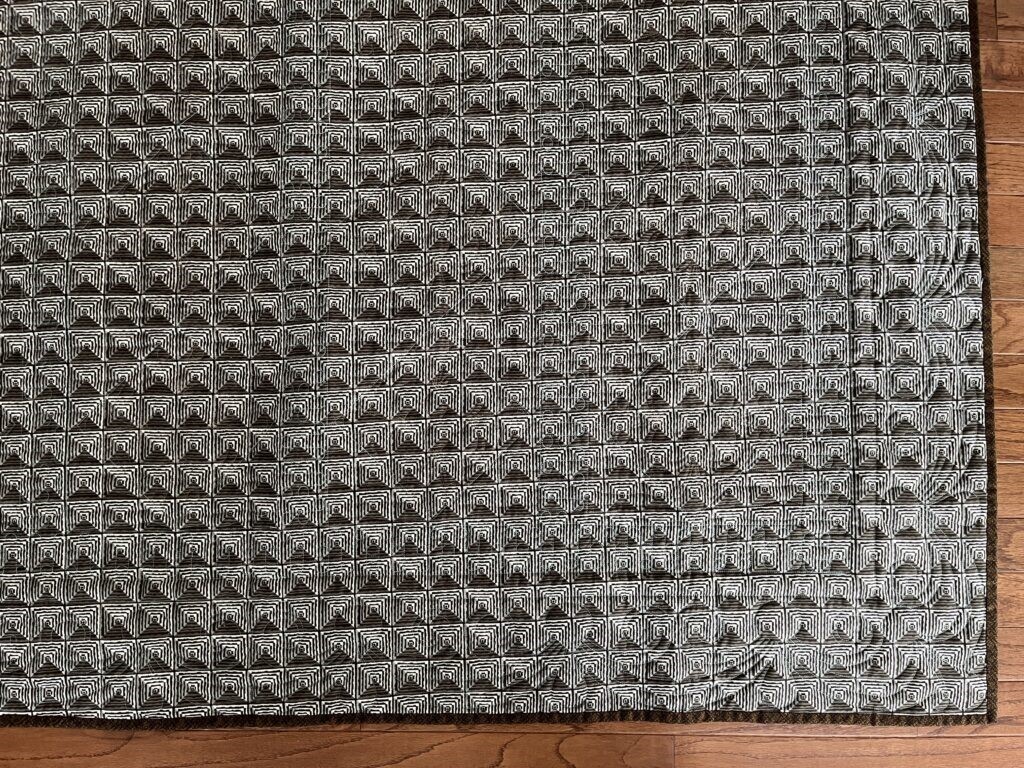
searched my stash and found my sale fabric that was the perfect backing fabric. It looks great, unless you see the edge and how wonky the design was printed on the fabric.
Back of Aztek. Bottom edge shows wonky printing of fabric
Live (or quilt) and Learn! You can see at the bottom of the photo above. The quilt is straight, the fabric design was printed a little wonky. Maybe that’s why it was on sale?
If you worry about matching the design within the fabric when you piece a backing, you might want to stick with smaller prints. Large prints can be difficult to match at the seam and will take a lot of extra fabric for matching. The backing in the photo above was pieced. I did a good job of matching the pattern! Also, remember to purchase extra fabric if you intend to match the pattern.
Step 2 – Measure twice, cut once
Measure your quilt top carefully, length and width, using reliable quilting supplies to ensure accuracy before cutting your backing fabric. Add 8-10 inches to both measurements so that your quilt backing will be 4-5 inches larger than your quilt top on all four sides. This extra fabric allows for quilting shrinkage and makes it easier to handle the quilt during the quilting process.
Step 3 – Choose your method
Now you have to decide how you will piece your backing. It can depend on many factors but the biggest factor will be the materials you have to make your backing. Let’s look at a couple of choices:
Method 1. Simple horizontal or vertical seam
The standard width of quilting cotton is 42-44 inches. If your quilt is wider than that, you’ll need to piece together multiple strips or fabric panels to make it large enough. However, keep in mind that fabric widths can vary, so always measure before cutting.
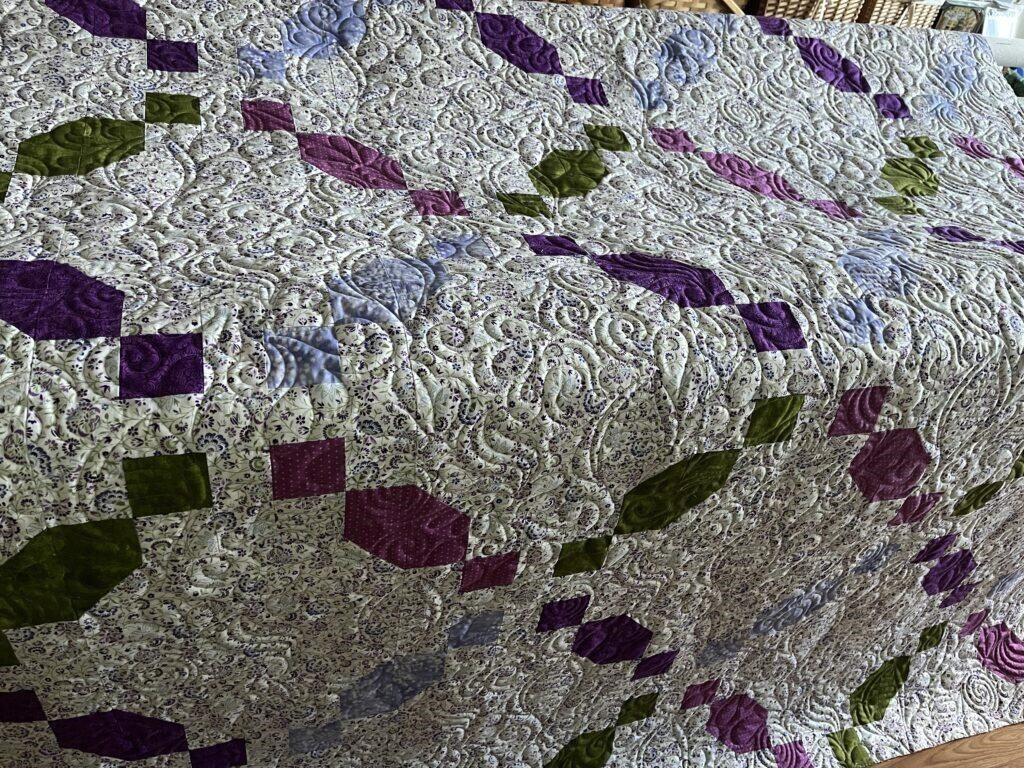
This is a quilt I just finished for my granddaughter’s birthday.
Quilt for Natalie by Mary Beth Krapil 2025
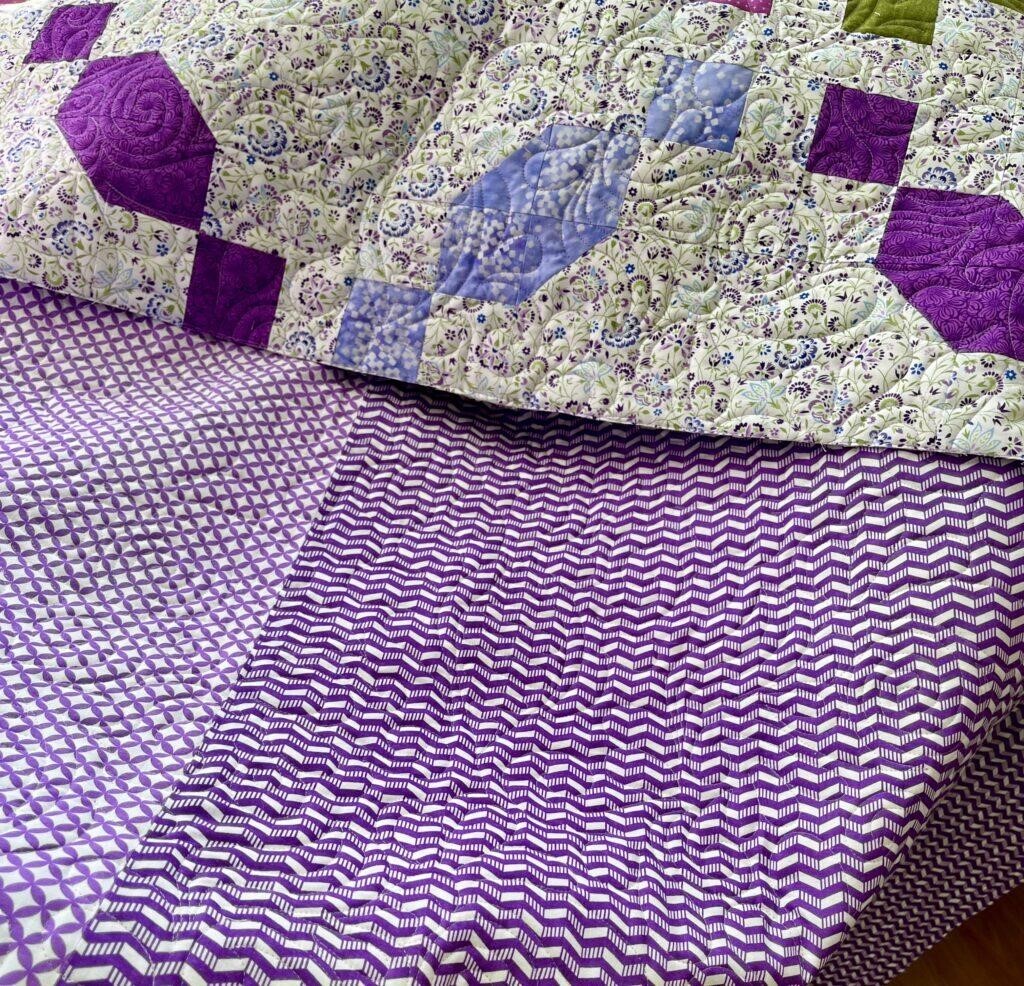
In an effort to use up some stash fabric I chose 2 fabrics for the quilt backing and sewed them together with one seam
Two similar but different fabrics for the quilt backing. One seam.
Step 1: Decide which direction, horizontal or vertical, seam(s) will make the most sense for your quilt top size. If you quilt on a frame mounted, moveable machine it is preferable to have the seam(s) horizontal or parallel with the poles of the frame. But most of the time it is possible to mount the quilt top sideways if your backing seam needs to be vertical.
That way you’ll mount the backing sideways to have the seam parallel with the poles. I needed to seam the 2 fabrics for Natalie’s quilt vertically. So I mounted the quilt on the fame sideways to have the seam running horizontal.
Step 2: Measure and cut fabric pieces needed. Example: Quilt top: 70″ x 90″
Backing needed: 80″ x 100″ (added 10″ to width and length of top)
Seam direction: Vertical – two widths of fabric seamed vertically makes sense here
Cuts needed: 2 pieces Width of fabric x 100″
Step 3: Lay out your fabric pieces and pin them together. If fabric design is directional pay close attention the direction of the pieces to keep the design consistent.
If you’re going to match the pattern, now is the time to do it. You may need extra fabric for matching so figure that out before cutting.
Step 4: Sew the seam. I like a wider 1/2 inch seam allowance on the backing. Pro tip: ALWAYS trim the selvedges from the backing. I measure 1/2 inch beyond the selvedge and that is where I sew my seam. I leave the selvedge on for sewing and then trim it away once the seam is sewn.
You can trim first if you prefer. After trimming the selvedge press the seam open. Pressing open creates less bulk and you will not have a noticeable “bump” on the back of your quilt.
If you need more than 2 widths of fabric for your size quilt top, cut as many as needed and repeat steps 3 and 4 for additional seams.
Method 2. Creative Piecing
Maybe you want to use up the fabric left over from piecing the quilt top. Then it’s time to get creative. Or perhaps you want a more unique and artistic quilt backing. Adding a design element such as a large block, patchwork, or applique to the back is a great idea.
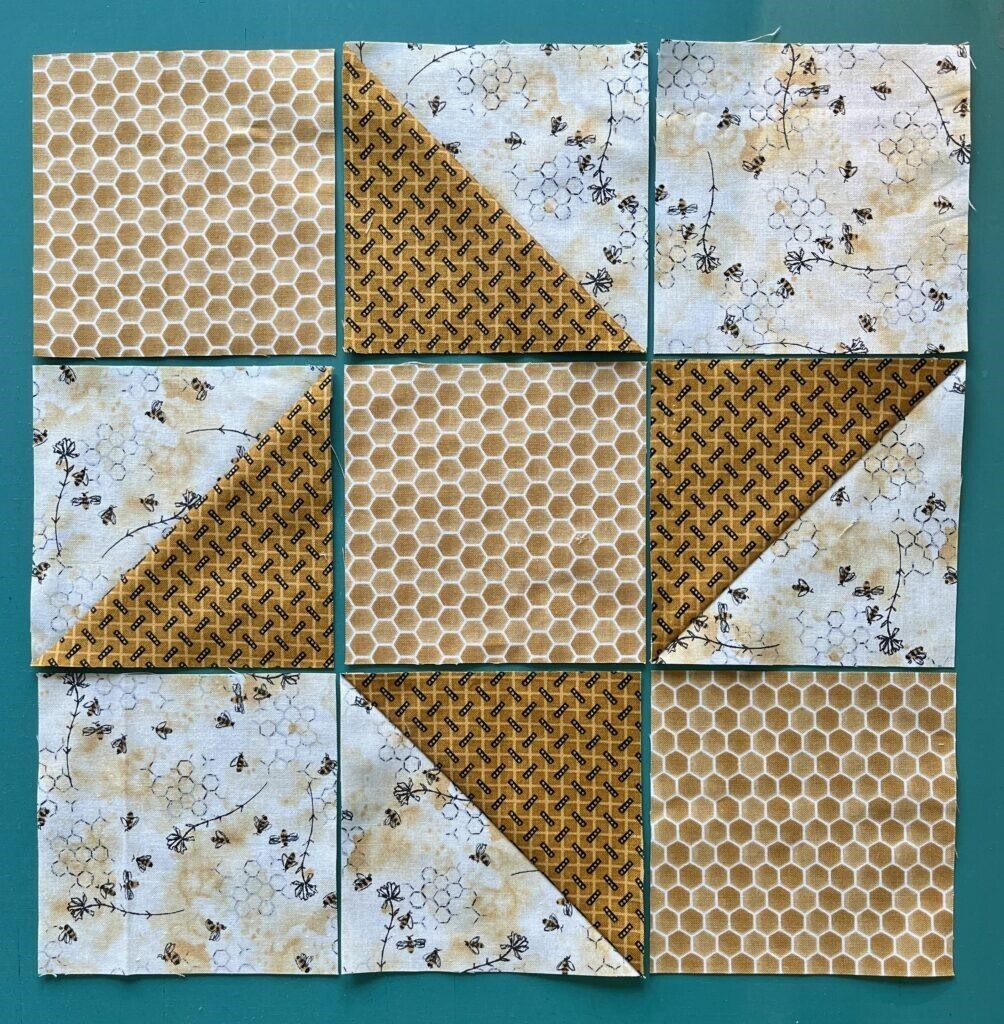
If you read the blog post about how to make a Friendship Star block, you may remember this block:

Friendship star with 2 corner fabrics changed up
Here is the quilt that I put those friendship star blocks into:
My Bee Friends by Mary Beth Krapil 2025
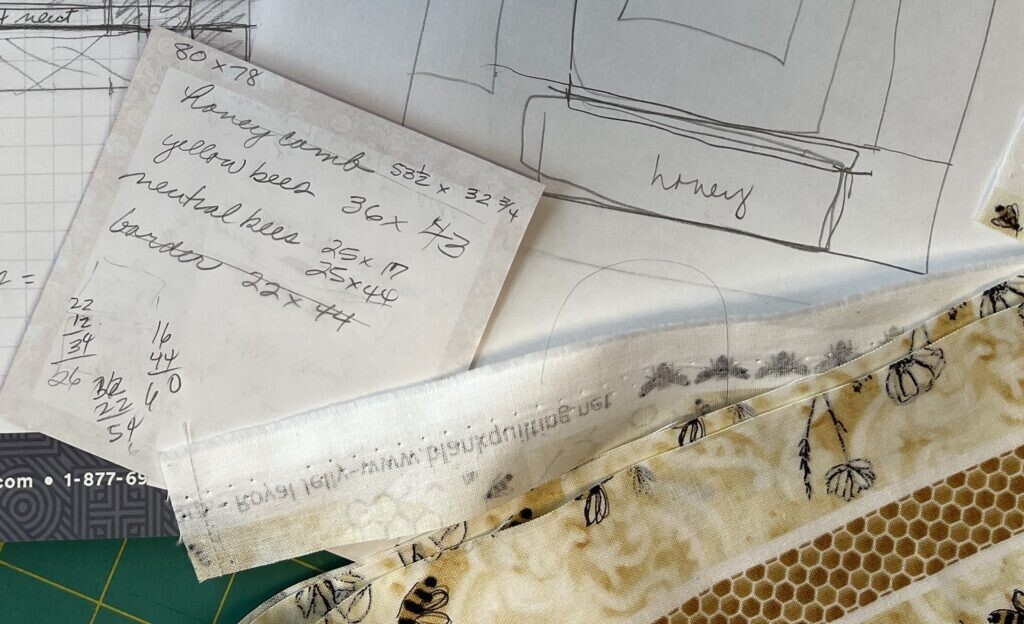
Step 1: Evaluate and measure the fabrics you have to work with. I like to keep the pieces as large as possible and still create an interesting pattern. So I start by making a list of what I have.
List of scraps and sizes
If you are not using scraps then skip to step 2.
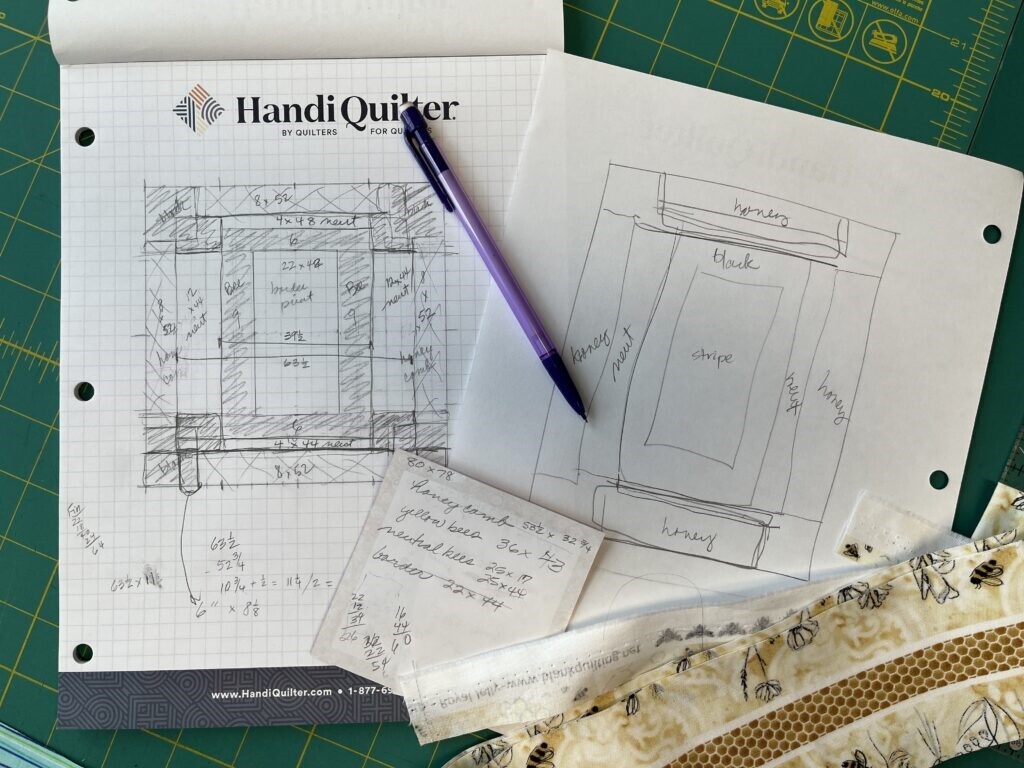
Step 2: Design your backing using a quilt design program like EQ8 or go old school and use graph paper. Make sure you know the size backing you need. This time I used graph paper.
Draft of pieced quilt backing
Step 3: Cut the pieces you need to accomplish your design. Don’t forget to add seam allowances so that the final size is correct.
Step 4: Sew together and press the seams flat.
Step 5: Trim as needed to create a nice square backing.
Tips for good results
1. Pay attention to grain
Avoid bias seams on your backing when possible, especially if you quilt on a frame mounted movable machine. The pieces in a backing are usually much larger than normal piecing on the front. Long bias seams increase the chance of fabric stretching and sagging. You don’t want the backing to sag and increase the possibility of tucks getting quilted into the backing. Keeping all the pieces straight-of-grain decreases the chances of this happening.
2. Press well
Press your seams as you go and press the entire quilt backing when you have it all pieced together. It is super-important for the backing to be as flat as you can make it.
3. Keep it square
Having your backing square for loading to your quilting frame is paramount. The four corners should be 90 degree angles and the sides should be straight and parallel to the opposite side. Trim to make it so. A wonky back results in a wonky quilt!
Piecing quilt backs is sometimes required. With a little creativity and some math, it can be an enjoyable part of the quilting process. Whether you keep it simple with basic piecing or go all out with creative designs, your quilt backing will add a beautiful touch to your quilts. Please remember to Quilt Every Day with Handi Quilter Australia!