Swing your way into summer with these eye-catching free motion earrings.
Requirements
- Singer Sewing Machine (we used the Heavy Duty HD6805c)
- Singer Darning/Embroidery Presser Foot
- Singer 4” Curved Microtip Embroidery Scissors
- Singer Sewing Needles
- Water Soluble fabric
- Embroidery Hoop 6” or bigger
- Round template, or object to trace
- 40wt Silk thread in two coordinating colours
Earing Requirements
- 2 x Shepard Hooks
- 2 x 4mm Jump Ring
- 2 x 10mm Jump Rings
- 2 x Jewellery making pliers
- Ribbon needle or sharp tool
Sewing Instruction
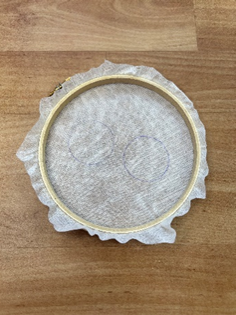
1. Fasten your water-soluble fabric to the embroidery hoop. It should be taught and wrinkle free. A great way to check is by tapping the fabric and listening for a “pop” sound.
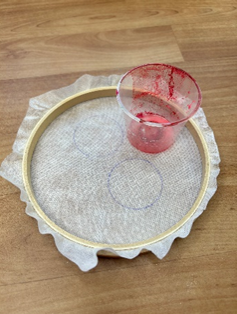
2. Grab a round templet for your design shape. The easiest way to do this is to draw a circle around something like a lid or cup.
Spicey tip - draw the inner circles as well so it’s easier to follow when sewing.
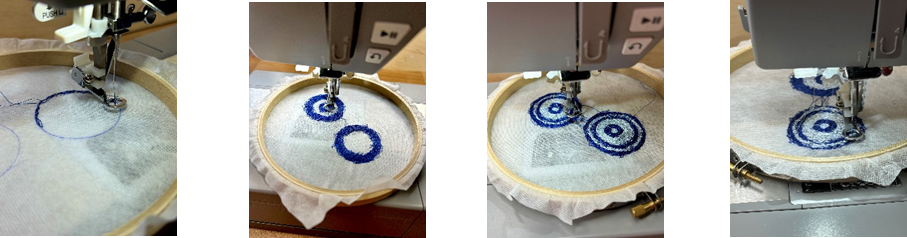
3. Prewind a bobbin of each colour. Change out the bobbin with each colour change to coordinate.
4. Start with the outer circle colour and then fill in every second ring. Continue sewing over to the second template and repeat. Change the thread to your next colour and repeat. Easy peasy, lemon squeezy.
a. I found my design reminded me of a bullseye, so I made the sky blue more dominant by making the lines thicker.
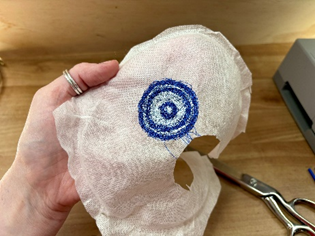
5. Remove the fabric from the embroidery ring.
6. Cut around the design with your curved Microtip Embroidery scissors.
Spicey tip – I love the organic look, so I chose to leave a mm extra when cutting them out. If you prefer clean edges don’t be shy to cut on the thread. It won’t unravel.
7. Place your design in some warm water to let the fabric dissolve.
8. Once dissolved it’s ready to go! Take them out and place them between some baking paper. Put a heavy book on top overnight. For me, they curled a little, so I did this to re-trained them to lay flat.

ASSEMBLING THE EARRINGS
9. Take your ribbon needle or something sharp and push a hole in the top of your design – just under a cm down.
10. Open the larger jump rings (10mm) with your pliers and hook it through each hole. Making sure the join is flush without any gaps.
11. Take your smaller jump rings (4mm) and hook the larger jump ring on along with the shepherd hooks.
12. Close the jump ring as before making sure its flush and without any gaps.
Spicey tip – The reason it’s important to close the gaps is because it can be easy for the rings to disconnect.
Congratulations on finishing your project!
TA-DA!!
I call it wearable art! The perfect splash of colour for any outing. Truly unique and made by you.
Who would have thought you could make such stunning earrings with your Singer Darning/Embroidery presser foot.
As always, have fun and be kind to yourself.
If you create your own free-motion earrings with your SINGER®Sewing machine, don’t forget to share your projects with us on Instagram, tagging @singersewinganz and using the hashtags #sewitwithsinger #singersewingmachines #singersewingaustralia or our Facebook page Singer Australia & New Zealand
We love seeing your creations.