Self Folding:
Buy or make Bias-binding
- Buy or make Bias-binding. If you would like to make your own bias-binding follow the instructions below:
- Fold the fabric diagonally so that one selvage is at a right angle to the other selvage. Press along the fold – the direction of the fabric grain at the fold is the bias grain, Cut along the pressed line. Set aside the triangle of fabric.
- Multiply the desired finished width of the binding by four to determine how wide to cut the strips. For example, for 1/4″ (6mm) finished binding, you’ll need strips 1″ (2.5cm) wide. Beginning at the diagonal cut edge of the fabric, measure and mark parallel lines that are the desired cutting width. After you have drawn the last strip, discard the triangular remnant – or save it as a scrap.
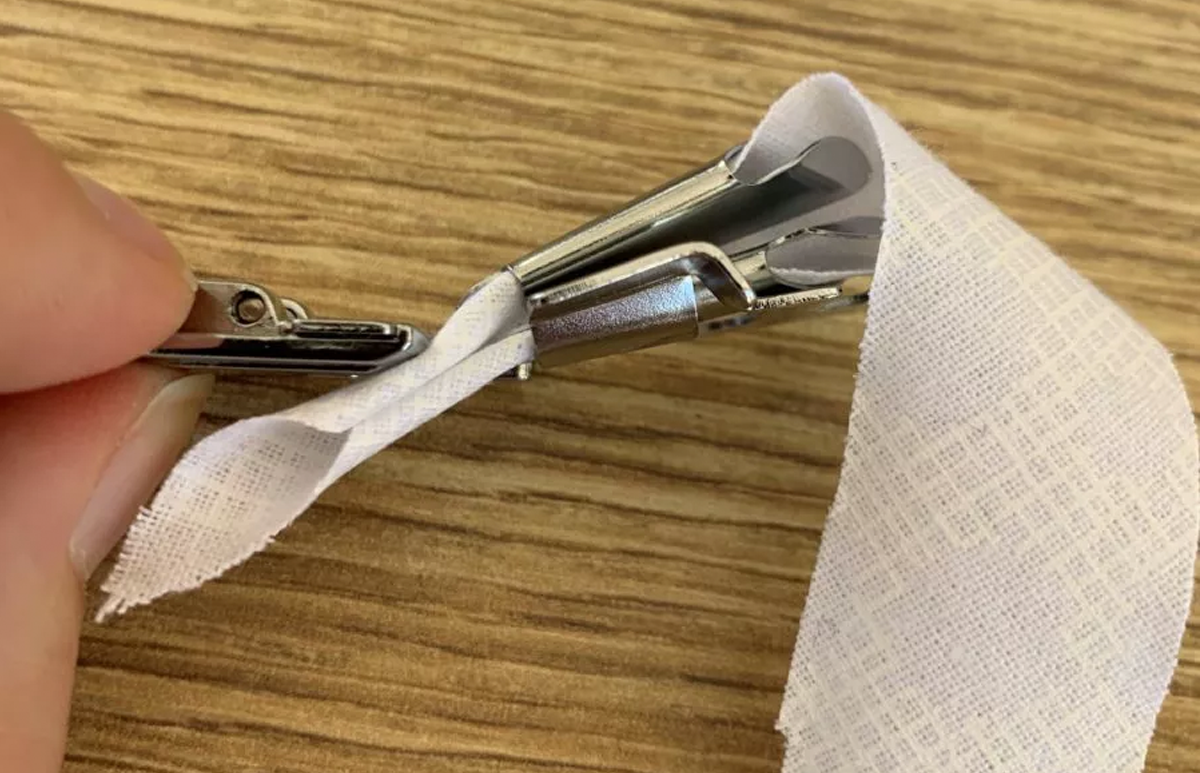
- Leave the Bias unfolded and cut the beginning on an angle.
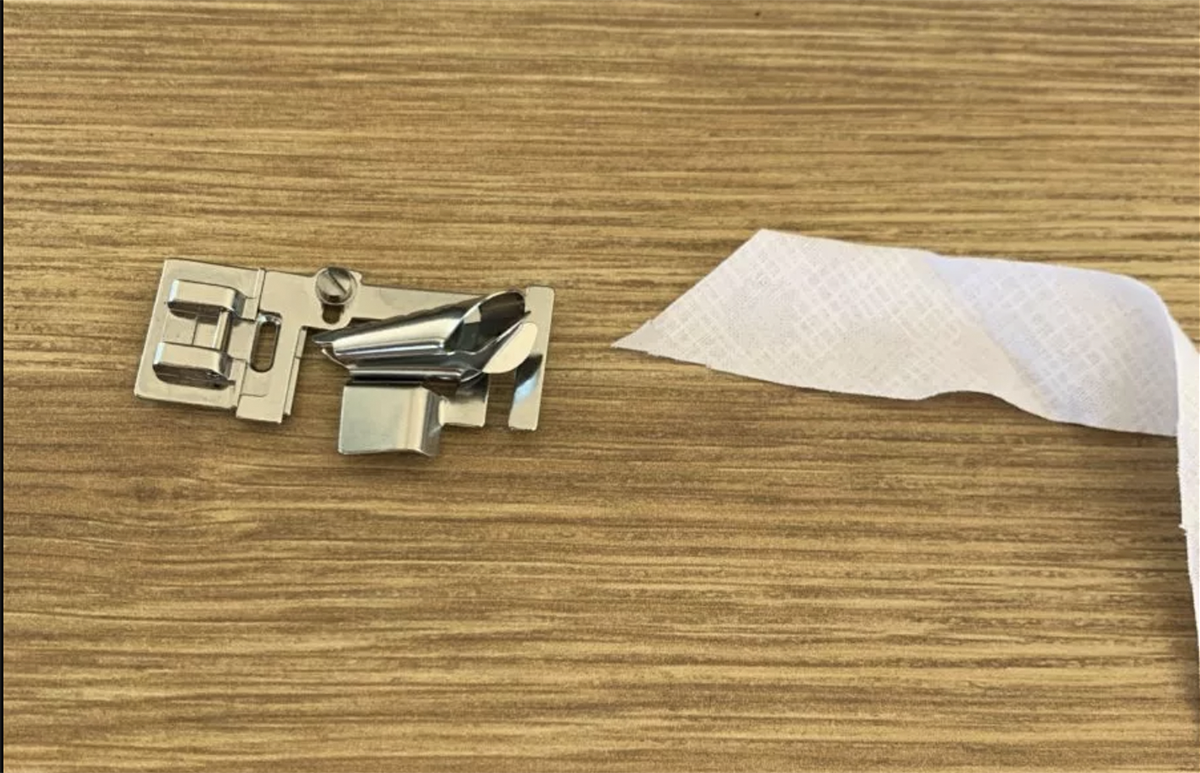
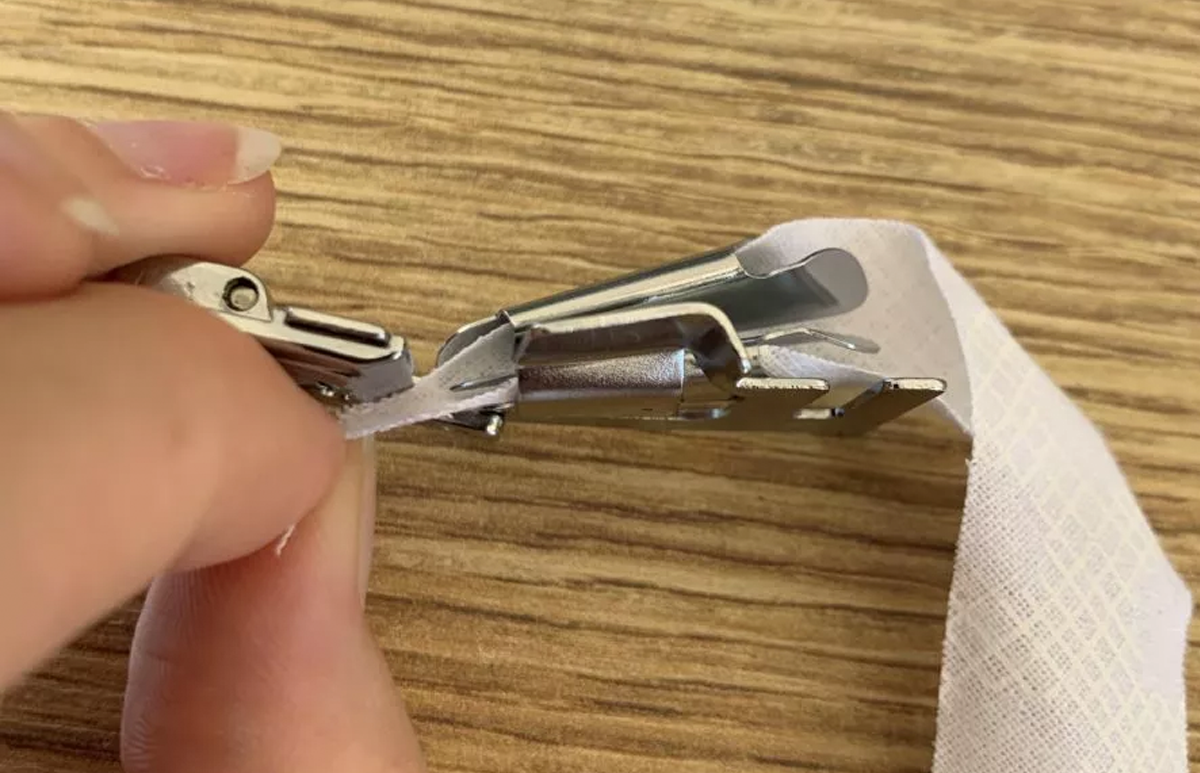
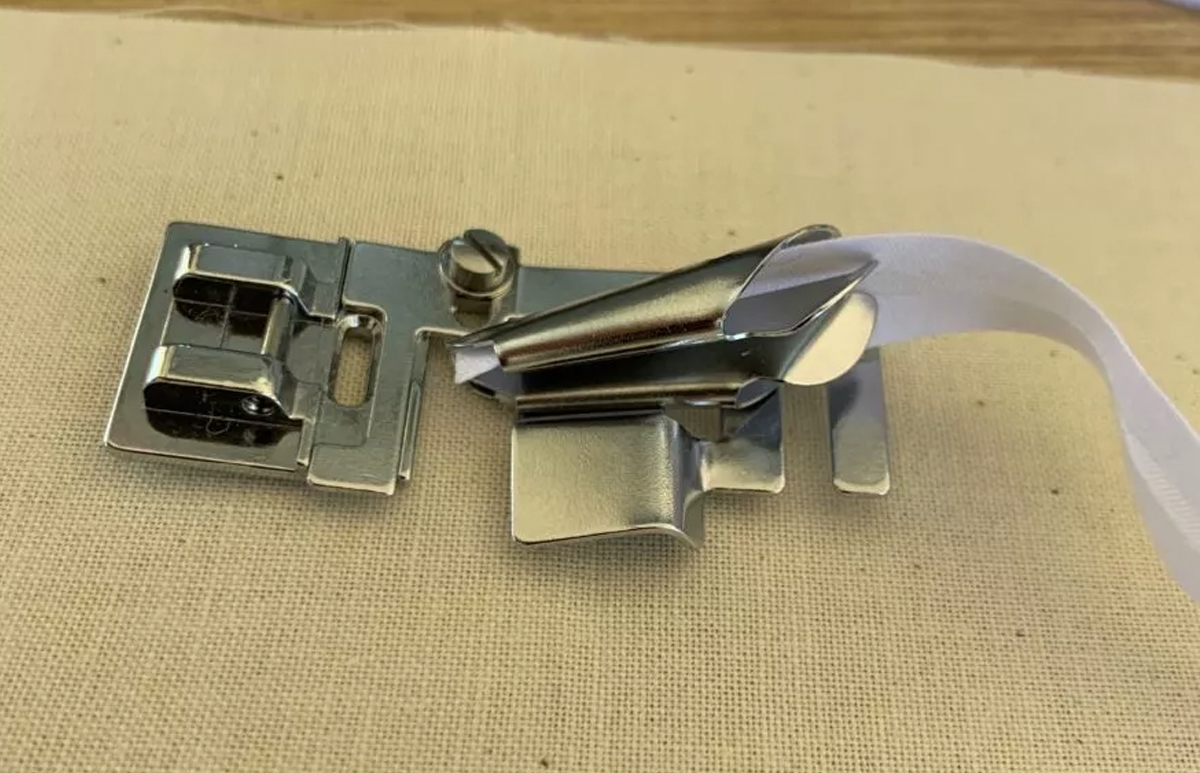
- With the Presser foot not attached, thread the bias through the folding implement on the bias foot.
Note: If working with patterned fabric, the pattern (right side) will need to face the right hand side when threading.
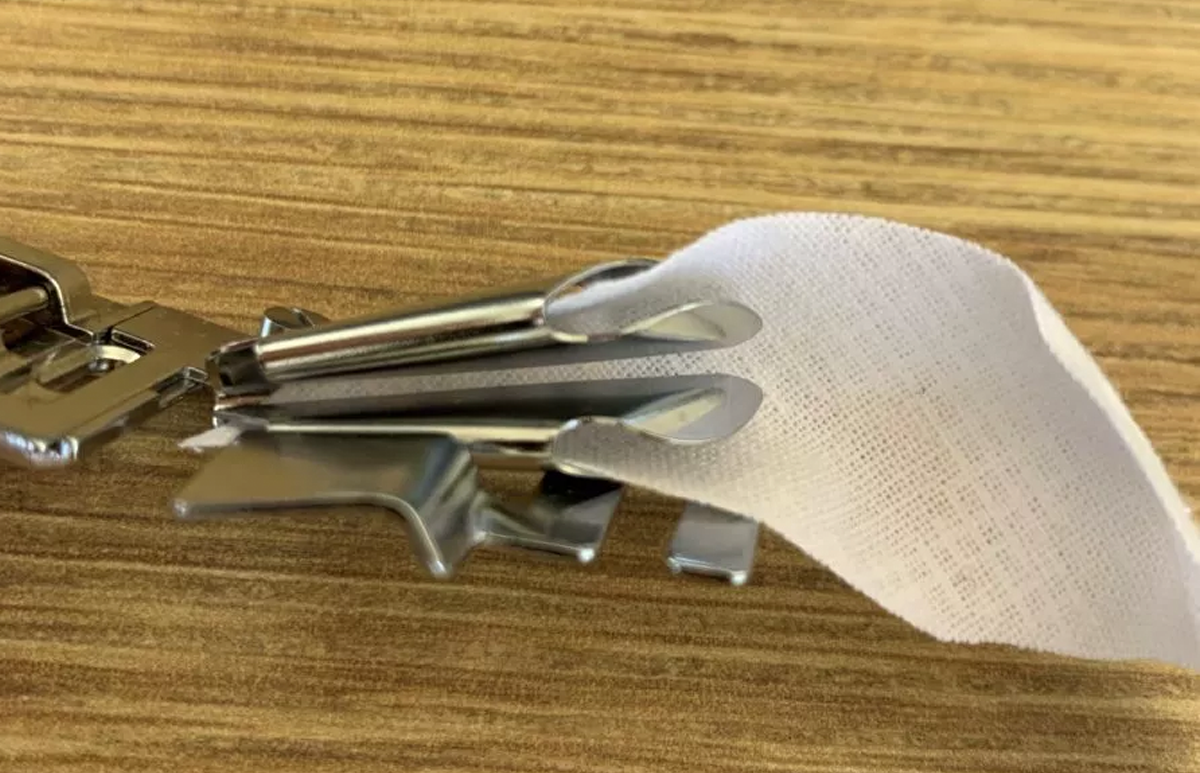
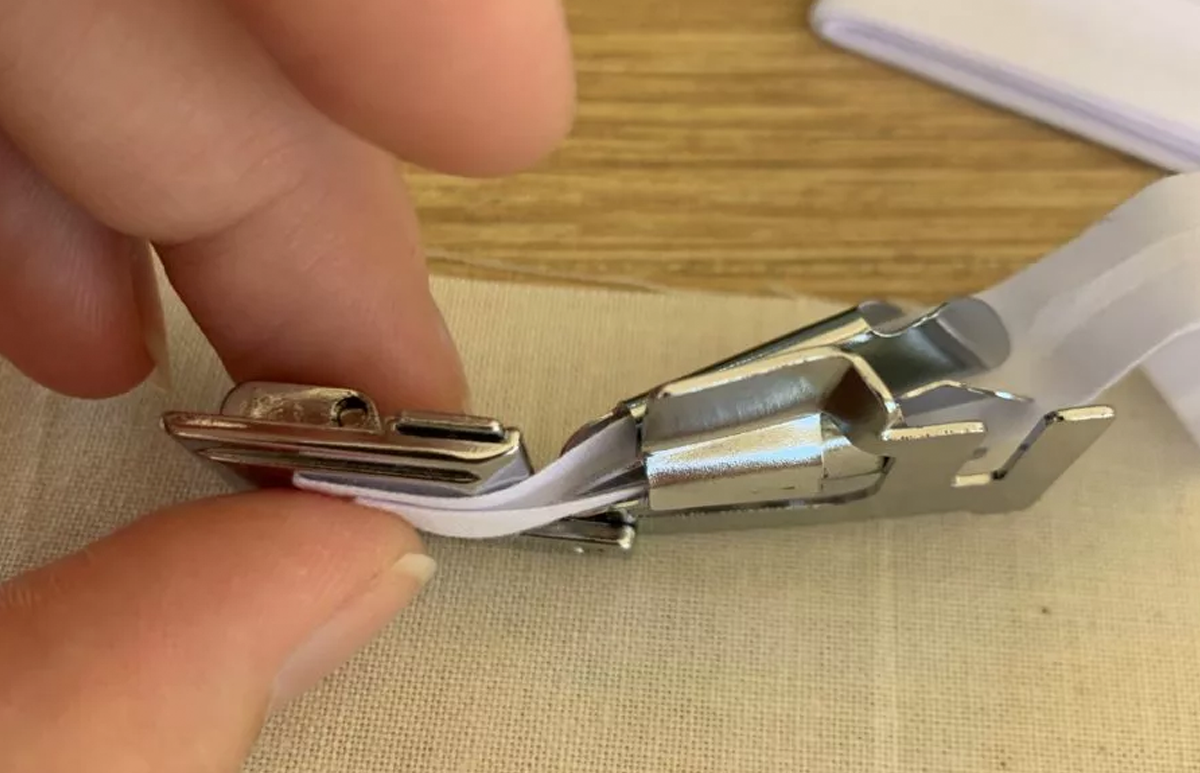
- Pull the remaining fabric through, using a pin or awl to assist. Fabric will start to curl to create a bias fold.
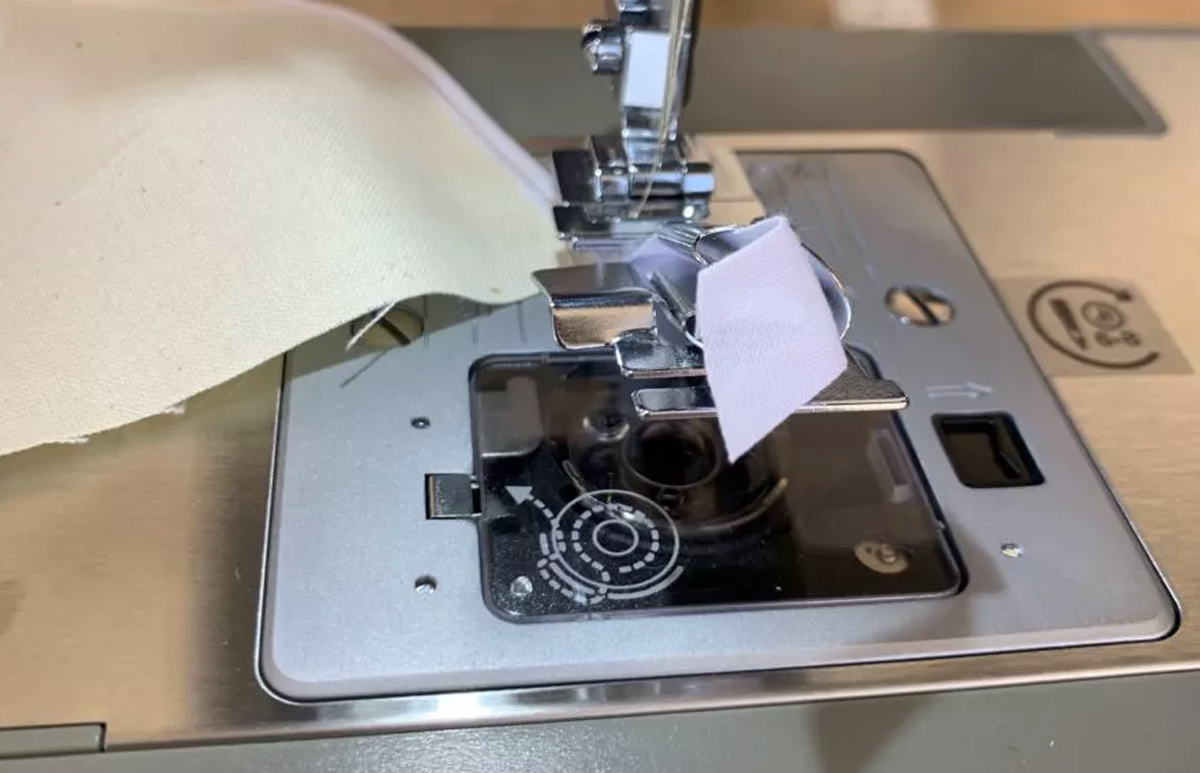
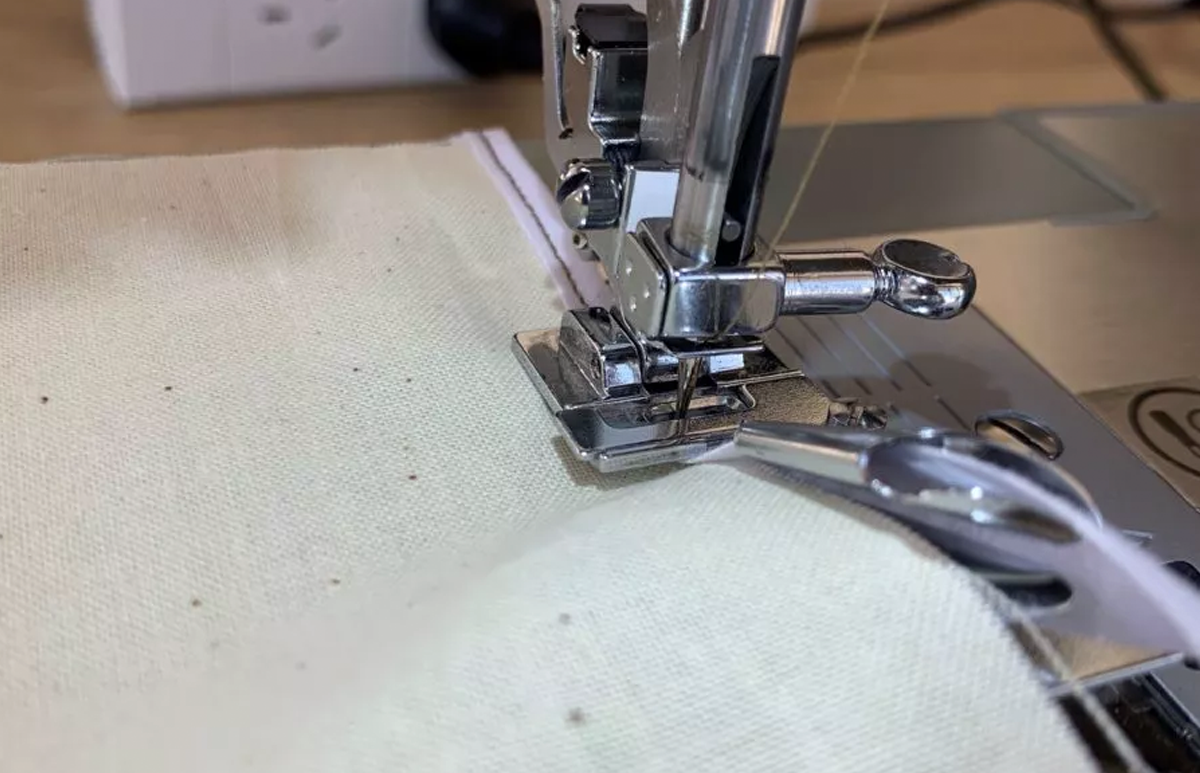
- Remove the current presser foot from the machine and attach the bias binding foot along with the threaded bias.
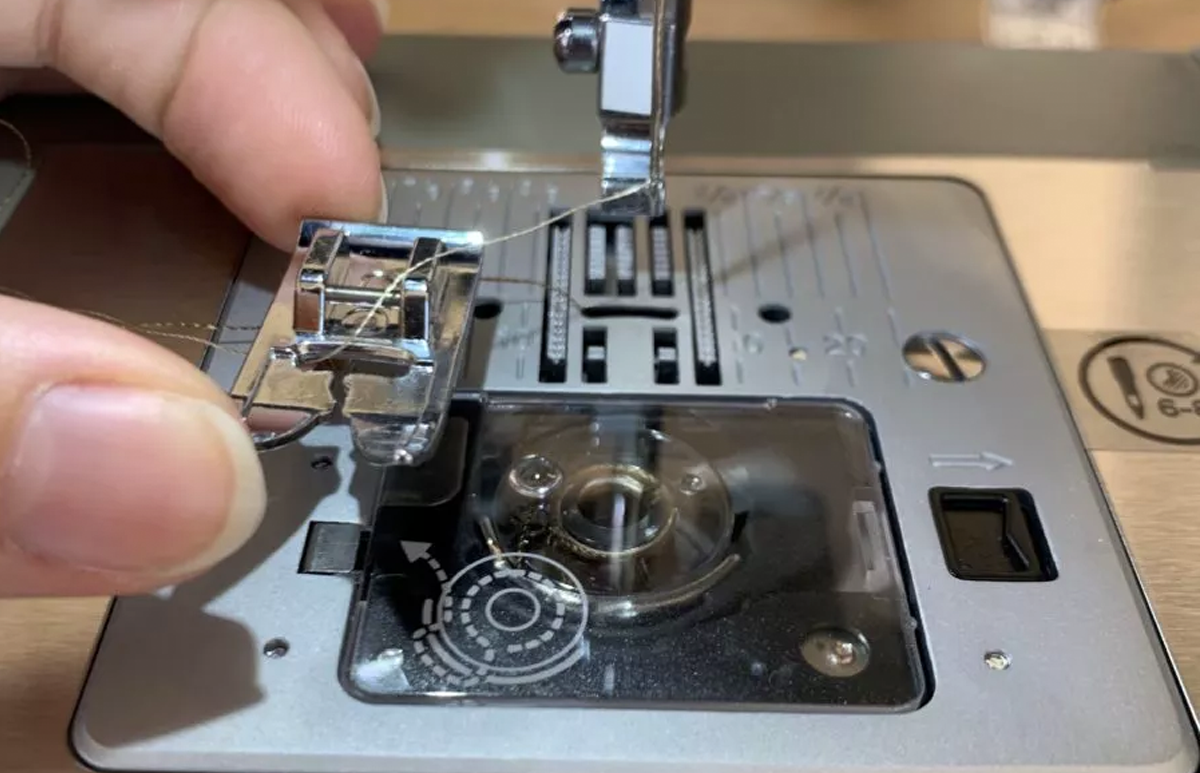
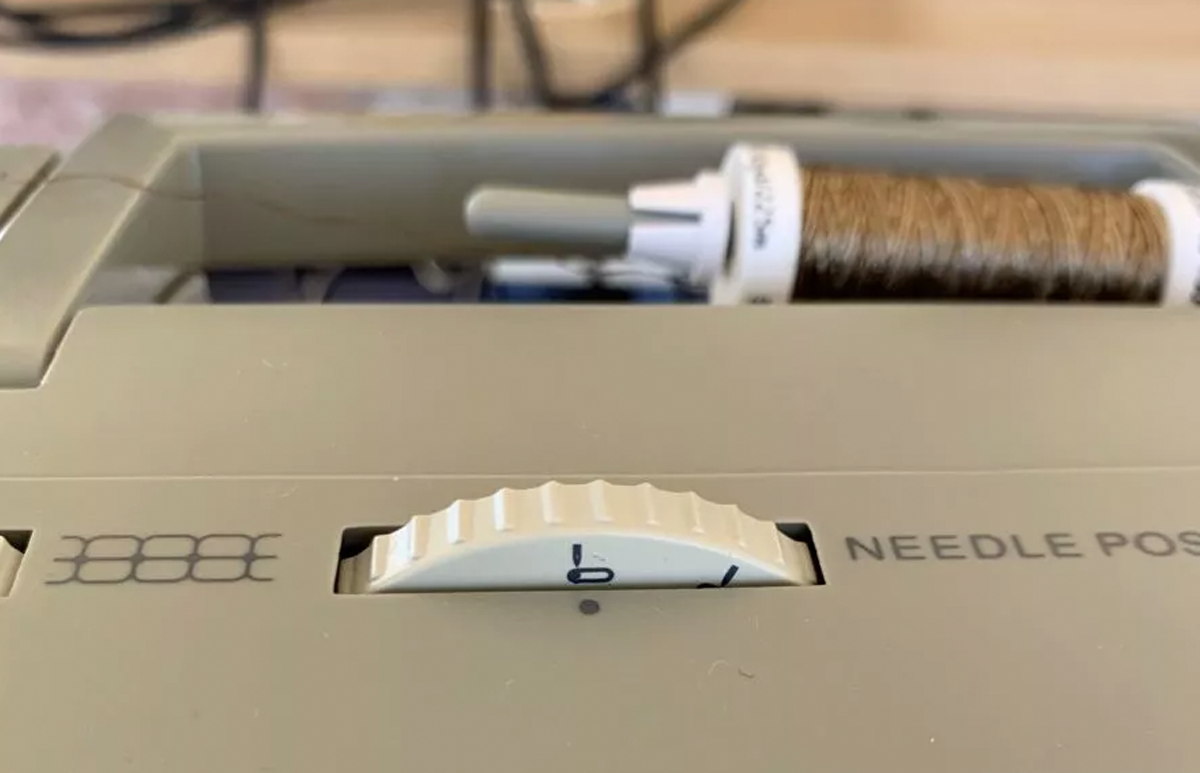
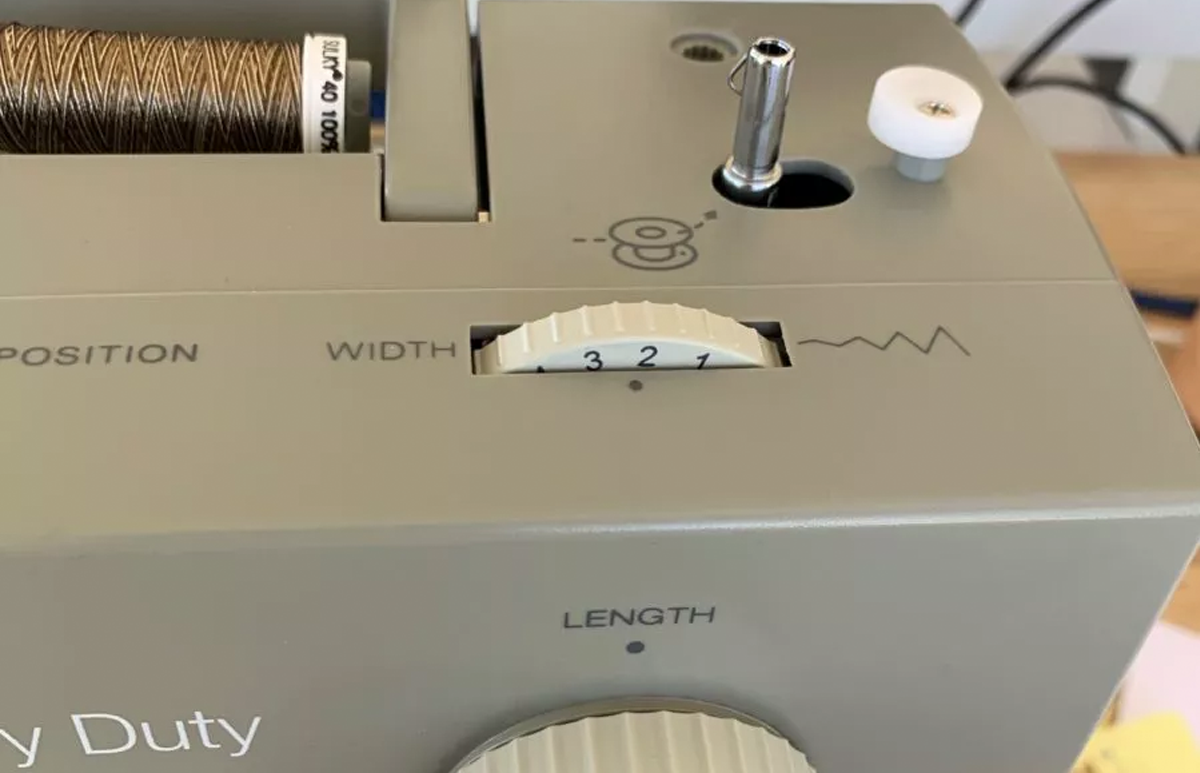
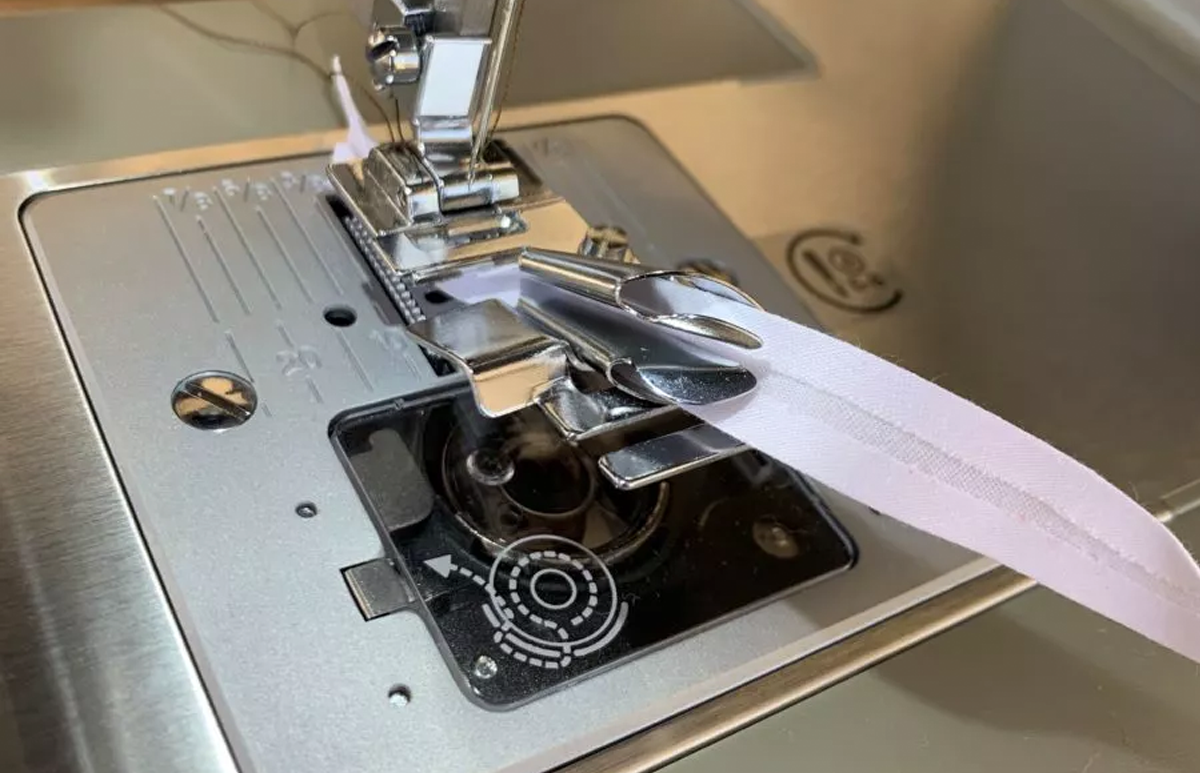
- Sew a few stitches along the bias to examine stitch position, adjust where needed. This can be done by adjusting the needle position to the left or adjusting the stitch width.
Note: The needle should only be set to straight stitch when working with bias binding.
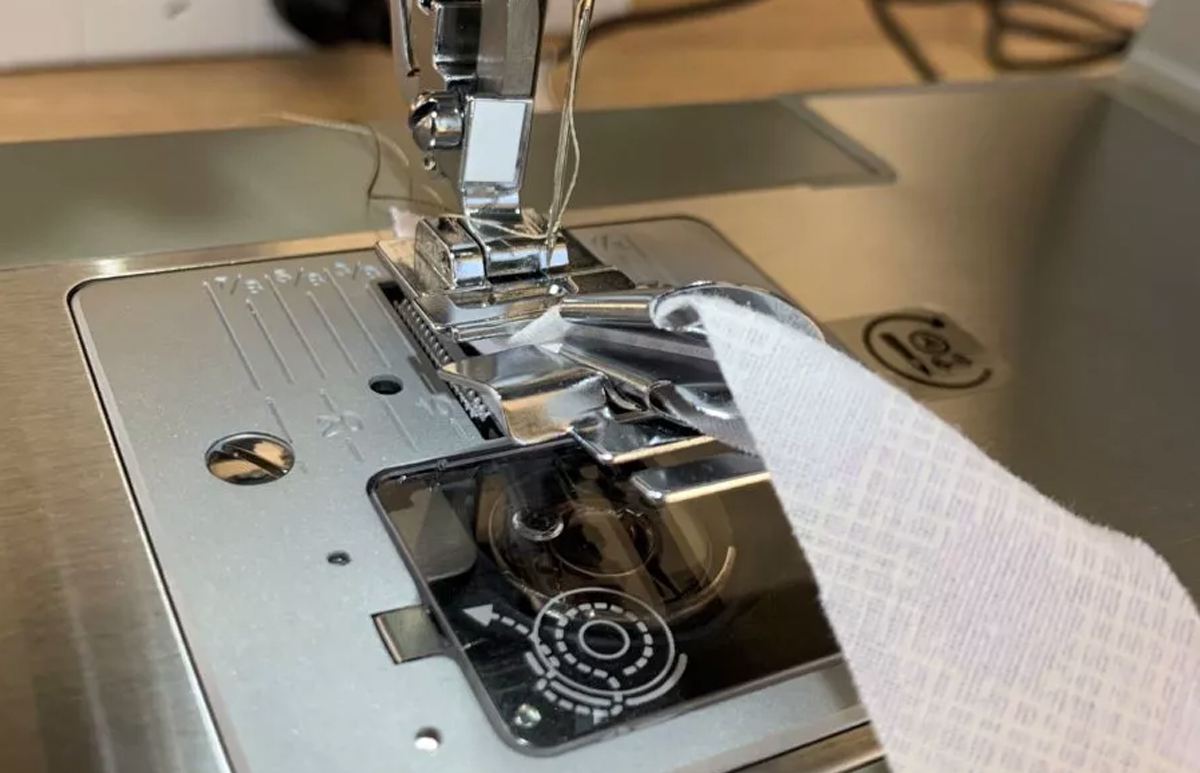
- Once desired stitch position has been set, select the fabric required for binding.
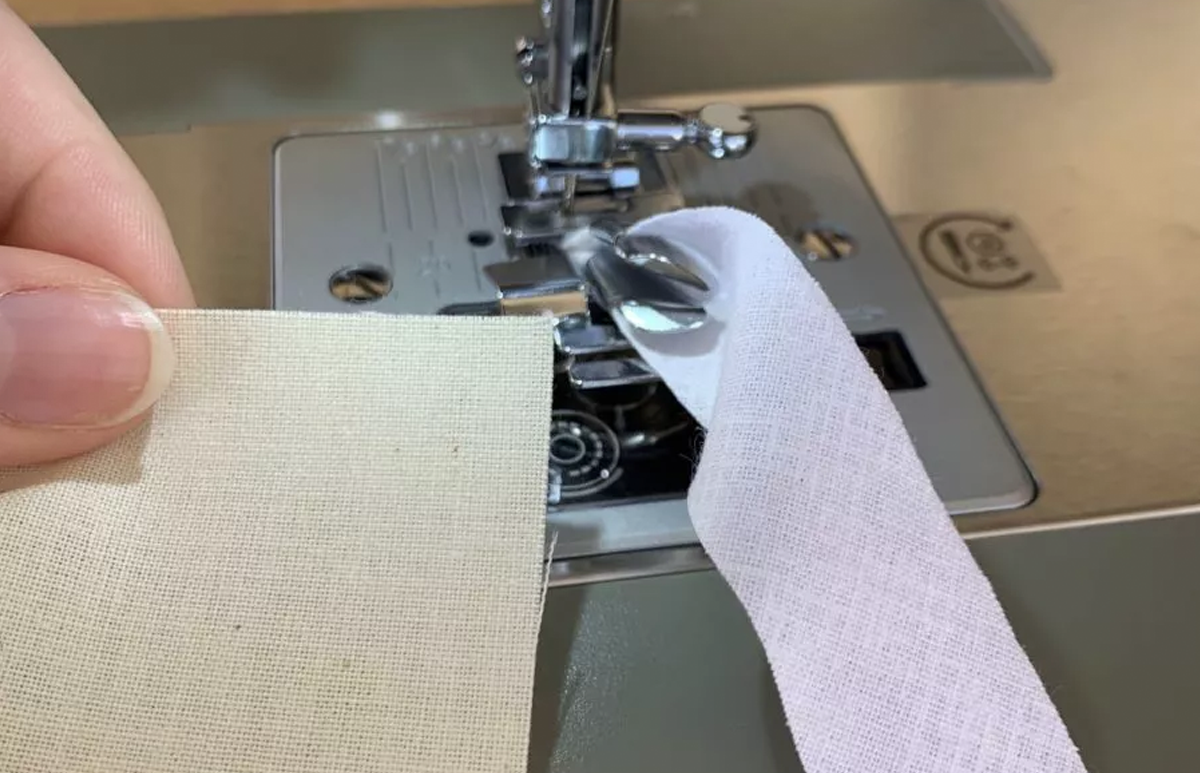
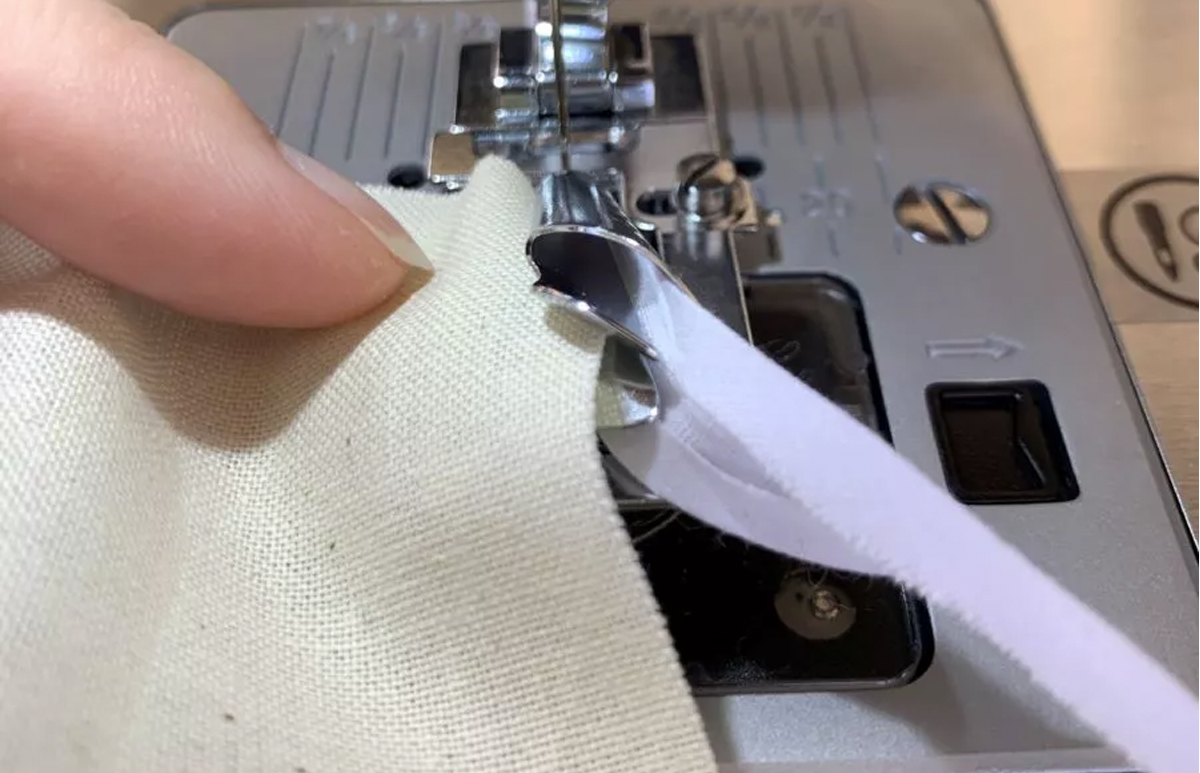
- Place the fabric between the top and bottom fold implement on the bias binding foot.
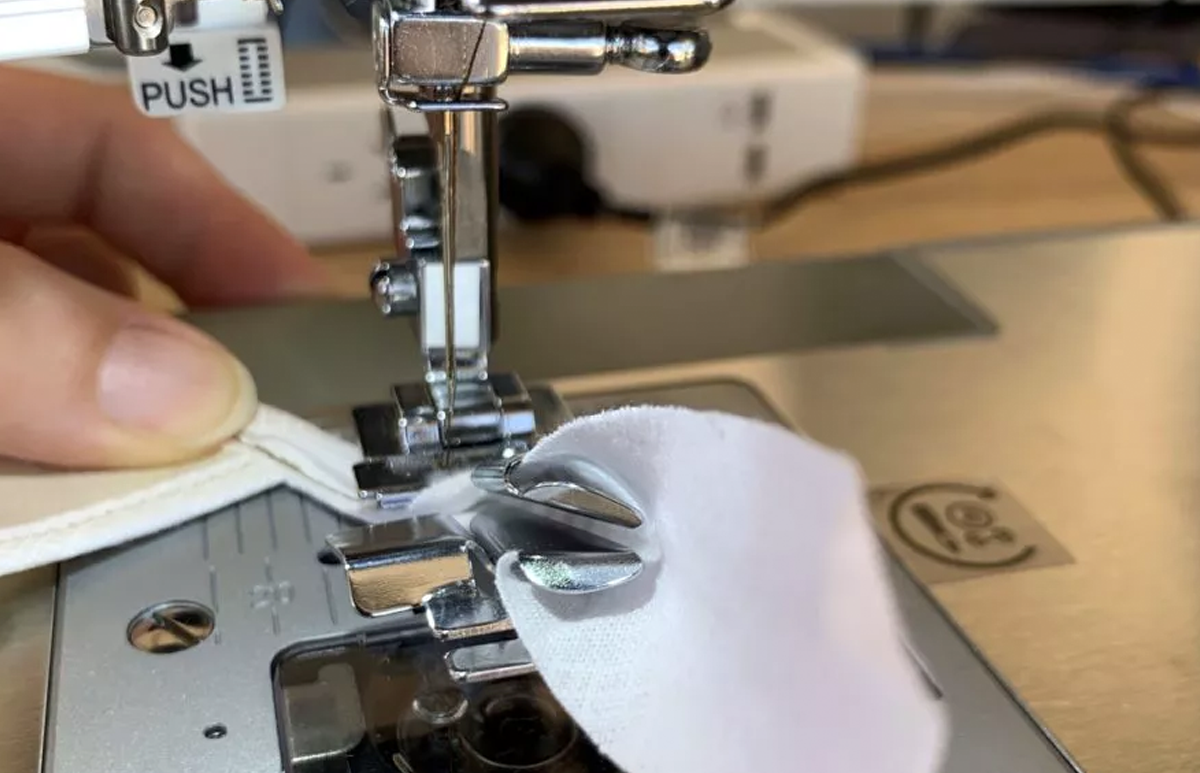
- Stitch until you reach the end of the fabric.
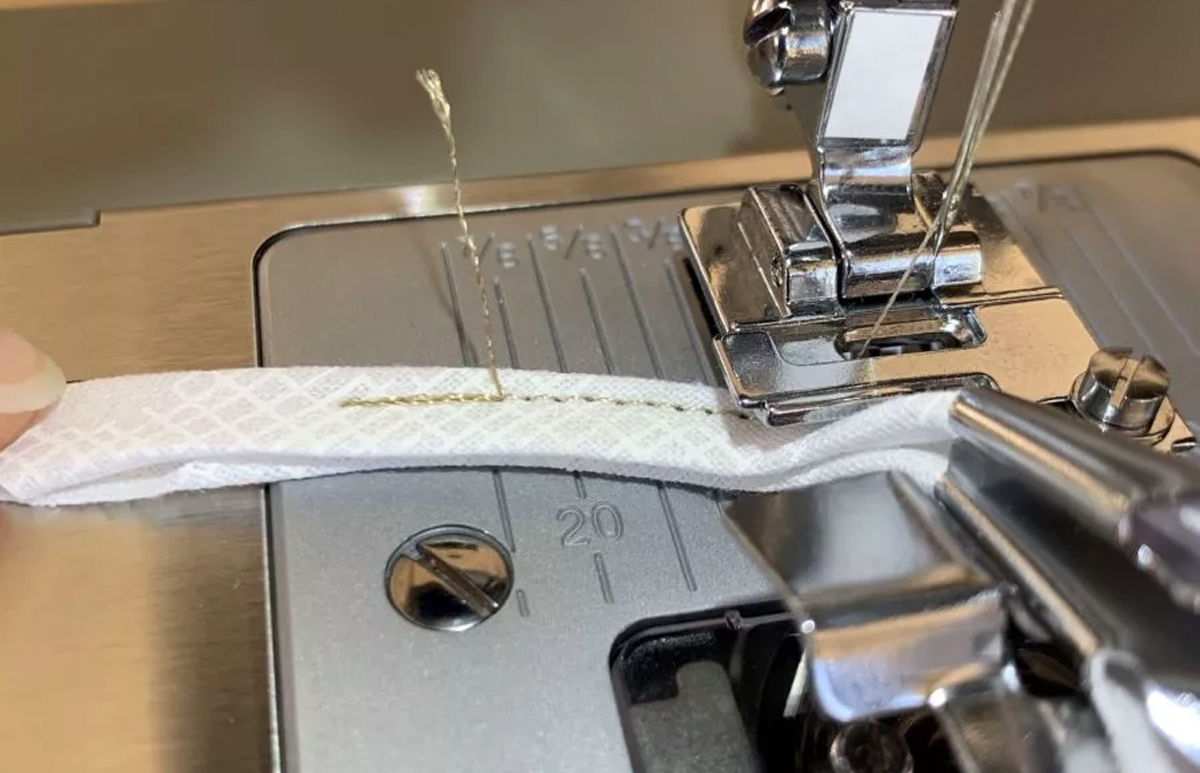
- To remove the project, cut off the bias binding just before the fold implement. Lift the presser foot and needle, gently pull the fabric, thread and remaining bias through.
Pre-Folded Bias:
Bias should be 6mm finish or smaller, otherwise an Adjustable Bias Binding Foot may be required.
- Leave the bias folded and cut the beginning on an angle.
- With the presser foot not attached, thread the bias through the folding implement on the bias foot
- Pull the remaining bias through, using a pin or awl to assist.
- Remove the current Presser foot from the machine and attach the bias binding foot along with the threaded bias.
- Sew a few stitches along the bias to examine stitch position, adjust where needed. This can be done by adjusting the needle position to the left or adjusting the stitch width.
Note: The needle should only be adjusted for straight stitch when working with bias binding.

- Once desired stitch position has been set, select the fabric required for binding.
- Place the fabric between the top and bottom fold implement on the bias binding foot.
- Stitch until you reach the end of the fabric.
- To remove the project, cut off bias binding just before the fold implement. Lift the presser foot and needle, gently pull the fabric, thread and remaining bias through.