
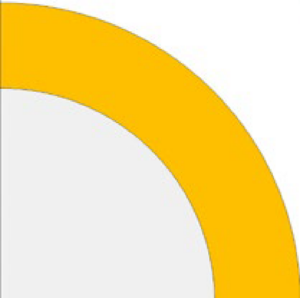
Curves are everywhere these days, and easy to make with GO! Signature Circles Die. Whether youare creating bold, modern shape or soft, flowing design, it is easier than you ever imagined! Withbuilt-in placement notches already cut for you, this innovative die lets your creativity run wild as youexplore countless project possibilities.
Materials
- Sewing Machine
- AccuQuilt GO! Cutter
- AQ55624 GO! Signature Circles – 6” Finished
- AQ55017 GO! Strip Cutter- 2 ½” (2” Finished)
- AQ55111 GO! Cutting Mat – 10 x 10
- AQ55113 GO! Cutting Mat – 10 x 24
- 45cm of Main Fabric
- 15cm x 30cm of 9 different rainbow fabrics
- 50cm x 50cm of wadding
- 50cm of backing fabric
- 15cm of binding fabric
- 45cm Pillow form
Cutting Instructions
All measurements will now be in inches consistent with quilting standards.
- Main fabric - Cut (2) 8” x Width of fabric (WOF)
- Cut (9) Bowtie Shape B and (18) quarter circle Shape A
- Rainbow fabrics- Cut (2) 4 ½”x 4 ½” squares in each colour
- Cut (2) arc Shape C of each colour, 18 in total
- Backing fabric
- Cut (2) 13 ½” x 18 ½” pieces for back flaps
- Binding fabric
- Cut (2) 2 ½” Strips for binding
Sewing Instructions
All seams are ¼” unless otherwise specified. Press all seams towards the outer curved side, unless otherwise indicated.
Creating Blocks:
There are (9) 6” finished blocks in total.
- After all the pieces have been cut, sort all block pieces on a table to achieve the look youwant. Two examples are above, although please feel free to explore your own design. Eachblock consists of one bow tie (Shape B), two arcs (Shape C) and two ¼ circles pieces (Shape A).
- Sew two background shapes A to two coloured Shape C,right sides together, matching alignment triangle on thecentre edge. Press seam toward shape C.

Hint: When aligning, pin or clip shapes together. I like to sew withShape A on the bottom Shape C on the top. This way you cancontrol the ease of the fabric and alleviate puckering.
- Sew the A/C units to Shape B, matching the aligning triangles as before.Press seams toward shape B.
- Repeat steps 3 – 4 to make a total of 9 blocks.

Assembling the Quilt Top
- Lay out blocks in 3 rows of 3 blocks in each row as desired. Sewblocks together into rows matching curved seams. Press seamsin opposite directions for each row.
- Sew rows together. Press seams to one side.
Binding
- Sew 2 x 2 ½” strips together along short ends. Press seam open.
- Press binding in half lengthwise. Set aside.

Quilting Pillow Top
- Layer the pillow top with the wadding underneath.
- Pin or baste layers together.
- Quilt as desired. Trim to 18 ½”x 18 ½”. Set aside.
Sewing Pillow Back Flaps
- Take one 13 ½” x 18 ½” rectangle and fold over edge at ¾” alongthe 18 ½” side and press. Fold over ¾” again and press.
- Stitch the folded edge to create a clean finished edge. Repeat thesesteps for the other back flap.
Finishing Pillow
- Place the pillow top wrong side up. Layer the two pillow flaps, rightside up, overlapping the stitched edges. Pin or clip in place
- Add binding, mitering corners.
- Place pillow form inside pillow and enjoy!
Congratulations on finishing your Rings or Trails Cushion!!
Don’t forget to share your projects with us on Instagram, tagging @accuquilt_australia and using the hashtags #accuquilt #accuquiltaustralia and #cuttimequiltmore or our Facebook page AccuQuilt Australia.