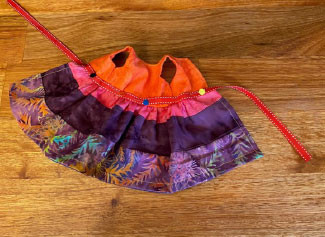
This cute little doll dress made on a Singer sewing machine can be found on YouTube. This tutorial and pattern by Leledesigns.
https://youtu.be/ze64qvY0l2Q
We have also written out the instructions for you below and taken our own photos during this process. We have also made a few changes to the original pattern, like lengthening the dress and adding ribbon.
NOTE: In the first instance print out the pattern from the above link.
Requirements:
- .25m fabric
- Sewing thread
- 1cm wide Velcro (or ribbon)
- Iron
- Sewing machine
- Pattern template/Printer
- Rotary cutter, mat and ruler
- Scissors and seam ripper
Cutting:
- Cut 1 ruffle on the fold - 13cm x 27cm rectangle (We added an extra 3cm onto the pattern to make dress longer. We also used scrap strips of jellyrolls stitched together.)
- Cut 2 x top bodice.
Construction:
- Press a 6mm seam on each short end of the ruffle strip. Stitch. Miter the corners.
- Press over a 2.5cm seam on the top long side of your ruffle. This will be your hem. You can top stitch or use one of your Singer Machines decorative stitches.
- Lay bodice pieces right side together, pin in place and then stitch a 3mm seam around each arm hole and around the front and neck as below.
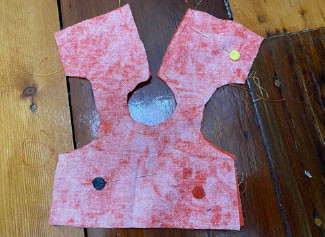
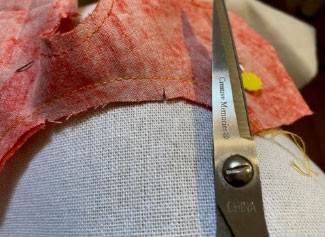
- Clip the curves to help your seams sit flatter. Turn the bodice inside out and press. We also then top-stitched the neckline and front with a small zig-zag stitch to help stop any fraying.
Tip: Use a pencil, knitting needle, or chopstick to assist if you don’t have another sewing tool to assist turning out.
- To make the ruffle bottom baste a line on the top side about 3mm from the edge. Then baste another line 3mm from the first. Be sure not to baste your side seams. Leave your thread tails long so we can use then to pull your gather in place shortly.
Note: If your machine has a gathering foot you may wish to use this instead. - Fold your bodice in half and sew 3mm side seams.
- Place a pin halfway along your ruffle and pull in your gathers evenly so that they match the bottom edge length of your bodice.
- With the right sides of your ruffle and bodice facing each other- pin in place. You may have to adjust to ensure your ends match up during this process. Sew a 6mm seam.
- You may need to pull out some of the basting stitches that are showing with a seam ripper.
- Press your seam down and you can do a top stitch on the front as close as possible to the bottom of the bodice seam. Otherwise, we used ribbon, which also ties up the dress at the back.